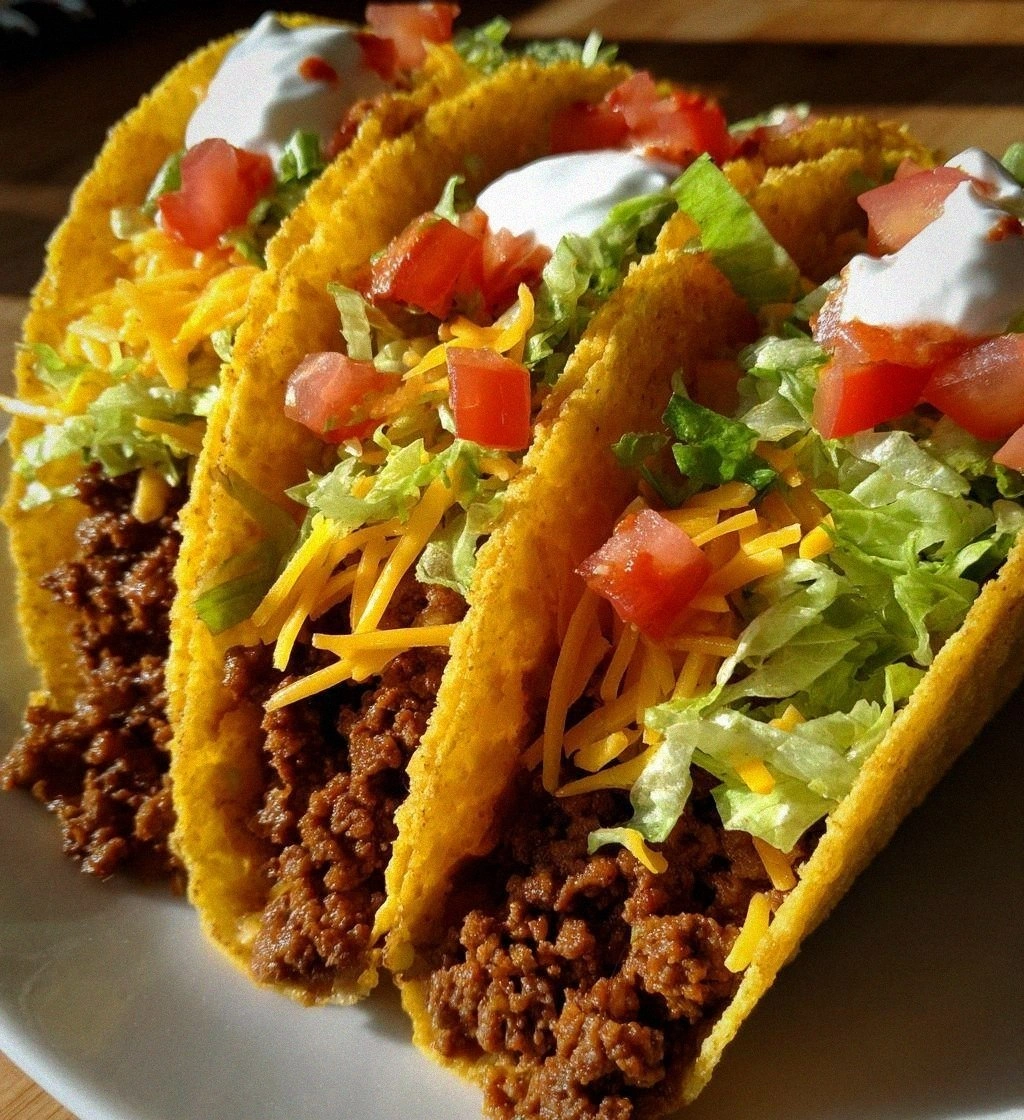
Cheesy Oven-Baked Tacos
 Save
Save
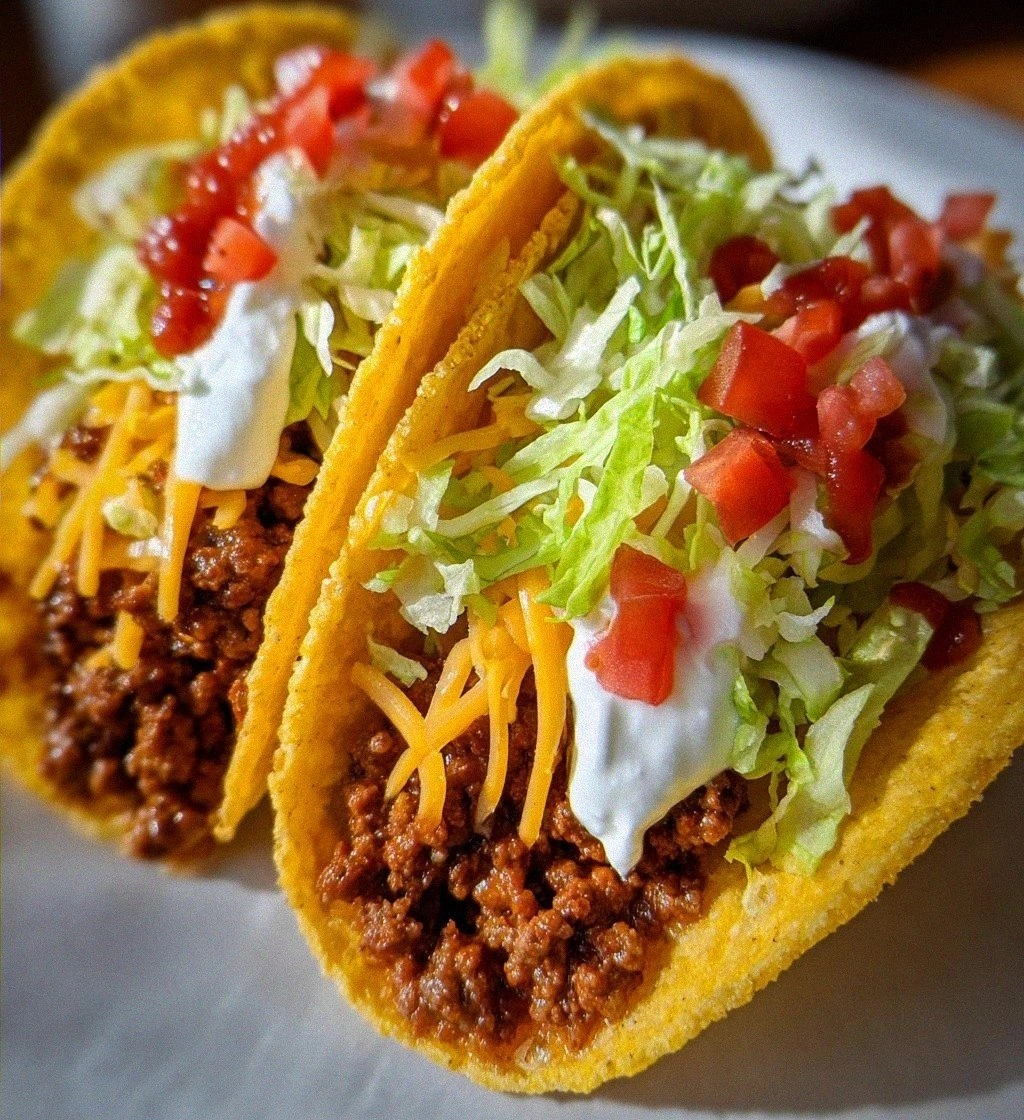
It was a chilly Saturday evening in late October, the kind of night where the wind whistles through the trees and the kitchen becomes the warm heart of the house. I was rummaging through the pantry, half‑expecting to make a simple spaghetti, when a half‑full bag of taco shells caught my eye and sparked a memory of my grandma’s bustling Sunday feasts. The moment I opened the oven door, a cloud of fragrant steam rose, carrying whispers of melted cheese, seasoned beef, and a hint of cumin that made my mouth water before the first bite. That scent reminded me of the first time I tried to reinvent classic tacos for a crowd, and the result was a dish that was both comfort food and a crowd‑pleaser, baked to golden perfection. Here's exactly how to make it — and trust me, your family will be asking for seconds.
Imagine the crackle of the oven as the taco shells start to brown, the cheese bubbling like a sunrise over a desert horizon, and the aroma of ground beef mingling with fresh lettuce and tangy salsa. Each bite delivers a symphony of textures: the crisp shell, the creamy cheese, the juicy beef, and the refreshing crunch of lettuce—all balanced in perfect harmony. But wait, there's a secret trick in step four that will elevate the flavor profile to something you’ve never experienced in a standard taco. Have you ever wondered why restaurant versions taste so different, even though the ingredients look the same? The answer lies in technique, timing, and a few little details that I’m about to share.
Before we dive into the step‑by‑step, let me tell you a quick story about the first time I tried this recipe for a birthday party. I was nervous, the guests were skeptical of “baked tacos,” and I was armed with nothing but a trusty skillet and a handful of confidence. As the timer dinged, the golden shells emerged, and the room filled with an irresistible aroma that made even the most skeptical guest reach for a second plate. The result? A round of applause, a flurry of compliments, and a new family tradition that still lives on today. Now, let’s get into the details that will make your own kitchen echo with that same applause.
Here’s the thing: this recipe isn’t just about tossing ingredients together and hoping for the best. It’s about layering flavors, mastering textures, and timing each step so that the cheese melts just right, the beef stays juicy, and the shells stay crunchy. The secret? A little patience, a dash of love, and a few pro tips that I’ve gathered over years of trial and error. Ready to discover the magic? Grab your apron, preheat that oven, and let’s embark on this cheesy adventure together.
🌟 Why This Recipe Works
- Flavor Depth: The combination of seasoned ground beef and taco seasoning creates a robust, savory base that’s amplified by the caramelization that occurs in the oven. Each bite delivers layers of spice that linger on the palate, making the dish unforgettable.
- Texture Contrast: By baking the tacos, the shells become delightfully crisp while the cheese turns gooey and stretchy, offering a satisfying crunch followed by a creamy melt that keeps you coming back for more.
- Ease of Preparation: With just one skillet and a baking sheet, you can streamline the cooking process, minimizing dishes and maximizing flavor—perfect for busy weeknights or casual gatherings.
- Time Efficiency: The entire recipe comes together in under an hour, making it a quick yet impressive option for dinner without sacrificing taste or quality.
- Versatility: The base recipe is a canvas; you can swap out proteins, add beans, or experiment with different cheeses to suit dietary preferences or flavor cravings.
- Nutrition Balance: By incorporating lettuce, tomato, and a modest amount of sour cream, you get a balanced mix of protein, veggies, and healthy fats that satisfy both taste buds and nutrition goals.
- Ingredient Quality: Using fresh, high‑quality taco shells and real shredded cheese ensures that every component shines, turning a simple dish into a gourmet experience.
- Crowd‑Pleasing Factor: The familiar taco flavor combined with a cheesy baked twist appeals to both kids and adults, making it a safe bet for any gathering.
🥗 Ingredients Breakdown
The Foundation: Taco Shells & Cheese
Taco shells are the structural backbone of this dish, providing that satisfying crunch that contrasts beautifully with the melty cheese. Choose sturdy corn or flour shells that can hold the fillings without breaking; I prefer corn shells for their authentic flavor and slight chew. The shredded cheese, ideally a blend of cheddar and Monterey Jack, melts evenly and adds a creamy richness that ties the whole dish together. If you’re feeling adventurous, sprinkle a bit of pepper jack for a subtle heat that awakens the palate. Remember, the quality of these two ingredients sets the stage for everything that follows.
Aromatics & Spices: Ground Beef & Taco Seasoning
Ground beef is the star protein, delivering a hearty, juicy bite that anchors the taco’s flavor profile. Opt for 80/20 lean‑to‑fat ratio; the fat renders during cooking, keeping the meat moist and adding depth. The taco seasoning packet is a shortcut to a perfectly balanced blend of chili powder, cumin, paprika, and garlic, but you can also create your own mix for a custom twist. Adding a splash of water after browning the beef helps the spices coat the meat evenly, creating a glossy, flavorful finish. A quick tip: let the seasoned beef rest for a couple of minutes before assembling so the flavors meld together.
The Secret Weapons: Fresh Veggies & Condiments
Shredded lettuce adds a refreshing crunch that cuts through the richness of the cheese and beef, while diced tomato brings a juicy burst of acidity that brightens the dish. When selecting lettuce, look for crisp, bright green leaves—iceberg or romaine work best for texture. Choose ripe, firm tomatoes with a deep red hue; they should feel heavy for their size, indicating juiciness. The sour cream adds a cool, tangy creaminess that balances the spices, and the salsa provides a zesty, slightly spicy kick that ties everything together. For an extra layer of flavor, consider a smoky chipotle salsa or a fresh pico de gallo.
Finishing Touches: Garnishes & Optional Extras
A sprinkle of fresh cilantro or a squeeze of lime can elevate the dish from delicious to unforgettable, adding brightness and a hint of citrus. If you love a little extra heat, jalapeño slices or a dash of hot sauce will do the trick without overwhelming the other flavors. For those seeking a healthier twist, swap out half the ground beef for black beans or lentils, preserving protein while adding fiber. Finally, a light drizzle of avocado crema can introduce a silky texture that pairs perfectly with the baked crust. The possibilities are endless, and each garnish adds its own personality to the final plate.
With your ingredients prepped and ready, let's get cooking. Here's where the fun really begins...
🍳 Step-by-Step Instructions
🔐 Expert Tips for Perfect Results
The Taste Test Trick
Before you assemble the tacos, taste the seasoned beef and adjust the seasoning if needed. A pinch more salt or a dash of smoked paprika can make a huge difference. I always add a tiny splash of Worcestershire sauce for an umami boost that isn’t obvious but deepens the flavor. This quick taste test ensures that every bite is balanced and flavorful. Trust me, a well‑seasoned base is the foundation of a standout dish.
Why Resting Time Matters More Than You Think
After baking, let the tacos sit for a couple of minutes before serving. This short rest allows the cheese to firm up slightly, preventing it from spilling out when you bite. It also lets the steam settle, keeping the shells crisp. I once served tacos straight from the oven and the cheese was a runaway mess—lesson learned! Patience at this stage is a small step that yields big rewards.
The Seasoning Secret Pros Won’t Tell You
Add a pinch of cocoa powder to the taco seasoning for a subtle earthiness that rounds out the spice profile. It’s a trick used by many Mexican chefs to deepen flavor without adding heat. I discovered it by accident while experimenting with a mole sauce, and it stuck. Just a quarter teaspoon is enough to make a noticeable impact. Give it a try and notice how the beef takes on a richer, more complex character.
Cheese Choice Mastery
Mixing cheeses—like sharp cheddar with milder Monterey Jack—creates a balanced melt that’s both flavorful and smooth. The cheddar provides bite, while Monterey Jack offers that perfect stretch. If you love a smoky note, throw in a little smoked gouda. The blend you choose can transform the dish from ordinary to gourmet. Experiment with ratios until you find your perfect melt.
Crisp Shells Every Time
If you’re using softer flour shells, brush them lightly with olive oil before baking. This creates a barrier that locks in moisture while giving the exterior a golden crust. I once tried skipping this step and ended up with soggy shells that fell apart. A quick brush of oil is all it takes to keep them sturdy and delicious. The result is a taco that holds its shape and delivers that satisfying crunch.
🌈 Delicious Variations to Try
One of my favorite things about this recipe is how versatile it is. Here are some twists I've tried and loved:
Southwest Black Bean & Corn
Swap the ground beef for a mixture of black beans, corn, and diced red bell pepper. The beans add protein and fiber, while the corn brings a sweet pop that complements the smoky cheese. Season with cumin, chili powder, and a splash of lime juice for a fresh, vegetarian spin. This variation is perfect for meat‑less nights and still delivers that satisfying crunch and melt.
Spicy Chipotle Chicken
Use shredded rotisserie chicken tossed in chipotle adobo sauce instead of beef. The smoky heat of chipotle pairs beautifully with the creamy cheese and crisp lettuce. Add a dollop of avocado crema for a cool counterpoint to the spice. This version brings a bold, smoky flavor that’s perfect for spice lovers.
Mediterranean Falafel
Replace the meat with crumbled falafel and use feta cheese instead of cheddar. Add sliced cucumber, kalamata olives, and a drizzle of tzatziki for a Mediterranean flair. The herbs and tangy yogurt sauce elevate the dish into a fresh, exotic experience. It’s a great way to bring world flavors to a familiar format.
Breakfast Breakfast Taco
Swap the beef for scrambled eggs and chorizo, and top with shredded cheddar, diced avocado, and a splash of hot sauce. The breakfast version is perfect for brunch gatherings and adds a hearty start to the day. Serve with a side of fresh salsa and a sprinkle of cilantro for a complete morning feast.
Cheesy Veggie Delight
Load the tacos with sautéed zucchini, bell peppers, and mushrooms, then finish with mozzarella and a sprinkle of fresh basil. The vegetables bring moisture and depth, while the mozzarella melts into a silky blanket. This variation is a celebration of garden produce and is perfect for those seeking a lighter, veggie‑forward option.
📦 Storage & Reheating Tips
Refrigerator Storage
Allow the baked tacos to cool completely before transferring them to an airtight container. Store them in the fridge for up to three days. To keep the shells from getting soggy, place a paper towel at the bottom of the container to absorb excess moisture. When you’re ready to eat, simply reheat as directed below. Proper storage preserves the crunch and flavor for a quick lunch or dinner.
Freezing Instructions
If you want to make a larger batch, freeze the assembled but unbaked tacos on a baking sheet for an hour, then transfer them to a freezer‑safe bag. They’ll keep for up to two months. When you’re ready to bake, add an extra 5‑7 minutes to the cooking time to ensure they’re heated through. This method is perfect for busy weeks when you need a ready‑made meal that still tastes fresh.
Reheating Methods
To reheat, place the tacos on a baking sheet and bake at 350°F (175°C) for 8‑10 minutes, or until the cheese is melted and the shells are crisp again. For a quicker option, microwave for 30 seconds, then finish under the broiler for a minute to restore crunch. The trick to reheating without drying it out? A splash of water or a few drops of olive oil brushed on the shells before heating. This keeps the texture pleasant and the flavors bright.
❓ Frequently Asked Questions
Can I use turkey instead of ground beef?
What type of cheese melts best for this recipe?
Do I need to pre‑bake the taco shells before adding the fillings?
Can I make this recipe gluten‑free?
How can I make the tacos spicier without overpowering the flavor?
Can I prepare the toppings ahead of time?
What’s the best way to reheat leftovers without losing crunch?
Can I add beans to the recipe for extra protein?
Remove the tacos from the oven and let them rest for about two minutes; this short pause allows the cheese to set slightly, making the tacos easier to handle. Then, spoon a dollop of sour cream onto each taco, followed by a generous drizzle of salsa. The cool sour cream and the vibrant salsa create a beautiful contrast of temperature and flavor. If you’d like a little extra heat, sprinkle on some sliced jalapeños or a dash of hot sauce. The combination of hot, cool, and tangy is what makes each bite a layered experience.
Finally, garnish each taco with a sprinkle of fresh cilantro, a squeeze of lime, and if you like, a light dusting of extra cheese. Serve the tacos hot, straight from the oven, on a large platter that invites everyone to dig in. The moment you bite into the crunchy shell, the melty cheese, and the savory beef, you’ll hear the satisfied sighs of your family. Go ahead, take a taste — you’ll know exactly when it’s right. And there you have it! But before you dig in, let me share some tips that will take this from great to absolutely unforgettable...
Similar Recipes
 Dinner
one pot winter vegetable casserole with kale and sweet potatoes
Warm up with our one pot winter vegetable casserole recipe featuring kale and sweet potatoes, perfect…
 Dinner
warm garlic roasted potatoes and turnips with fresh rosemary for winter
Cozy up with roasted garlic potatoes and turnips kissed with rosemary—easy winter side dish ready in…
 Dinner
Savory Mushroom and Spinach Quesadillas
Delicious Savory Mushroom and Spinach Quesadillas
 Dinner
Creamy Chicken and Spinach Skillet Pasta: A Culinary Delight
Delicious Creamy Chicken and Spinach Skillet Pasta: A Culinary Delight
 Dinner
Sweet and Sour Tofu Stir Fry: A Flavorful Plant-Based Delight
Delicious Sweet and Sour Tofu Stir Fry: A Flavorful Plant-Based Delight
 Dinner
Zesty Beef Tacos with Creamy Avocado Salsa
Delicious Zesty Beef Tacos with Creamy Avocado Salsa
 Dinner
Homemade pizza
Learn how to make delicious Homemade pizza. Easy recipe with step-by-step instructions.
 Dinner
NFL Playoff Spinach and Artichoke Stuffed Chicken
Learn how to make delicious NFL Playoff Spinach and Artichoke Stuffed Chicken. Easy recipe with step-by-step…

Clara
I cook these recipes at home before they ever land here — simple ingredients, clear steps.