Introduction
Creamy garlic mashed potatoes are often regarded as the epitome of comfort food, a staple side dish that graces dinner tables across the globe. Whether it’s a holiday feast or a simple weeknight dinner, these velvety potatoes bring warmth and satisfaction to any meal. Their versatility is remarkable; they pair wonderfully with everything from roasted meats to vegetarian entrees, making them a go-to choice for both casual and formal occasions.
What makes creamy garlic mashed potatoes truly special is their ability to deliver rich, robust flavors with minimal effort. Using fresh ingredients elevates the dish, ensuring that every bite is bursting with taste. The combination of creamy texture and a hint of garlic creates a comforting harmony that is hard to resist. In this guide, we will delve into the fundamentals of making the perfect creamy garlic mashed potatoes, starting with an understanding of the essential ingredients and concluding with detailed preparation steps.
Understanding the Basics of Mashed Potatoes
The Role of Potatoes
The type of potato you choose plays a crucial role in the texture and flavor of your mashed potatoes. For the best results, you should opt for starchy potatoes, with Russet and Yukon Gold being the top contenders.
– Russet Potatoes: Known for their high starch content, Russets are fluffy when cooked, making them ideal for achieving that light and airy texture in mashed potatoes. Their earthy flavor complements the creaminess of the dish beautifully.
– Yukon Gold Potatoes: These potatoes offer a naturally buttery taste and a creamy texture, making them a fantastic choice for mashed potatoes. They hold their shape well and provide a slightly denser mash, which many people find appealing.
Each variety brings its unique characteristics to the table, so you might find it enjoyable to experiment with different combinations to discover your personal favorite.
The Importance of Creaminess
The creaminess of your mashed potatoes is key to their appeal. Various dairy options can be utilized to achieve this luscious texture. Here are some popular choices:
– Heavy Cream: This is often the go-to for achieving the richest, most indulgent mashed potatoes. The high fat content ensures a luxurious mouthfeel.
– Sour Cream: Incorporating sour cream not only adds creaminess but also a tangy flavor that can elevate the dish significantly. This option works well if you prefer a bit of zest in your potatoes.
– Milk: For a lighter option, whole milk or even buttermilk can be used. While they won’t create the same level of richness as cream, they still provide a beautifully smooth mash.
If you’re looking for dairy-free alternatives, unsweetened almond milk or coconut cream can serve as suitable substitutes, ensuring everyone can enjoy this delightful dish.
Flavor Enhancers
Garlic is the star flavor enhancer in creamy garlic mashed potatoes. Using fresh garlic significantly boosts the taste, providing a pungent yet pleasant aroma that permeates the dish. Here’s how to incorporate garlic effectively:
– Fresh Garlic: When using fresh garlic, you can roast it beforehand to mellow its sharpness. Roasting transforms the garlic into a sweet, caramelized delicacy that infuses the potatoes with an irresistible flavor.
– Garlic Powder: If you’re in a pinch, garlic powder can be used as a substitute. However, the depth of flavor won’t be quite as robust as that achieved with fresh garlic.
In addition to garlic, a pinch of salt and black pepper is essential for enhancing the overall flavor profile of the dish. Optional herbs, such as chives or parsley, can also add a touch of freshness and color, further elevating your creamy garlic mashed potatoes.
Gathering Your Ingredients
To make the ultimate creamy garlic mashed potatoes, you’ll need the following ingredients:
Potatoes
– Quantity: For a serving of four, around 2 pounds of potatoes is ideal.
– Type: A combination of Russet and Yukon Gold potatoes is recommended for the best texture and flavor.
Dairy Products
– Heavy Cream or Milk: About ½ to 1 cup, depending on your desired creaminess level. If you prefer a lighter mash, opt for milk.
– Butter: 4 tablespoons of unsalted butter, which adds richness and flavor. Feel free to adjust this based on your taste preference.
Garlic
– Fresh Garlic: Approximately 4-6 cloves, depending on how garlicky you like your mashed potatoes. Remember, roasting the garlic will add a delightful sweetness.
Seasonings
– Salt: To taste, usually about 1 teaspoon.
– Black Pepper: Freshly cracked, to taste.
– Optional Herbs: Chopped chives or parsley for garnish, adding both flavor and a pop of color.
With your ingredients gathered, you’re now prepared to take the next steps toward creating creamy garlic mashed potatoes that will impress your family and friends.
Preparation Steps for Perfect Mashed Potatoes
Selecting and Preparing Potatoes
The first step in ensuring your mashed potatoes turn out perfectly is to select and prepare the potatoes properly. Here’s how to do it:
1. Washing: Start by thoroughly washing the potatoes under cold running water to remove any dirt or debris. This step is crucial, especially if you plan to leave the skins on for a rustic mash.
2. Peeling: If you prefer a smoother texture, peel the potatoes using a vegetable peeler. For added flavor and nutrition, you can leave the skins on, particularly with Yukon Gold potatoes.
3. Chopping: Cut the potatoes into even-sized chunks, about 1 to 2 inches. This ensures they cook uniformly, preventing some pieces from becoming overcooked while others remain undercooked.
Cooking Potatoes
Once the potatoes are prepped, it’s time to cook them to perfection. Here’s how to do it:
1. Boiling: Place the chopped potatoes in a large pot and cover them with cold water. Adding a generous pinch of salt to the water will help season the potatoes as they cook. Bring the pot to a boil over medium-high heat.
2. Simmering: Once boiling, reduce the heat to medium-low and let the potatoes simmer. Cook them for about 15-20 minutes or until they are fork-tender. To test doneness, insert a fork into a piece; it should slide in easily without resistance.
3. Draining: Carefully drain the potatoes in a colander, allowing them to sit for a minute to evaporate any excess moisture. This step is essential, as excess water can lead to a watery mash.
With the potatoes properly cooked, you’re now ready to move on to the next steps that will transform them into creamy garlic mashed potatoes, bursting with flavor and comfort.
Preparing the Garlic
To achieve a rich, aromatic flavor that enhances the overall profile of your Zesty Greek Yogurt Ranch Dip, the preparation of garlic is crucial. You have two excellent methods to infuse that delightful garlicky essence: roasting and sautéing.
Roasting Garlic: Roasting garlic is a simple yet transformative process that brings out the sweet, mellow flavors of the bulb. To roast garlic, preheat your oven to 400°F (200°C). Take a whole bulb of garlic and slice off the top to expose the individual cloves. Drizzle with olive oil, wrap it in aluminum foil, and place it in the oven. Roast for about 30-35 minutes until the cloves are soft and golden brown. Once roasted, allow it to cool slightly before squeezing the cloves out of their skins. The result is a sweet, buttery garlic that adds depth to your dip.
Sautéing Garlic: If you’re short on time, sautéing garlic is another excellent option. Heat a tablespoon of olive oil or butter in a skillet over medium heat. Add minced garlic (about 2-3 cloves) and sauté for 1-2 minutes until fragrant and lightly golden. Be cautious not to burn the garlic, as it can quickly turn bitter. Sautéed garlic provides a sharper, more pronounced flavor that can really elevate your dip.
Crafting the Creamy Garlic Mixture
Once you have your garlic prepared, it’s time to create the creamy foundation of your Zesty Greek Yogurt Ranch Dip. The base typically consists of Greek yogurt, which lends a tangy flavor and creamy texture, complemented by a touch of mayonnaise for richness.
Combining Ingredients: In a mixing bowl, combine 1 cup of Greek yogurt and 1/2 cup of mayonnaise. This combination not only creates a luscious dip but also balances the tang of the yogurt with the creaminess of the mayonnaise. Next, add your prepared garlic—whether roasted or sautéed—along with 1 tablespoon of lemon juice, a teaspoon of dried dill, and a teaspoon of onion powder. These ingredients work harmoniously to create a zesty, flavorful dip.
Using a whisk, mix the ingredients thoroughly until smooth and creamy. If you prefer a chunkier dip, you can also use a fork to mash the garlic directly into the yogurt and mayonnaise mixture, allowing for some texture.
Adjusting Consistency
The beauty of homemade dips lies in their versatility, and adjusting the consistency of your Zesty Greek Yogurt Ranch Dip is no exception. If you find your dip is thicker than desired, gradually add a splash of milk or buttermilk to thin it out. A tablespoon at a time is best to ensure you achieve your preferred consistency without making the dip too runny.
Conversely, if you prefer a thicker dip for spreading, you can add additional Greek yogurt or even a bit more mayonnaise. The key here is to taste as you go; this allows you to adjust the flavors and consistency to your liking.
Taste Testing
Once your dip is well mixed, it’s time for the fun part—taste testing! Using a clean spoon, take a small sample of your dip and assess the flavors. This is the moment to add any additional seasonings according to your preference. If you like it spicier, consider adding a pinch of cayenne pepper or a dash of hot sauce. If you prefer a more herby flavor, fresh chopped parsley or chives can add a lovely freshness. Adjusting the seasonings ensures that the dip is not only delicious but tailored to your taste.
Serving Suggestions and Pairings
Now that your Zesty Greek Yogurt Ranch Dip is ready, think about how you want to serve it. This dip is incredibly versatile and can accompany a wide array of dishes.
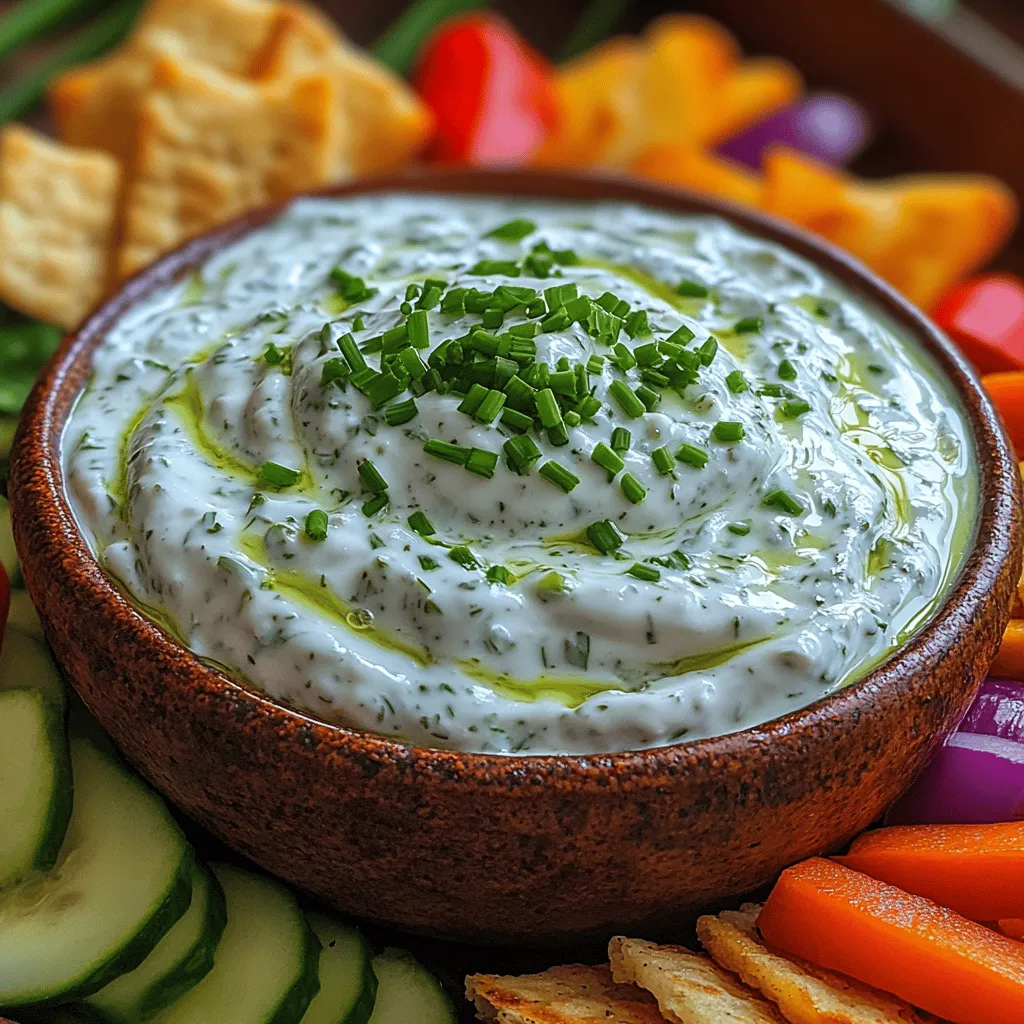
Classic Comfort Meals: For a traditional approach, serve your dip alongside a platter of fresh veggies such as carrot sticks, cucumber slices, and bell pepper strips. It pairs wonderfully with classic comfort foods like meatloaf, roasted chicken, or grilled steak. The refreshing tang of the dip complements the savory notes of these hearty meals, making it a delightful addition to your dinner table.
Vegetarian Options: If you’re looking for plant-based pairings, consider serving your dip with roasted vegetable skewers or as a topping for baked potatoes. It also works beautifully as a dressing for a hearty salad, adding a creamy texture that enhances the freshness of greens and veggies.
Creative Twists: For a fun twist, consider adding toppings or mix-ins to your dip. Chopped chives or green onions can bring a pop of color and flavor. Crumbled feta or shredded cheese can add a savory depth, while crispy bacon bits introduce a delightful crunch. These additions not only elevate the taste but also make your presentation visually appealing.
Storing and Reheating Creamy Garlic Mashed Potatoes
If you happen to have leftovers (though we doubt it!), storing and reheating your Zesty Greek Yogurt Ranch Dip is straightforward.
Storage Tips: To keep your dip fresh, transfer it to an airtight container. It can be refrigerated for up to five days. Ensure that you press a piece of plastic wrap directly onto the surface of the dip before sealing the container to prevent it from drying out.
Reheating Techniques: Since this dip is best enjoyed cold, reheating isn’t necessary. If you do find it has thickened after refrigeration, simply stir in a bit of milk or yogurt to restore its creamy consistency before serving.
Conclusion
Making your own Zesty Greek Yogurt Ranch Dip not only enhances your culinary repertoire but also offers a delightful experience for family and friends. The process of preparing the garlic, mixing the ingredients, and adjusting the flavors allows you to create a dip that is truly your own.
Whether served at a casual gathering or as an accompaniment to a family meal, this dip is sure to be a hit. It embodies the essence of comfort food—simple, satisfying, and bursting with flavor. Experiment with variations, try different mix-ins, and make this recipe a staple in your kitchen. Your taste buds will thank you, and your guests will be clamoring for the recipe!