Jewish Beef Brisket Recipe That Melts in Your Mouth Every Time
 Save
Save
I still remember the first time I tasted my grandmother’s brisket on a chilly Friday night, the way the steam curled up like a promise of comfort and the scent of caramelized onions wrapped the whole house in a warm hug. The moment you lift the lid, a cloud of fragrant steam hits you, carrying whispers of sweet paprika, the earthy depth of beef broth, and the subtle kiss of brown sugar that makes your mouth water before you even take a bite. That memory is the heartbeat of this recipe, and I’m thrilled to share it with you so you can recreate that same magic in your own kitchen, no matter the occasion.
What makes this Jewish Beef Brisket truly melt-in-your-mouth is the marriage of low‑and‑slow cooking with a carefully balanced blend of aromatics, spices, and a touch of sweetness that turns a tough cut of meat into a tender, flavorful masterpiece. Imagine a slice that practically falls apart with the slightest tilt of your fork, each bite delivering a chorus of flavors that dance across your palate – a little sweet, a little smoky, a little savory, and a whole lot of love. The secret isn’t just in the ingredients; it’s in the patience, the timing, and a few little tricks that I’ve gathered over decades of family gatherings and holiday feasts.
But wait – there’s a hidden step that most home cooks overlook, and it’s the key to that melt‑in‑your‑mouth texture that will have your guests reaching for seconds without even realizing they’ve already finished the first serving. I’m going to reveal that trick a little later, after we walk through the basics, because I want you to feel the anticipation building as you prep each component. Trust me, once you see the difference that a quick sear and a slow, gentle simmer make, you’ll never go back to the “quick‑cook” shortcut again.
Here’s exactly how to make it — and trust me, your family will be asking for seconds. Grab a good piece of brisket, set aside a few minutes to prep, and get ready to embark on a culinary journey that will become a new tradition in your home. The steps are simple, the flavors are unforgettable, and the result? A dish that melts in your mouth every single time.
🌟 Why This Recipe Works
- Flavor Depth: The combination of caramelized onions, garlic, and tomato paste creates a rich, umami‑filled base that penetrates the meat, while the brown sugar adds a subtle sweetness that balances the acidity of the broth.
- Texture Perfection: Slow cooking at a low temperature breaks down the connective tissue in the brisket, turning what could be a tough cut into a fork‑tender slice that literally melts on the tongue.
- Ease of Execution: Despite the impressive result, the method uses just a few steps and minimal active cooking time, making it perfect for busy families who still want a show‑stopping main dish.
- Time Investment: While the overall cooking time is longer, most of it is hands‑off, allowing you to prep side dishes, set the table, or simply relax while the flavors develop.
- Versatility: This brisket can be served over mashed potatoes, noodles, or even as a hearty sandwich filling, making it adaptable to any meal plan or dietary preference.
- Nutrition Balance: Using leaner cuts of brisket and low‑sodium broth keeps the dish hearty without being overly heavy, while the modest amount of sugar adds flavor without a sugar overload.
- Ingredient Quality: Each component – from the marbled beef to the fresh garlic – is chosen for its ability to contribute both flavor and texture, ensuring every bite is a celebration of quality.
- Crowd‑Pleasing Factor: The classic Jewish brisket is a beloved comfort food that resonates across generations, making it a guaranteed hit at holiday tables, Shabbat dinners, or any family gathering.
🥗 Ingredients Breakdown
The Foundation – Beef Brisket
The star of the show is a 4‑lb beef brisket, preferably one with good marbling. That streaks of fat are not just decorative; they melt into the meat as it cooks, infusing it with buttery richness and keeping the final product moist. When selecting your brisket, look for a piece that has a uniform thickness so it cooks evenly, and don’t be afraid to ask your butcher for a “well‑marbled” cut – the extra fat equals extra flavor. If you can’t find a whole brisket, a flat cut works just as well, but you’ll need to adjust the cooking time slightly. The secret to that melt‑in‑your‑mouth texture starts here, with the right piece of meat.
Aromatics & Spices – Onions, Garlic, Paprika
Two onions, sliced thinly (about a quarter‑inch thick), become sweet and tender as they cook, forming a luscious bed for the brisket to rest on. Fresh garlic, minced, adds a pungent, aromatic bite that deepens the overall flavor profile – never settle for jarred garlic, the freshness makes a world of difference. Paprika, whether smoked or sweet, contributes a subtle earthiness and a warm, reddish hue that makes the sauce look as inviting as it tastes. Together, these aromatics create a fragrant foundation that will fill your kitchen with an irresistible aroma, drawing everyone to the table.
The Secret Weapons – Tomato Paste, Brown Sugar
A quarter‑cup of tomato paste might seem modest, but its concentrated sweetness and acidity act as a flavor catalyst, balancing the richness of the beef and the sweetness of the brown sugar. The brown sugar (packed tightly) adds a caramelized depth that, when combined with the tomato paste, creates a glossy, slightly sweet glaze that clings to the meat. This duo is the reason the sauce doesn’t turn bland or overly salty; it’s the sweet‑savory harmony that makes every bite unforgettable. If you’re looking for a twist, a splash of pomegranate molasses can replace part of the brown sugar for a tangy, fruity note.
Finishing Touches – Broth, Salt, Pepper
Two cups of low‑sodium beef broth provide the liquid base for the slow simmer, allowing you to control the final salt level without risking a salty disaster. Kosher salt, added at the right moment, seasons the meat evenly, while freshly ground black pepper adds a gentle heat that rounds out the flavor profile. The broth also helps keep the brisket moist throughout the long cooking process, and as it reduces, it concentrates into a silky sauce that’s perfect for spooning over the sliced meat. Remember, the key is to taste as you go – a pinch more salt or pepper can make the difference between good and phenomenal.
With your ingredients prepped and ready, let's get cooking. Here’s where the fun really begins…
🍳 Step-by-Step Instructions
🔐 Expert Tips for Perfect Results
The Taste Test Trick
Before you seal the pot and place it in the oven, take a quick taste of the broth mixture. Adjust the seasoning with a pinch more salt or a dash of pepper if needed. This small step ensures the final sauce isn’t bland, and it’s a habit that separates good cooks from great ones. I once served a brisket that was under‑seasoned because I skipped this step, and the whole family politely suggested “maybe a little more salt?” – a lesson learned!
Why Resting Time Matters More Than You Think
Resting isn’t just a pause; it’s an active process where the meat’s fibers re‑absorb the juices that were forced to the surface during cooking. Skipping this step can result in a dry slice, even if the meat is perfectly tender. Cover the brisket loosely with foil during the 20‑minute rest to keep it warm while allowing steam to escape, preserving the crust. Trust me on this one: the difference is noticeable the moment you cut into the meat.
The Seasoning Secret Pros Won’t Tell You
A sprinkle of ground cumin or a dash of cinnamon can add an unexpected depth that elevates the flavor profile without overpowering the classic taste. I once added a pinch of cinnamon to the sauce for a holiday dinner, and the subtle warmth paired perfectly with the sweet brown sugar. Keep these spices in your pantry; a little goes a long way, and you’ll thank yourself when the dish feels both familiar and intriguingly new.
Low‑and‑Slow vs. High‑Heat
Cooking brisket at a low temperature (300°F) allows the connective tissue to break down slowly, resulting in that coveted melt‑in‑your‑mouth texture. If you’re tempted to crank up the heat to save time, you’ll end up with a tougher piece that’s chewy rather than tender. Patience truly pays off here, and the gentle simmer also helps the flavors meld more harmoniously.
The Right Pan Matters
A heavy‑bottomed Dutch oven or a braising pot distributes heat evenly, preventing hot spots that can cause uneven cooking. If you use a thin‑walled pot, the bottom may scorch, imparting a bitter taste to the sauce. Investing in a good quality cast‑iron or enameled pot is worth it for this and many other slow‑cooked dishes.
Re‑Searing for Extra Flavor (Optional)
After the brisket has rested, you can quickly re‑sear the slices in a hot skillet for 30 seconds per side. This adds a fresh crust that contrasts beautifully with the tender interior. I’ve done this for holiday meals where the brisket is the star of the buffet, and guests love the added texture.
🌈 Delicious Variations to Try
One of my favorite things about this recipe is how versatile it is. Here are some twists I’ve tried and loved:
Barbecue‑Infused Brisket
Swap the tomato paste for a smoky barbecue sauce and add a teaspoon of liquid smoke. The result is a tangy, smoky version that pairs perfectly with coleslaw and cornbread, turning a classic Jewish dish into a backyard BBQ centerpiece.
Mediterranean Brisket
Add a handful of pitted olives, a splash of red wine, and a sprinkle of oregano. The olives bring briny depth, while the wine adds acidity, creating a bright, Mediterranean‑inspired profile that works beautifully with couscous or roasted eggplant.
Spicy Szechuan Brisket
Introduce a tablespoon of doubanjiang (fermented bean paste) and a pinch of Sichuan peppercorns. This version delivers a gentle heat and a numbing spice that surprises the palate, perfect for those who love a little kick.
Sweet‑And‑Savory Apple Brisket
Add sliced apples and a drizzle of maple syrup during the last hour of cooking. The apples soften and release a gentle sweetness that complements the brown sugar, while the maple adds a rustic, autumnal note.
Herb‑Infused Brisket
Toss in a bundle of fresh thyme, rosemary, and a couple of bay leaves with the broth. The herbs infuse the meat with an aromatic freshness that brightens the rich sauce, making it an elegant option for a spring dinner.
Curry‑Flavored Brisket
Stir in a tablespoon of curry powder and a splash of coconut milk during the simmer. This creates a creamy, fragrant sauce that pairs wonderfully with basmati rice and naan, offering a fusion twist that’s both comforting and exotic.
📦 Storage & Reheating Tips
Refrigerator Storage
Allow the brisket to cool to room temperature, then transfer it along with its sauce into an airtight container. It will keep for up to four days in the fridge. When you’re ready to eat, reheat gently on the stovetop over low heat, adding a splash of broth if the sauce looks thick – this prevents drying out and keeps the meat juicy.
Freezing Instructions
Portion the brisket into freezer‑safe bags or containers, making sure to include a good amount of sauce to protect the meat from freezer burn. Label with the date; it will stay at peak quality for up to three months. To thaw, move the bag to the refrigerator overnight, then reheat using the same low‑heat stovetop method, stirring occasionally.
Reheating Methods
The trick to reheating without drying it out? A splash of broth or water, covered, and a gentle simmer. If you’re in a hurry, the microwave works – cover the piece with a damp paper towel and heat in 30‑second intervals, stirring the sauce in between. For a crispier finish, finish the reheated slices in a hot skillet for a minute per side, just to revive that caramelized crust.
❓ Frequently Asked Questions
Can I use a pressure cooker instead of the oven?
What cut of brisket is best – flat or point?
Do I need to add the brown sugar?
Can I make this recipe vegetarian?
How do I know when the brisket is done?
Can I add vegetables to the pot?
Is it okay to use canned tomato paste?
What side dishes pair best with this brisket?
Recipe Card
When the meat is tender, remove the pot from the oven and let it rest, still covered, for 20 minutes. This resting period allows the juices to redistribute, preventing a dry slice when you finally carve it. While the brisket rests, place the pot back on the stovetop over medium heat and let the sauce reduce for about 10‑15 minutes, stirring occasionally, until it thickens to a glossy glaze.
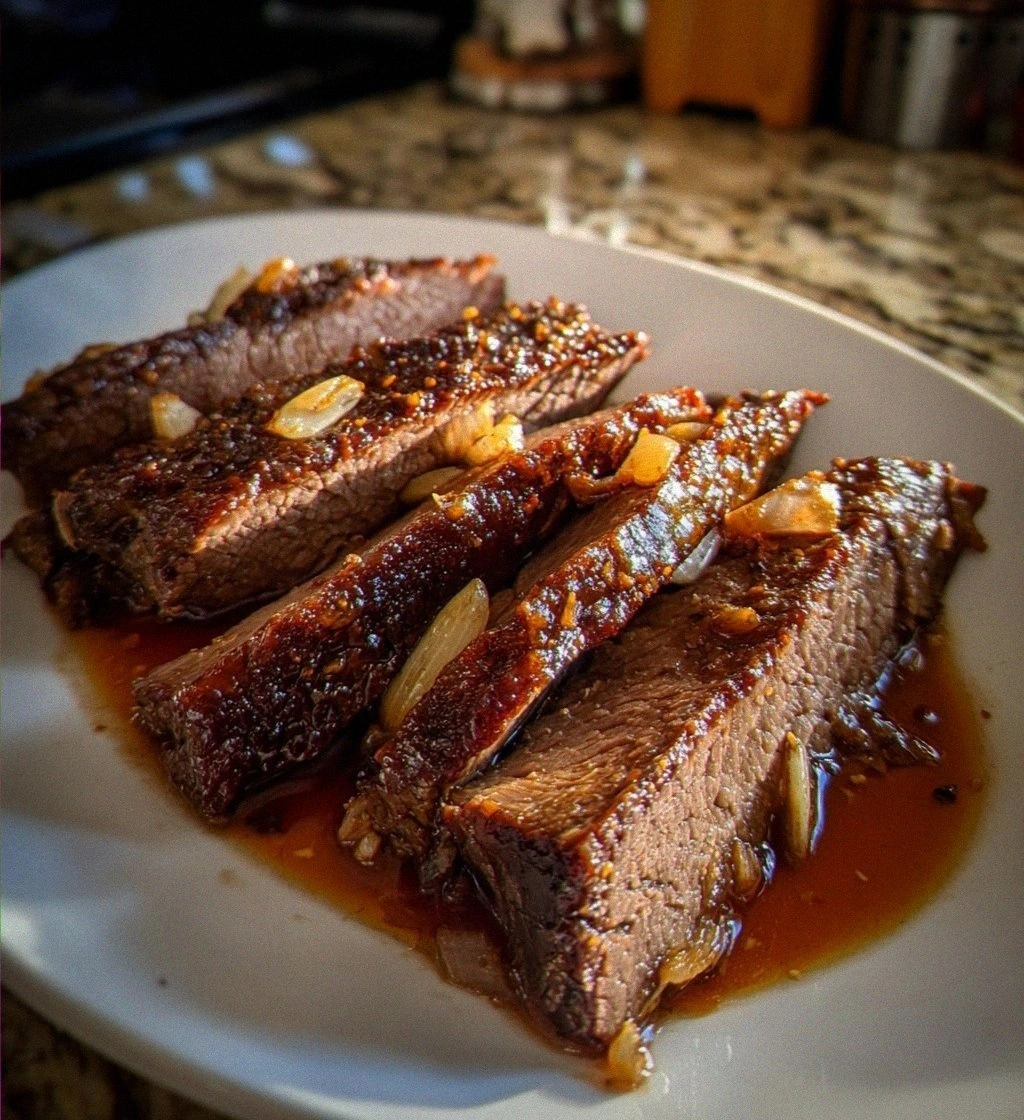
Slice the brisket against the grain – this is the secret to that melt‑in‑your‑mouth texture. The grain runs in one direction; cutting perpendicular shortens the muscle fibers, making each bite tender. Arrange the slices on a serving platter, spoon the reduced sauce over the top, and garnish with a sprinkle of fresh parsley if you like a pop of color. Go ahead, take a taste — you’ll know exactly when it’s right.
Serve the brisket hot, accompanied by buttery mashed potatoes, roasted root vegetables, or a simple noodle pilaf. The sauce doubles as a luscious gravy, so don’t be shy about drizzling it over your sides. And that’s the final step! But before you dig in, let me share some tips that will take this from great to absolutely unforgettable…