Nutty Bliss Frozen Dessert Recipe
 Save
Save
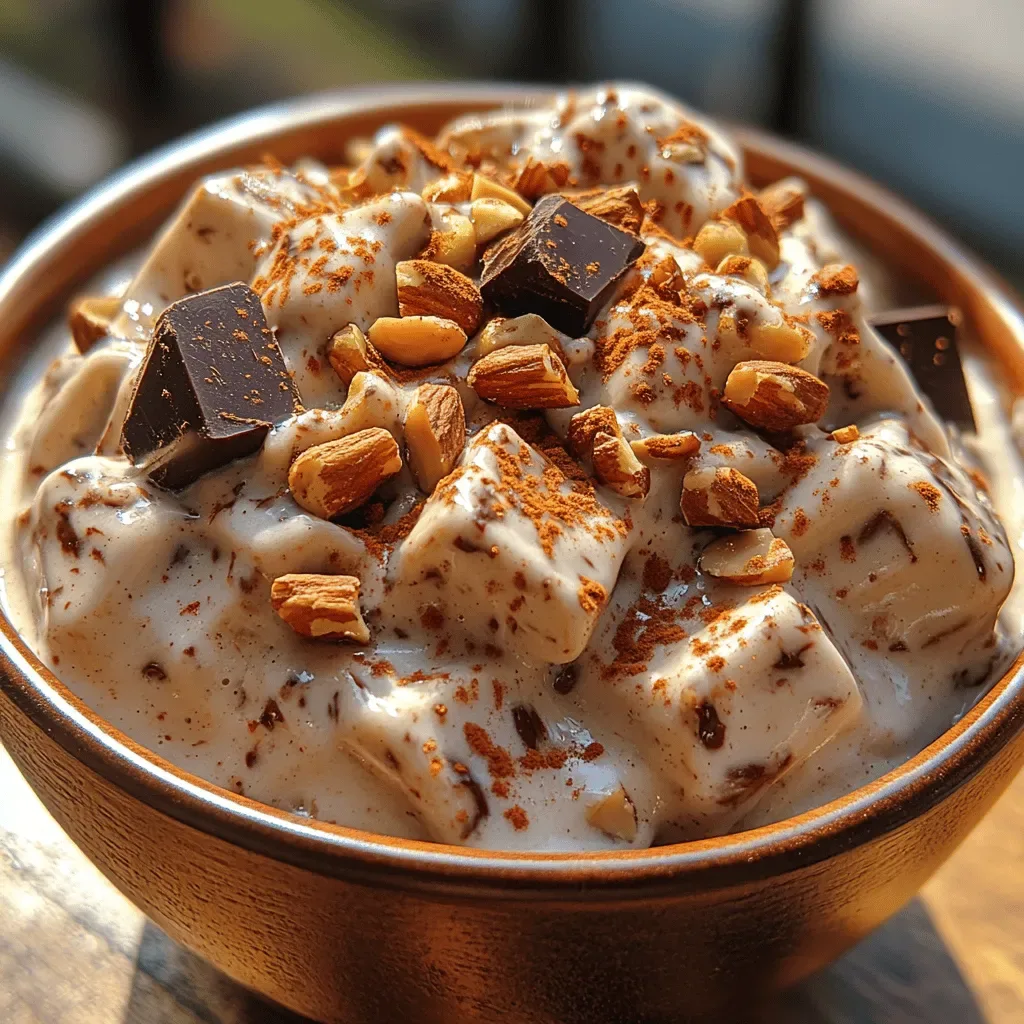
Imagine scooping a silky, nut‑infused frozen treat that melts on your tongue while delivering a satisfying crunch in every bite. Nutty Bliss Frozen Dessert captures that moment, turning a simple dessert into a celebration of texture and flavor.
What makes this recipe stand out is its no‑churn simplicity paired with a homemade nut butter swirl that stays perfectly marbled, never separating. The blend of toasted almonds, creamy cashew butter, and a hint of vanilla creates a depth you’d expect from a premium gelato.
Whether you’re feeding a family after dinner, impressing guests at a summer soirée, or craving a midnight snack, this dessert satisfies every sweet tooth. Kids love the playful crunch, while adults appreciate the sophisticated nutty aroma and the light, airy texture.
The process involves whisking a sweetened dairy base, folding in a nutty ribbon, and freezing in a shallow pan for even crystal formation. A quick burst in the freezer yields a scoopable, velvety dessert ready to enjoy within a few hours.
Why You'll Love This Recipe
Effortless No‑Churn Method: Skip the ice‑cream maker and still achieve a professional‑grade texture with just a whisk and a freezer. The mixture sets perfectly without specialized equipment, making it accessible for any kitchen.
Irresistible Nutty Crunch: Toasted almonds and a creamy cashew swirl deliver contrasting textures that keep you reaching for another spoonful, adding both richness and a satisfying bite.
Customizable Sweetness: The base can be sweetened with honey, maple syrup, or a sugar‑free alternative, allowing you to control the level of indulgence while preserving the nutty character.
Make‑Ahead Friendly: Once frozen, the dessert stores well for up to a month, so you can prep ahead for parties or busy weeks without sacrificing flavor or texture.
Tips & Tricks
Perfecting the Recipe
Use Cold Ingredients. Chill the cream, milk, and even the mixing bowl before whisking. Cold liquids freeze faster, reducing crystal size and yielding a smoother texture.
Don’t Over‑Whisk. Mix just until the honey dissolves; excessive whisking incorporates too much air, which can turn the final product gummy after freezing.
Freeze in a Shallow Pan. A wider surface area freezes quicker and more evenly, preventing the formation of large ice crystals that ruin creaminess.
Flavor Enhancements
Add a splash of toasted hazelnut liqueur to the base for an adult twist, or fold in a teaspoon of espresso powder for a subtle coffee note. A pinch of smoked sea salt on the finished scoop heightens the nutty depth and balances sweetness.
Common Mistakes to Avoid
Avoid stirring the base too early; premature agitation creates ice crystals that make the dessert gritty. Also, never use low‑fat dairy—insufficient fat leads to a watery, icy final product.
Pro Tips
Toast Nuts Thoroughly. Lightly toast almonds and cashews in a dry skillet until golden; this releases oils and deepens the nutty flavor dramatically.
Use a Silicone Spatula. When swirling the nut butter, a flexible silicone spatula creates smooth ribbons without tearing the semi‑set ice cream.
Finish with a Quick Blast. After the final freeze, run the pan under warm water for 10 seconds before serving; this loosens the edges for effortless scooping.
Variations
Ingredient Swaps
Swap the cashew butter for almond butter for a slightly sweeter profile, or replace toasted almonds with chopped pistachios for a vibrant green hue. Coconut milk can stand in for half the dairy to add a subtle tropical note while keeping the texture creamy.
Dietary Adjustments
For a dairy‑free version, use equal parts coconut cream and oat milk; the high fat content mimics cream’s richness. To make it vegan, replace honey with agave nectar and ensure the cashew butter contains no added dairy. A low‑sugar version can be achieved by using a sugar‑free maple syrup substitute.
Serving Suggestions
Serve scoops in chilled waffle cones for a handheld treat, or layer the dessert with crushed shortbread in parfait glasses. Pair with a drizzle of dark chocolate ganache and a sprinkle of flaky sea salt for an elegant finish.
Storage Info
Leftover Storage
Allow the dessert to cool completely, then transfer it to an airtight container. Store in the freezer for up to 4 weeks; the sealed environment prevents freezer burn and maintains the nutty swirl’s integrity. For quicker access, portion the dessert into individual ramekins before freezing.
Reheating Instructions
When ready to serve, remove the container from the freezer and let it sit at room temperature for 5‑7 minutes. This short softening period makes scooping effortless while preserving the creamy texture. If the dessert feels too firm, run the container under warm water for a few seconds—never microwave, as it can melt the delicate swirl.
Frequently Asked Questions
Can I prepare this dessert a day ahead?
What if I only have frozen nuts on hand?
Can I substitute the honey with another sweetener?
What are the best toppings to pair with Nutty Bliss?
This Nutty Bliss Frozen Dessert blends a silky, no‑churn base with a luscious, crunchy swirl, delivering a dessert that feels both indulgent and approachable. The detailed steps, storage tips, and creative variations ensure you can master it today and adapt it for any occasion. Feel free to experiment with flavors, textures, and toppings—cooking is your canvas. Scoop, savor, and share the blissful experience with friends and family!
Nutty Bliss Frozen Dessert Recipe
Delicious Nutty Bliss Frozen Dessert Recipe
Ingredients
Base
- 2 cups heavy cream
- 1 cup whole milk
- ½ cup honey
- 1 tablespoon pure vanilla extract
- ¼ teaspoon fine sea salt
Nut Butter Swirl
- ¾ cup raw cashews
- ½ cup toasted sliced almonds
- ¼ cup creamy cashew butter
- 2 tablespoons maple syrup
- 1 tablespoon melted coconut oil
Sweetener & Flavor Boost
- 2 teaspoons almond extract
- 1 tablespoon toasted honey (optional)
Optional Toppings
- Chopped toasted almonds
- Drizzle of caramel sauce
- Fresh berries for garnish
Instructions
Freezing the Base
- Pre‑chill the Pan. Place a shallow metal or glass baking dish in the freezer for 10 minutes. A cold surface jump‑starts crystal formation, giving the dessert a smoother texture once fully set.
- Pour the Cream Mixture. Remove the pan, quickly pour the whisked base into it, spreading evenly. The thin layer (about 1‑inch deep) ensures rapid, uniform freezing and reduces the risk of icy granules.
- Initial Freeze. Return the pan to the freezer and let it sit undisturbed for 45‑60 minutes. You’ll notice the edges beginning to firm while the center stays soft—this is the perfect window for the next step.
- Stir and Scrape. Using a sturdy spatula, gently stir the semi‑frozen base, scraping the frozen edges toward the center. This breaks up large ice crystals and incorporates air, creating a lighter mouthfeel.
- Repeat Freeze‑Stir Cycle. Return the pan to the freezer for another 30 minutes, then repeat the stir‑scrape process once more. Two cycles are usually enough for a creamy consistency without an ice‑cream maker.
- Incorporate the Swirl. Drizzle spoonfuls of the nut butter mixture over the semi‑set ice cream. Using a butter knife, gently swirl in a figure‑eight pattern, ensuring the ribbons remain distinct yet integrated.
Similar Recipes
 Desserts
3x lekker christmas banana bread voor perfecte kerstsfeer
Learn how to make delicious 3x lekker christmas banana bread voor perfecte kerstsfeer. Easy recipe with…
 Desserts
Raspberry Freezer Jam
Learn how to make delicious Raspberry Freezer Jam. Easy recipe with step-by-step instructions.
 Desserts
Irresistible White Chocolate Oreo Bark Recipe to Try Now
Learn how to make delicious Irresistible White Chocolate Oreo Bark Recipe to Try Now. Easy recipe…
 Desserts
Mini Pistachio Tiramisu Desserts
Discover bite‑size pistachio tiramisu desserts that blend creamy mascarpone, crunchy pistachios, and espresso flavor for a…
 Desserts
Irresistible Chocolate Doughnut Holes Recipe
Delicious Irresistible Chocolate Doughnut Holes Recipe
 Desserts
Pumpkin Cheesecake Dip: A Fall Favorite
Delicious Pumpkin Cheesecake Dip: A Fall Favorite
 Desserts
Oreo Pops Valentine’s Day: 7 Sweet Ways to Show Love
Learn how to make delicious Oreo Pops Valentine’s Day: 7 Sweet Ways to Show Love. Easy…
 Desserts
Spiced Churro Waffle Sticks: A Sweet Twist on a Classic Treat
Delicious Spiced Churro Waffle Sticks: A Sweet Twist on a Classic Treat

Clara
I cook these recipes at home before they ever land here — simple ingredients, clear steps.