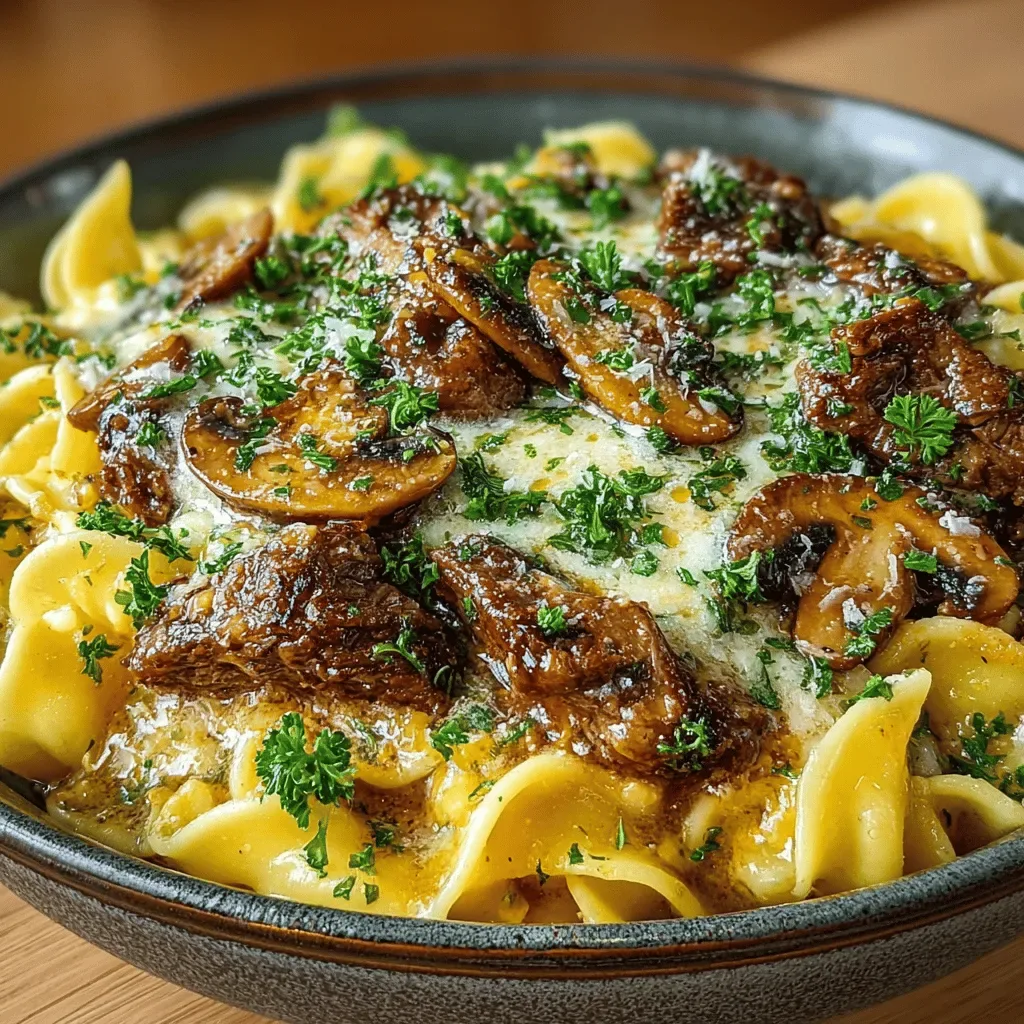
Imagine a dinner where golden‑browned chicken meets tender pasta shells, all smothered in a luscious cheese‑laden sauce that whispers of spinach and artichoke. That’s the magic of Cheesy Spinach Artichoke Chicken Shells—a crowd‑pleasing, comfort‑food masterpiece that feels both indulgent and wholesome.
What makes this dish truly special is the marriage of three textures: the crisp exterior of the seared chicken, the creamy interior of the cheese‑infused sauce, and the satisfying bite of the pasta shell that holds everything together.
This recipe is perfect for busy weeknights, family gatherings, or a cozy weekend dinner. Anyone who loves a good cheesy sauce—kids, cheese aficionados, and even picky eaters—will be drawn to its bright green specks of spinach and tender artichoke hearts.
The cooking process is straightforward: sear the chicken, sauté the aromatics, build a velvety sauce, combine with cooked shells, then bake until bubbly and golden. In under an hour you’ll have a restaurant‑quality plate ready to serve.
Why You'll Love This Recipe
One‑Pan Efficiency: By searing the chicken and then finishing everything in the same skillet, cleanup is minimal while flavors build on each other for maximum depth.
Cheese Lover’s Dream: A blend of mozzarella and Parmesan creates a silky, melt‑in‑your‑mouth sauce that coats each shell without becoming greasy.
Nutritious Boost: Fresh spinach and artichoke hearts add fiber, vitamins, and antioxidants, balancing indulgence with wholesome goodness.
Versatile Presentation: Serve it straight from the oven, or plate individual shells for a more elegant look—perfect for both casual and formal settings.
Ingredients
For this dish I rely on a handful of fresh, high‑quality components that each play a specific role. The chicken provides a sturdy, protein‑rich foundation, while the jumbo shells act as edible bowls for the sauce. Spinach and artichoke contribute earthy, slightly sweet notes, and the blend of cheeses creates that luxurious, gooey texture we all crave. Finally, aromatics and seasonings bring depth and a hint of heat.
Main Ingredients
- 12 large pasta shells
- 2 boneless, skinless chicken breasts (about 1 lb)
- 2 cups fresh baby spinach, roughly chopped
- 1 cup marinated artichoke hearts, drained and coarsely chopped
Sauce Components
- 1 cup heavy cream
- ½ cup low‑sodium chicken broth
- 1 cup shredded mozzarella cheese
- ½ cup grated Parmesan cheese
- 2 cloves garlic, minced
- 1 tablespoon Dijon mustard
Seasonings & Garnish
- 1 teaspoon smoked paprika
- ½ teaspoon red pepper flakes (optional)
- Salt and freshly ground black pepper, to taste
- 2 tablespoons fresh parsley, chopped (for garnish)
The synergy of these ingredients is what elevates the dish. The cream and broth create a velvety base that carries the cheese without becoming cloying, while garlic and mustard add a subtle bite. Smoked paprika lends a gentle earthiness, and the red pepper flakes provide optional heat. When everything comes together, each bite delivers a balanced blend of richness, freshness, and savory depth.
Step-by-Step Instructions
Preparing the Base
Begin by bringing the chicken to room temperature—let it rest on the counter for about 15 minutes. Pat it dry with paper towels, then slice each breast horizontally to create two thin cutlets. Season both sides generously with salt, pepper, and smoked paprika; the seasoning will penetrate the meat as it rests, ensuring every bite is flavorful.
Cooking the Chicken & Shells
- Heat the Skillet. Place a large oven‑safe skillet over medium‑high heat and add 2 tablespoons olive oil. When the oil shimmers (about 2 minutes), it’s hot enough to sear without burning.
- Sear the Chicken. Lay the seasoned cutlets in a single layer, leaving space between pieces. Cook undisturbed for 4 minutes until a golden crust forms, then flip and sear the other side for an additional 3 minutes. Remove the chicken and set aside; it will finish cooking in the oven.
- Blanch the Shells. While the chicken rests, bring a pot of salted water to a boil. Add the pasta shells and cook for 6‑7 minutes, just until they begin to soften but are still firm inside. Drain and rinse briefly under cold water to stop cooking.
- Combine in the Skillet. Return the skillet to medium heat, add the minced garlic, and sauté for 30 seconds until fragrant. Stir in the chicken broth, scraping up any browned bits (fond) from the bottom—these add depth to the sauce.
- Build the Cream Sauce. Reduce the heat to low, then whisk in the heavy cream, Dijon mustard, and red pepper flakes. Let the mixture simmer gently for 3‑4 minutes, allowing it to thicken slightly. Finally, stir in mozzarella and Parmesan until they melt into a glossy sauce.
Finishing the Dish
Add the blanched shells, chopped spinach, and artichoke hearts to the skillet, tossing to coat each piece with the sauce. Nestle the seared chicken on top, then transfer the entire skillet to a preheated 375°F (190°C) oven. Bake for 12‑15 minutes, or until the chicken reaches an internal temperature of 165°F and the sauce is bubbling and lightly browned around the edges. Remove from the oven, let rest for 5 minutes, then sprinkle fresh parsley before serving.
Tips & Tricks
Perfecting the Recipe
Dry the Chicken. Patting the meat dry before seasoning ensures a proper sear and prevents steaming, which would leave the chicken soggy.
Don’t Over‑cook the Pasta. Blanch the shells just until they’re al‑dente; they will finish cooking in the oven and absorb the sauce without falling apart.
Use an Oven‑Safe Skillet. A heavy‑bottomed cast‑iron or stainless skillet distributes heat evenly, giving a uniform bake and beautiful caramelization.
Flavor Enhancements
Finish the sauce with a squeeze of fresh lemon juice for bright acidity, or stir in a tablespoon of sun‑dried tomato pesto for an umami boost. A pinch of nutmeg in the cream adds a subtle warmth that complements the spinach beautifully.
Common Mistakes to Avoid
Skipping the resting period after searing will cause the chicken to release its juices, making the sauce watery. Also, avoid turning the heat up too high once the cream is added; high heat can cause the sauce to curdle and the cheese to separate.
Pro Tips
Grate Your Own Cheese. Freshly grated Parmesan melts more smoothly and provides a richer flavor than pre‑shredded varieties.
Season in Layers. Add a pinch of salt at each stage—when searing, when making the sauce, and just before the final bake—to build depth without over‑salting.
Use a Meat Thermometer. Checking for 165°F ensures safety while preventing overcooking, which can dry out the chicken.
Variations
Ingredient Swaps
Replace chicken with turkey cutlets or pork tenderloin for a different protein profile. For a vegetarian twist, use firm tofu cubes or large portobello slices. Swap spinach for kale or Swiss chard, and artichokes for roasted red peppers to keep the dish fresh and seasonal.
Dietary Adjustments
To make the recipe gluten‑free, ensure the pasta shells are labeled gluten‑free and use tamari instead of any soy‑based broth. For dairy‑free diners, substitute heavy cream with coconut cream and use a dairy‑free mozzarella alternative. Keto lovers can replace the pasta with low‑carb “conchiglie” made from shirataki or cauliflower rice.
Serving Suggestions
Pair the dish with a simple lemon‑herb quinoa, garlic‑roasted asparagus, or a crisp mixed greens salad dressed with balsamic vinaigrette. A side of warm, crusty sourdough is perfect for sopping up any extra sauce, while a light fruit sorbet makes a refreshing finish.
Storage Info
Leftover Storage
Allow leftovers to cool to room temperature, then transfer to an airtight container. Store in the refrigerator for up to 4 days. For longer preservation, portion the dish into freezer‑safe bags, press out excess air, and freeze for up to 3 months. Thaw overnight in the fridge before reheating.
Reheating Instructions
Reheat in a preheated 350°F (175°C) oven, covered with foil, for 15‑20 minutes until the interior is hot and the cheese regains its melt. For a quicker method, microwave individual portions on medium power for 2‑3 minutes, stirring halfway and adding a splash of broth if the sauce looks dry.
Frequently Asked Questions
This Cheesy Spinach Artichoke Chicken Shells recipe delivers a harmonious blend of savory chicken, tender pasta, and a decadent cheese sauce that feels both comforting and elevated. By following the detailed steps, using fresh ingredients, and applying the pro tips, you’ll achieve a restaurant‑worthy dish with minimal fuss. Feel free to experiment with the suggested swaps or add your own twist—cooking is an adventure, after all. Enjoy every cheesy, garlicky bite!