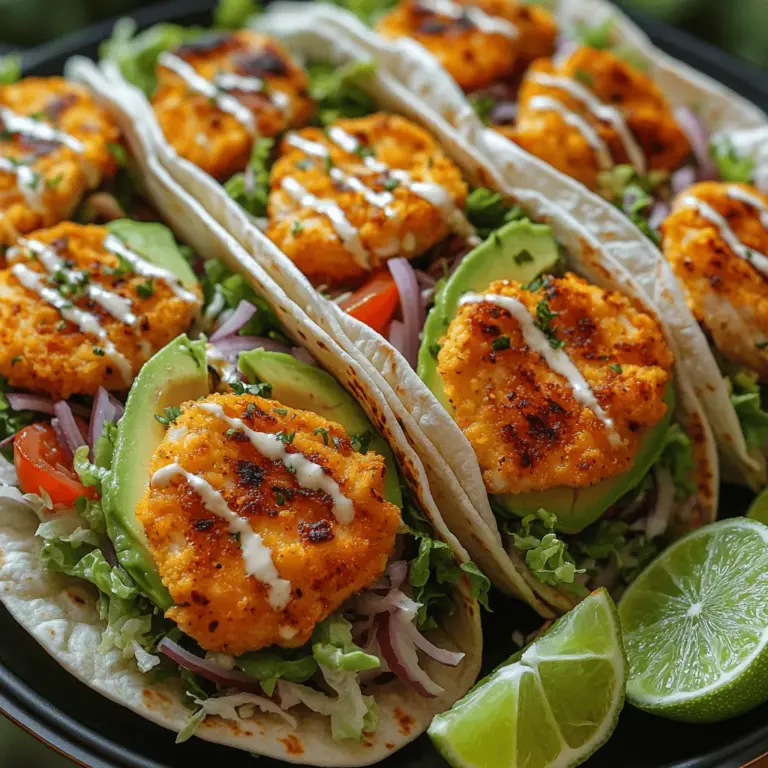
Crispy Chicken Avocado Wraps: A Delightful Recipe

WANT TO SAVE THIS RECIPE?

Crispy Chicken Avocado Wraps Recipe

Introduction

Wraps have emerged as a favorite meal choice for many, adored for their versatility and convenience. They seamlessly combine various ingredients into a portable format, making them ideal for busy lifestyles, lunchboxes, or even casual dinners. Among the myriad of wrap options available, Crispy Chicken Avocado Wraps stand out as a particularly delightful dish. This recipe brings together the irresistible crunch of crispy chicken, the rich creaminess of ripe avocado, and the freshness of vibrant vegetables, creating a satisfying meal that appeals to both the palate and the eye.

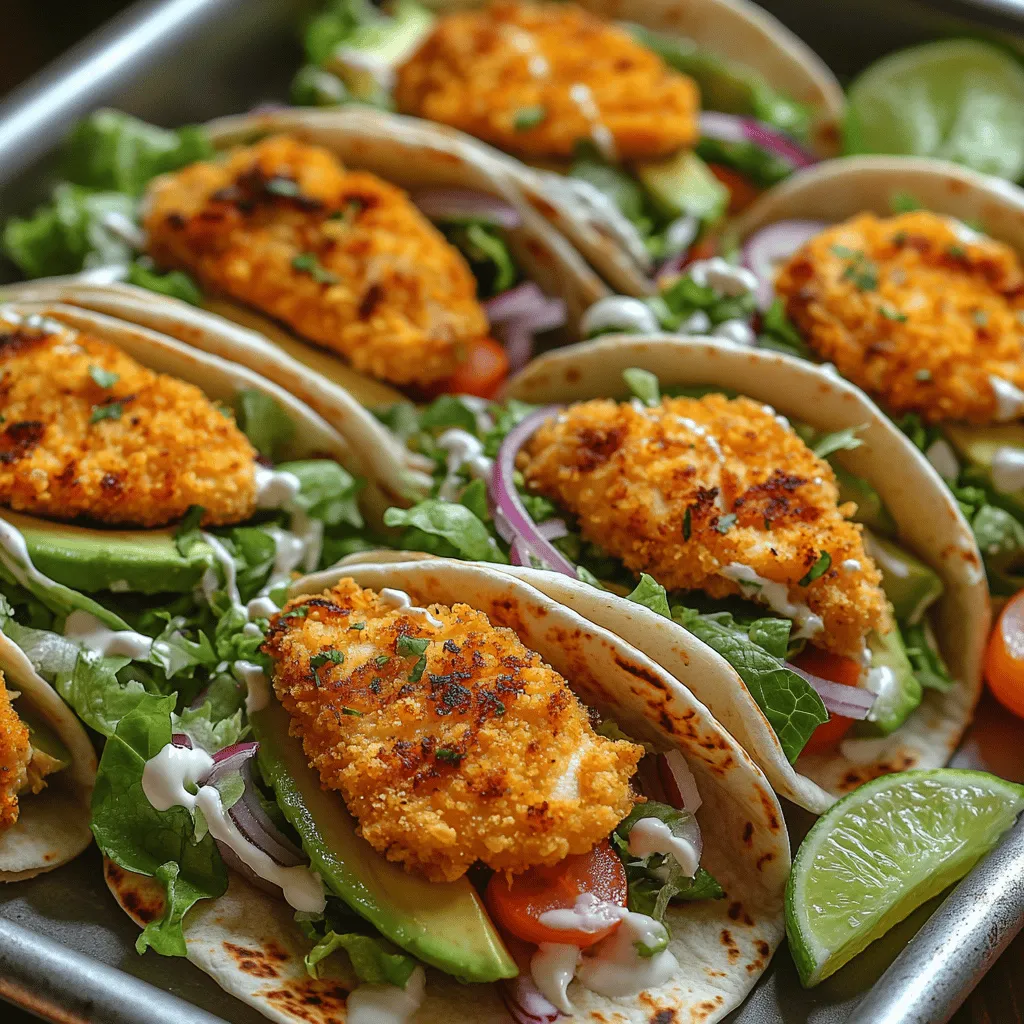
The balance of flavors and textures in Crispy Chicken Avocado Wraps is one of the key elements that makes them so appealing. The golden, crispy exterior of the chicken contrasts beautifully with the smooth, buttery avocado, while the crisp lettuce and juicy tomatoes add layers of freshness. These wraps not only taste great but also provide a fulfilling meal that can be enjoyed at any time of the day.

The Allure of Crispy Chicken Avocado Wraps

Crispy chicken has an undeniable allure, capturing the hearts of food lovers around the globe. Its texture and flavor make it a favorite in various cuisines, from classic fried chicken to Asian-inspired dishes. The crispy coating adds a satisfying crunch that elevates the dining experience, making it a go-to choice for many recipes.

In addition to the crispy chicken, the health benefits of using avocado play a significant role in the appeal of this wrap. Avocados are packed with healthy monounsaturated fats, which are known to support heart health and provide a source of sustained energy. They are also rich in vitamins and nutrients, including potassium, vitamin E, and B vitamins. Incorporating avocado into your meals not only enhances flavor but also contributes to a balanced diet.

The versatility of wraps is another reason they have gained popularity. Crispy Chicken Avocado Wraps can be enjoyed at lunch, dinner, or even as a snack during a picnic. They can be customized to fit any occasion, making them a perfect choice for gatherings with friends or family. Whether served cold or warm, these wraps are sure to satisfy a range of tastes and preferences.

Gathering Your Ingredients

To create the perfect Crispy Chicken Avocado Wraps, it’s essential to gather high-quality ingredients that will enhance the overall flavor and texture of the dish. Here’s a breakdown of the key components you will need:

1. Chicken Breasts: Choose boneless, skinless chicken breasts for the best results. They should be fresh and of high quality, as this will affect the taste and tenderness of the final dish.

2. Buttermilk: This ingredient is crucial for marinating the chicken, as it helps tenderize the meat while infusing it with flavor. If you don’t have buttermilk on hand, you can create a substitute by mixing milk with a splash of vinegar or lemon juice.

3. Breadcrumbs: For the crispy coating, use panko breadcrumbs for extra crunch. They provide texture that traditional breadcrumbs might not achieve.

4. Avocado: Choose ripe avocados that yield slightly to pressure. They should be creamy and flavorful, adding a rich dimension to the wrap.

5. Fresh Vegetables: Lettuce, tomatoes, and cucumbers are common choices. Opt for crisp varieties to add freshness and crunch.

6. Wraps or Tortillas: Whole wheat or spinach wraps can enhance the nutritional value of your meal. Choose large enough tortillas to comfortably hold all your ingredients.

7. Sauces: A creamy dressing or sauce, such as ranch or a spicy mayo, can elevate the flavors. Feel free to explore different options based on your taste preferences.

Selecting high-quality ingredients is vital for achieving the best flavor and texture in your wraps. For those with dietary restrictions or preferences, there are various substitutions available. For instance, you can replace chicken with grilled tofu for a vegetarian version or use gluten-free breadcrumbs if needed. The flexibility of this recipe allows you to personalize it according to your needs while still delivering a mouthwatering result.

Marinating the Chicken for Maximum Flavor

One of the secrets to achieving juicy and flavorful chicken is through the marination process. Marinating chicken breasts in buttermilk not only tenderizes the meat but also allows the chicken to absorb a depth of flavor that will shine through in every bite. The lactic acid in buttermilk breaks down the proteins in the chicken, making it more tender, while the flavors from any added seasonings permeate the meat.

For best results, marinate your chicken for at least 1 hour, but ideally, aim for overnight. This extended time allows the flavors to develop fully, resulting in a more flavorful chicken. To ensure the chicken absorbs the flavors effectively, consider adding spices and herbs to the buttermilk marinade, such as garlic powder, onion powder, paprika, or your favorite seasoning blend. This will create a flavorful base that enhances the overall taste of the dish.

When marinating, it’s best to use a non-reactive container, such as glass or stainless steel, to prevent any chemical reactions that could affect the flavor. Seal the container or cover it with plastic wrap to keep the chicken submerged in the marinade for optimal flavor absorption.

Setting Up Your Breading Station

Once your chicken has marinated, it’s time to prepare the breading station, an essential step in creating the crispy coating that will make your wraps irresistible. Setting up the breading station requires three key components: the flour, the egg wash, and the breadcrumbs.

1. Flour: Start with all-purpose flour seasoned with salt and pepper. This initial layer helps the egg adhere to the chicken, creating a solid base for the breadcrumbs.

2. Egg Wash: In a separate bowl, beat a couple of eggs with a splash of water or milk. This mixture will help the breadcrumbs stick to the chicken, forming a crispy layer during frying or baking.

3. Breadcrumbs: Finally, place the panko breadcrumbs in a third bowl. For added flavor, consider mixing in spices or grated parmesan cheese to the breadcrumbs before coating your chicken.

To bread the chicken, first, dredge each piece in the seasoned flour, shaking off any excess. Then, dip it into the egg wash, ensuring it is evenly coated. Finally, press the chicken into the panko breadcrumbs, making sure to coat it thoroughly. This three-step process is crucial for achieving that coveted crispy texture.

With the chicken marinated and the breading station set up, you are now ready to move on to the cooking process, where the magic truly happens. The combination of these elements sets the stage for creating delicious Crispy Chicken Avocado Wraps that will leave a lasting impression.
<strong>Introduction</strong>” /></p>
</p>
<h2>Insights on Achieving the Perfect Coating for a Crispy Texture</h2>
</p>
<p>Achieving the perfect crispy coating on your chicken is crucial for these wraps. It not only adds texture but enhances the overall flavor profile. To ensure an irresistible crunch, start by selecting the right breading technique. A common method is the classic three-step breading process: flour, egg wash, and breadcrumbs.</p>
</p>
<p>1. <strong>Flour</strong>: Use all-purpose flour seasoned with salt, pepper, and any other spices you prefer, such as paprika or garlic powder. This initial coating helps the egg adhere better to the chicken.</p>
</p>
<p>2. <strong>Egg Wash</strong>: Beat a couple of eggs and add a splash of water or milk. This mixture helps the breadcrumbs stick and adds moisture.</p>
</p>
<p>3. <strong>Breadcrumbs</strong>: Opt for panko breadcrumbs for a lighter, airier texture. They create a more pronounced crunch compared to regular breadcrumbs.</p>
</p>
<p>For an additional layer of flavor, consider adding grated Parmesan cheese or herbs directly into the breadcrumb mixture. This enhances the taste and contributes to a beautiful golden color when fried.</p>
</p>
<h2>Cooking the Chicken to Perfection</h2>
</p>
<p>Frying chicken to perfection is an art that requires attention to detail. Here’s how to do it:</p>
</p>
<h3>Detailed Instructions on Frying Chicken</h3>
</p>
<p>1. <strong>Prepare the Chicken</strong>: After coating your chicken pieces in the breading mixture, allow them to rest for about 10-15 minutes. This rest period helps the coating adhere better during frying.</p>
</p>
<p>2. <strong>Heat the Oil</strong>: In a large skillet or frying pan, pour enough oil to cover the bottom (about 1/4 inch deep). Heat the oil over medium-high heat until it reaches about 350°F (175°C). Use a kitchen thermometer for accuracy; if you don’t have one, test the oil by dropping in a small piece of bread—if it sizzles and bubbles immediately, the oil is ready.</p>
</p>
<p>3. <strong>Fry the Chicken</strong>: Carefully place the coated chicken pieces in the hot oil, avoiding overcrowding the pan. This ensures even cooking and maintains the oil temperature. Fry for about 4-5 minutes on each side or until the chicken is golden brown and cooked through.</p>
</p>
<p>4. <strong>Checking Internal Temperature</strong>: To ensure food safety, use a meat thermometer to check the internal temperature of the chicken. It should reach at least 165°F (75°C). This step is essential for preventing foodborne illnesses.</p>
</p>
<p>5. <strong>Achieving a Golden-Brown Crust</strong>: After frying, place the chicken on a plate lined with paper towels to absorb excess oil. For an extra crispy texture, you can place the fried chicken in a preheated oven at 200°F (93°C) while you finish frying the remaining pieces.</p>
</p>
<p>6. <strong>Avoiding Oily Chicken</strong>: To avoid a greasy finish, ensure the oil is hot enough before adding the chicken. Additionally, draining the chicken on paper towels helps maintain a crispy texture by reducing excess oil.</p>
</p>
<h2>Assembling Your Delicious Wraps</h2>
</p>
<p>Once your chicken is perfectly cooked, it’s time to assemble your wraps. This process is both straightforward and enjoyable, allowing for creativity in layering and customization.</p>
</p>
<h3>Step-by-Step Process for Assembling the Wraps</h3>
</p>
<p>1. <strong>Choose Your Wrap</strong>: Start with a large tortilla or wrap of your choice—flour, whole wheat, or spinach wraps all work well.</p>
</p>
<p>2. <strong>Layering Techniques</strong>: Begin by spreading a layer of your chosen sauce (such as ranch, chipotle mayo, or hummus) across the center of the wrap. This adds flavor and moisture while helping to hold the ingredients together.</p>
</p>
<p>3. <strong>Add the Chicken</strong>: Place the freshly fried chicken on top of the sauce. If you prefer, you can slice the chicken into strips for easier wrapping.</p>
</p>
<p>4. <strong>Include Vegetables</strong>: Add a generous portion of fresh vegetables. Sliced avocados, lettuce, tomatoes, and cucumbers are great options that complement the chicken beautifully.</p>
</p>
<p>5. <strong>Cheese and Extras</strong>: If desired, sprinkle some shredded cheese on top. Feta, mozzarella, or cheddar can enhance the flavor profile. You might also add extras like jalapeños for heat or olives for a briny touch.</p>
</p>
<h3>Suggestions for Customizing Wraps</h3>
</p>
<p>Feel free to personalize your wraps according to your taste. Consider adding:</p>
</p>
<p>– <strong>Fruits</strong>: Thinly sliced apples or mango for a sweet twist.</p>
<p>– <strong>Nuts</strong>: Toasted almonds or walnuts for added crunch.</p>
<p>– <strong>Herbs</strong>: Fresh cilantro or parsley for an aromatic finish.</p>
</p>
<h3>Tips for Wrapping Techniques</h3>
</p>
<p>To ensure your wraps are secure and the filling stays intact, follow these steps:</p>
</p>
<p>1. <strong>Fold the Sides</strong>: After layering your fillings, fold the sides of the tortilla inward.</p>
</p>
<p>2. <strong>Roll Tightly</strong>: Starting from the bottom (the side closest to you), roll the wrap tightly while keeping the sides tucked in.</p>
</p>
<p>3. <strong>Seal the Wrap</strong>: If needed, you can secure the wrap with a toothpick or wrap it in parchment paper to hold its shape until serving.</p>
</p>
<h2>Serving Suggestions and Pairings</h2>
</p>
<p>Crispy Chicken Avocado Wraps are delightful on their own, but pairing them with complementary sides can elevate the meal.</p>
</p>
<h3>Ideas for Pairing the Wraps</h3>
</p>
<p>1. <strong>Chips</strong>: Serve your wraps with tortilla chips or potato chips for added crunch. Consider offering a dip like guacamole or salsa on the side.</p>
</p>
<p>2. <strong>Salads</strong>: A fresh green salad with a citrus vinaigrette can balance the richness of the wraps. Incorporate ingredients like arugula, mixed greens, or even quinoa for a nutritious side.</p>
</p>
<p>3. <strong>Dips</strong>: Pair your wraps with dips like tzatziki, ranch dressing, or a spicy aioli, which can enhance the flavor experience.</p>
</p>
<h3>Discussion on the Role of Lime Wedges</h3>
</p>
<p>Don’t forget to serve lime wedges alongside your wraps. A squeeze of fresh lime juice brightens the flavors and adds a refreshing zest. This simple addition can elevate the dish, making it even more enjoyable.</p>
</p>
<h3>Creative Serving Ideas</h3>
</p>
<p>These wraps are versatile and can be served in various settings:</p>
</p>
<p>– <strong>Casual Lunches</strong>: Perfect for picnics or lunchboxes, these wraps are easy to transport and can be made in advance.</p>
<p>– <strong>Formal Gatherings</strong>: Present the wraps on a platter with an assortment of dips for a sophisticated appetizer at parties.</p>
<p>– <strong>Game Day</strong>: Serve them as finger food while watching the big game. They’re sure to be a hit among friends and family.</p>
</p>
<h2>Nutritional Information</h2>
</p>
<p>Understanding the nutritional benefits of your Crispy Chicken Avocado Wraps can help you make informed choices.</p>
</p>
<h3>Overview of Nutritional Benefits</h3>
</p>
<p>These wraps provide a well-balanced meal, rich in protein, healthy fats, and essential nutrients. Here’s a general breakdown per serving:</p>
</p>
<p>– <strong>Calories</strong>: Approximately 500-600 calories, depending on the ingredients used.</p>
<p>– <strong>Protein</strong>: Around 30-35 grams, primarily from the chicken and cheese.</p>
<p>– <strong>Fats</strong>: About 20-25 grams, mainly from the avocado and cooking oil.</p>
<p>– <strong>Carbohydrates</strong>: Approximately 40-45 grams, depending on the type of wrap and added vegetables.</p>
</p>
<h3>Discussion on Making the Wraps Healthier</h3>
</p>
<p>To make your wraps even healthier, consider these modifications:</p>
</p>
<p>– <strong>Use Whole Grain Wraps</strong>: Opt for whole grain or low-carb tortillas to increase fiber content.</p>
<p>– <strong>Minimize Oil</strong>: Bake the chicken instead of frying for a healthier option while still achieving a crispy texture.</p>
<p>– <strong>Add More Vegetables</strong>: Load up on fresh veggies to enhance the nutritional profile and lower calorie density.</p>
</p>
<h2>Conclusion</h2>
</p>
<p>Crispy Chicken Avocado Wraps are a delicious and satisfying meal that can be enjoyed in various settings, from casual lunches to festive gatherings. With the right techniques for frying chicken, assembling the wraps, and pairing them with complementary sides, you can create an unforgettable dish that everyone will love.</p>
</p>
<p>Don’t hesitate to experiment with flavors and ingredients to find your perfect combination. The versatility of wraps allows for endless possibilities, making them a staple in your culinary repertoire. We encourage you to try making these wraps at home, savoring every bite of the crispy chicken, creamy avocado, and fresh vegetables. Enjoy the process, and let your creativity shine in the kitchen!</p>
</div>

Introduction

Crispy Chicken Avocado Wraps

Discover the irresistible Crispy Chicken Avocado Wraps that combine crispy chicken, creamy avocado, and fresh veggies for an unforgettable meal. Perfect for lunch, dinner, or snacks, these versatile wraps are easy to customize to suit any occasion. Learn the secrets to marinating chicken for unbeatable flavor, achieving a crispy coating, and assembling your wraps. Enjoy the balance of flavors and textures for a delicious, satisfying dish that’s sure to please everyone!

Ingredients
  

2 large boneless, skinless chicken breasts

1 cup buttermilk

1 cup all-purpose flour

1 tsp paprika

1/2 tsp garlic powder

1/2 tsp onion powder

1/2 tsp cayenne pepper (optional, for heat)

Salt and pepper, to taste

1 cup panko breadcrumbs

2 ripe avocados, peeled and sliced

1 cup shredded lettuce (romaine or iceberg)

1/2 cup diced tomatoes

1/4 cup red onion, thinly sliced

4 large flour tortillas (10-inch)

1/4 cup ranch dressing or your favorite sauce

Lime wedges, for serving

Instructions
 

Marinate the Chicken: Place the chicken breasts in a bowl with buttermilk. Cover and refrigerate for at least 1 hour, or up to overnight for best flavor and tenderness.

    Prepare the Breading Station: Set up your breading station with three shallow dishes: one with flour mixed with paprika, garlic powder, onion powder, cayenne, salt, and pepper; the second with beaten eggs (or more buttermilk for a thicker coating); and the third with panko breadcrumbs.

      Coat the Chicken: Remove the marinated chicken from the buttermilk. Dredge each breast first in the seasoned flour, shaking off any excess. Then dip into the egg wash (or buttermilk), and finally coat with panko breadcrumbs, pressing gently to adhere well.

        Fry the Chicken: In a large skillet, heat vegetable oil over medium-high heat. Once hot, add the breaded chicken breasts (you may need to cook in batches). Fry for 5-7 minutes per side or until golden brown and cooked through (internal temperature should reach 165°F/75°C). Remove and let rest on paper towels to drain excess oil.

          Assemble the Wraps: Lay a tortilla flat on a clean surface. Spread a tablespoon of ranch dressing in the center. Layer with shredded lettuce, crispy chicken (sliced or whole), avocado slices, diced tomatoes, and red onion.

            Wrap it Up: Fold in the sides of the tortilla and then roll it from the bottom up to create a wrap. Slice in half if desired and secure with a toothpick if necessary.

              Serve: Serve with lime wedges on the side for a zesty kick. Enjoy your Crispy Chicken Avocado Wraps!

                Prep Time, Total Time, Servings: 15 min | 30 min | 4 servings

                  WANT TO SAVE THIS RECIPE?

                  Leave a Comment

                  Recipe Rating