Crispy Chicken Parmesan Fingers: A Delicious Recipe to Savor
 Save
Save
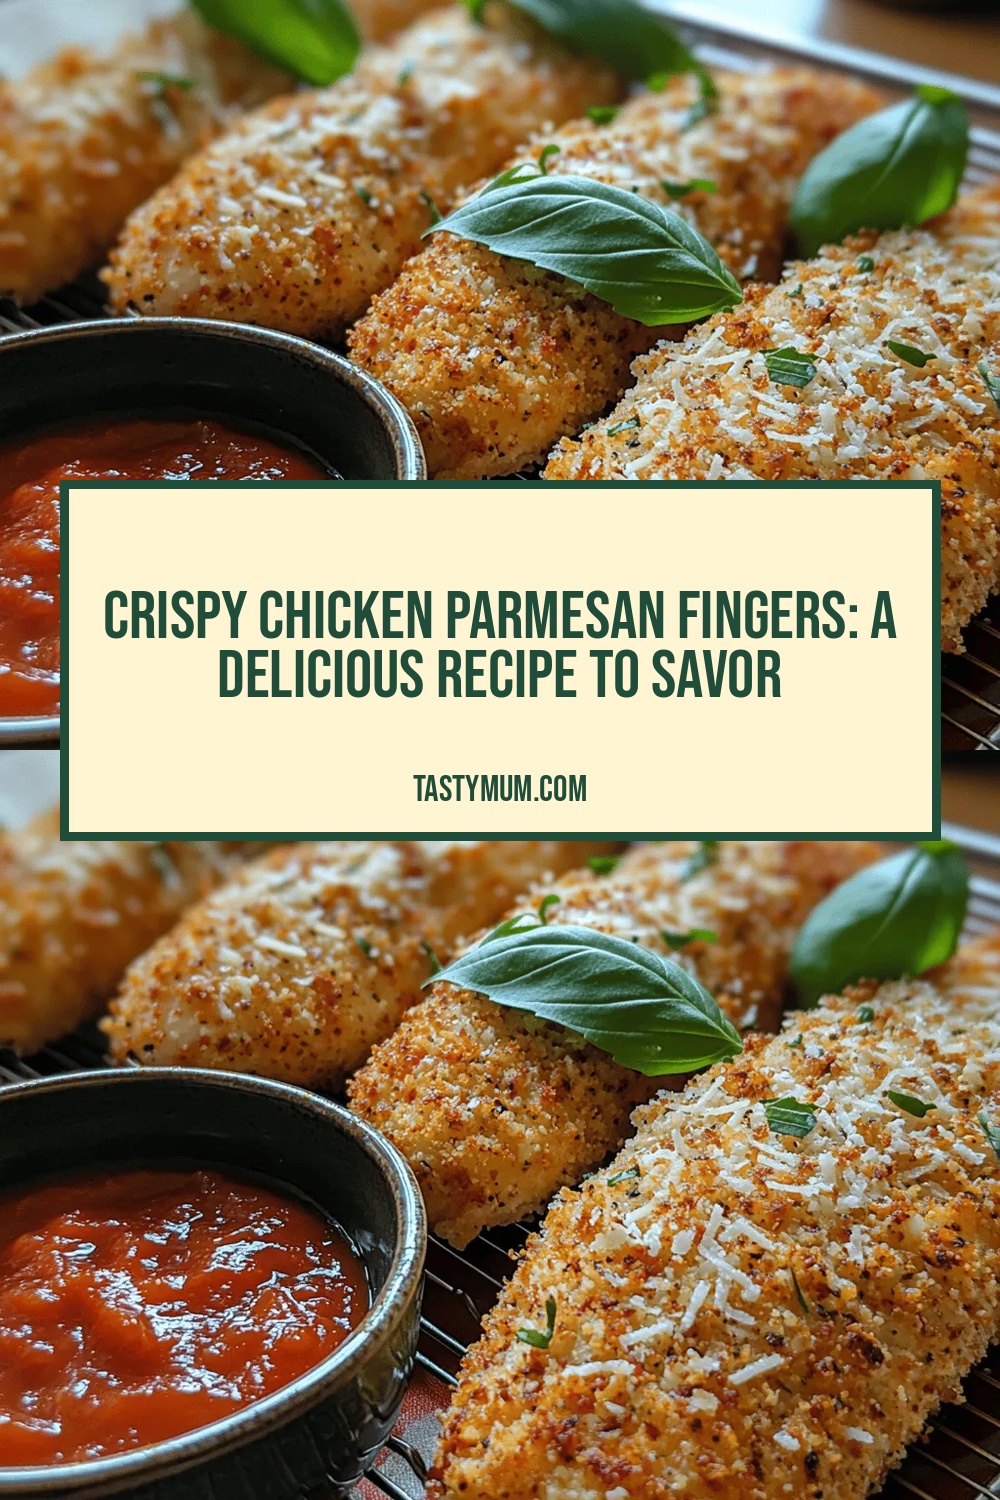
Craving a crowd‑pleasing appetizer that feels indulgent yet stays simple enough for a weeknight? Crispy Chicken Parmesan Fingers deliver that perfect blend of crunchy coating, melty cheese, and tangy tomato sauce—all in bite‑size form.
What sets this recipe apart is the double‑layered breading: a light flour‑egg dip followed by a Parmesan‑infused breadcrumb mix that locks in juiciness while creating a golden crust.
Kids, teens, and even picky adults will love dipping these fingers into marinara, making them ideal for game nights, family dinners, or casual gatherings.
The process starts with cutting chicken into strips, coating, frying, then finishing under the broiler with sauce and mozzarella, ensuring every bite is crispy on the outside and tender inside.
Why You'll Love This Recipe
Crunchy Meets Creamy: A crisp breadcrumb‑Parmesan crust gives way to a molten mozzarella center, creating a satisfying textural contrast in every bite.
Easy Finger Food: Shaped like strips, these fingers are perfect for dipping, making them a mess‑free option for kids and parties alike.
Fast Weeknight Solution: From prep to plate in under an hour, the recipe fits busy schedules without sacrificing flavor.
Customizable Flavors: Swap herbs, add a pinch of red pepper, or experiment with different cheeses to tailor the taste to your palate.
Tips & Tricks
Perfecting the Recipe
Room‑temperature strips. Let the chicken pieces sit for 10‑15 minutes before coating; this promotes even cooking and prevents a cold center.
Dry the coating. After each dredging step, give the strips a quick shake to remove excess flour or egg; too much moisture will sog the breadcrumbs.
Use panko, not regular breadcrumbs. Panko’s larger flakes create a lighter, crunchier crust that stays crisp even after baking.
Don’t skip the brief rest after frying. Letting the strips rest on paper towels for a couple of minutes lets excess oil drain, preserving crispness.
Flavor Enhancements
Stir a teaspoon of fresh basil into the marinara just before baking for a fragrant lift. A drizzle of high‑quality extra‑virgin olive oil over the finished dish adds richness, and a pinch of smoked paprika in the breadcrumb mix introduces a subtle, smoky depth.
Common Mistakes to Avoid
Avoid covering the chicken with sauce before the cheese; excess moisture can make the crust soggy. Also, resist the urge to over‑bake—once the cheese is bubbly and golden, the chicken is already perfectly cooked.
Pro Tips
Season the flour. Add a pinch of garlic powder and salt to the flour bowl; this infuses flavor into the inner layer of the coating.
Use a thermometer. Checking that the chicken reaches 165°F guarantees safety without overcooking.
Finish under the broiler. A 1‑minute burst of high heat creates an extra‑crisp top while keeping the interior juicy.
Serve with a dipping bowl. Present extra warm marinara in a small ramekin for guests to dip each finger repeatedly.
Variations
Ingredient Swaps
Replace chicken with pork tenderloin strips for a richer flavor, or use firm tofu cubes for a vegetarian spin. Swap panko for crushed cornflakes for an ultra‑crunchy texture, and experiment with smoked mozzarella or provolone for a different melt profile.
Dietary Adjustments
For gluten‑free diners, use gluten‑free flour and certified gluten‑free breadcrumbs. To make the dish dairy‑free, substitute Parmesan with nutritional yeast and mozzarella with a plant‑based melt cheese. Keto lovers can replace the flour with almond flour and use a sugar‑free marinara.
Serving Suggestions
Pair the fingers with garlic‑buttered spaghetti for a classic Italian meal, or serve alongside a crisp Caesar salad for balance. For a casual spread, arrange the fingers on a platter with assorted dipping sauces—ranch, garlic aioli, or spicy sriracha mayo.
Storage Info
Leftover Storage
Allow the chicken fingers to cool to room temperature, then transfer them to an airtight container. Refrigerate for up to 3 days. For longer keeping, place the cooled fingers in a freezer‑safe bag, squeeze out excess air, and freeze for up to 2 months. Separate sauce from the fingers if you plan to freeze for best texture.
Reheating Instructions
Reheat in a preheated 350°F oven on a wire rack for 10‑12 minutes, or until the coating regains its crunch and the interior is hot. For a quicker fix, microwave individual pieces on medium power for 1‑2 minutes, then finish under the broiler for 1 minute to restore crispness.
Frequently Asked Questions
Can I make this recipe ahead of time?
Can I use frozen chicken for this dish?
What side dishes pair best with Crispy Chicken Parmesan Fingers?
How can I keep the coating crispy when reheating leftovers?
This Crispy Chicken Parmesan Fingers recipe delivers restaurant‑quality flavor with straightforward, home‑kitchen techniques. From the perfectly seasoned coating to the melty mozzarella‑marinara finish, each step is designed for consistency and delicious results. Feel free to experiment with herbs, cheeses, or protein swaps—cooking is your playground. Serve hot, dip generously, and enjoy every crunchy, cheesy bite!
Crispy Chicken Parmesan Fingers: A Delicious Recipe to Savor
Delicious Crispy Chicken Parmesan Fingers: A Delicious Recipe to Savor
Ingredients
Main Ingredients
- 2 large boneless, skinless chicken breasts
- 1 cup all‑purpose flour
- 2 large eggs, lightly beaten
Breading & Cheese
- 1 ½ cups panko breadcrumbs
- ½ cup grated Parmesan cheese
- 1 ½ cups shredded mozzarella cheese
Sauce & Seasonings
- 2 cups marinara sauce (store‑bought or homemade)
- 2 cloves garlic, minced
- 1 tsp Italian seasoning
- ½ tsp red pepper flakes (optional)
- Salt and freshly ground black pepper, to taste
- 2 Tbsp olive oil (for pan‑frying)
Instructions
Breading & Frying
- Set up a breading station. Place the flour in a shallow bowl, beaten eggs in a second bowl, and a mixture of panko breadcrumbs, grated Parmesan, garlic powder, and red pepper flakes in a third. This three‑step coating ensures each strip gets an even, crunchy layer.
- Dredge the strips. Lightly coat each chicken strip in flour, shaking off excess, then dip into the egg, and finally press into the breadcrumb‑Parmesan blend. The coating should cling firmly; a gentle press helps the crumbs adhere.
- Pan‑fry to golden brown. Heat 2 Tbsp olive oil in a large skillet over medium‑high heat until shimmering. Working in batches, add the breaded strips, being careful not to crowd the pan. Fry for 2‑3 minutes per side, or until each side turns a deep golden‑brown. Transfer to a paper‑towel‑lined plate to drain excess oil.
Sauce & Baking
- Warm the marinara. In a saucepan, combine the marinara sauce, minced garlic, and Italian seasoning. Simmer over low heat for 5 minutes, allowing the garlic to infuse the sauce without burning.
- Assemble in a baking dish. Spread a thin layer of sauce on the bottom of a 9‑x 13‑inch baking dish. Arrange the fried chicken strips in a single layer, then spoon the remaining sauce over each piece, ensuring full coverage.
- Add mozzarella. Sprinkle the shredded mozzarella evenly over the sauced chicken. The cheese will melt and form a bubbly, golden topping during baking.
- Bake to finish. Preheat the oven to 375°F (190°C). Place the dish on the middle rack and bake for 12‑15 minutes, or until the cheese is melted, lightly browned, and the internal temperature of the chicken reaches 165°F (74°C). A quick broil (1‑2 minutes) at the end adds extra crispness if desired.
Similar Recipes
 Appetizers
Creamy Tomato Basil Bliss with Grilled Cheese Delight
Delicious Creamy Tomato Basil Bliss with Grilled Cheese Delight
 Appetizers
Refreshing Mediterranean Breeze Pasta Salad
Delicious Refreshing Mediterranean Breeze Pasta Salad
 Appetizers
Colorful Mini Sandwich Skewers
Delicious Colorful Mini Sandwich Skewers
 Appetizers
Battered Fish Burgers: An Amazing Ultimate Recipe Idea
Learn how to make delicious Battered Fish Burgers: An Amazing Ultimate Recipe Idea. Easy recipe with…
 Appetizers
Sugar Cookie Protein Baked Oats
Learn how to make delicious Sugar Cookie Protein Baked Oats. Easy recipe with step-by-step instructions.
 Appetizers
Irresistibly Crispy Roasted Baked Cauliflower You’ll Love
Learn how to make delicious Irresistibly Crispy Roasted Baked Cauliflower You'll Love. Easy recipe with step-by-step…
 Appetizers
Pizza Poppers
Learn how to make delicious Pizza Poppers. Easy recipe with step-by-step instructions.
 Appetizers
Ube Coconut Waffles: A Tasty Tropical Delight!
Learn how to make delicious Ube Coconut Waffles: A Tasty Tropical Delight!. Easy recipe with step-by-step…

Clara
I cook these recipes at home before they ever land here — simple ingredients, clear steps.