Introduction
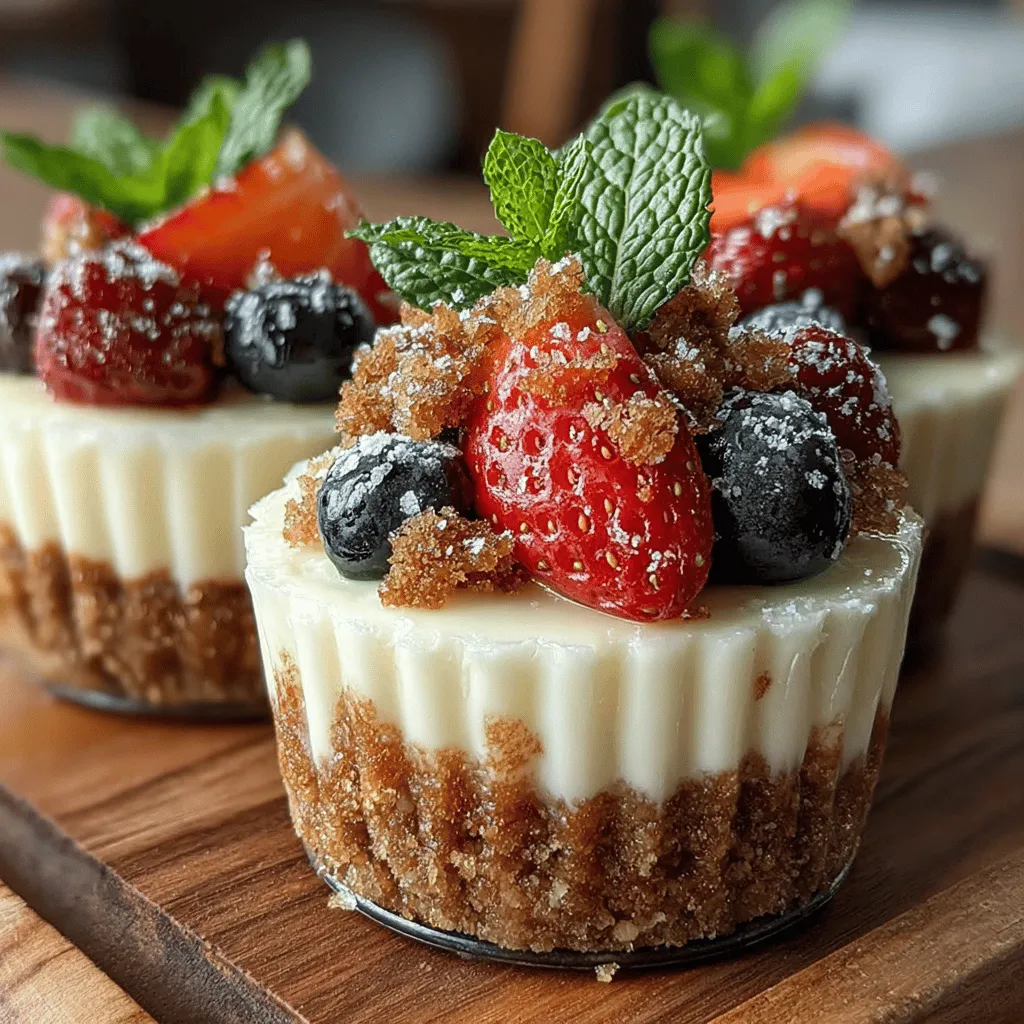
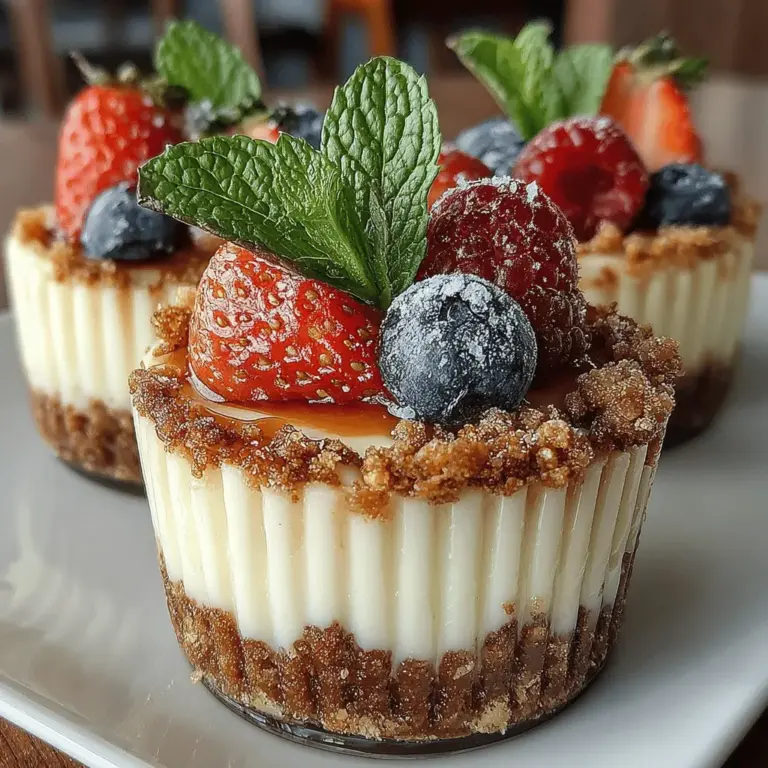
Savor the sweetness of summer with these dreamy no-bake cheesecake cups. Perfectly creamy and topped with fresh berries, this dessert is designed for any occasion, from casual family gatherings to elegant dinner parties. The best part? You don’t even need to turn on the oven! This article provides a comprehensive guide to making these delectable cheesecake cups, including step-by-step instructions and insights into the ingredients.
As the days grow warmer and the sun shines brighter, the craving for refreshing desserts rises. No-bake cheesecake cups not only satisfy that craving but also offer a convenient way to enjoy a classic dessert without the heat of baking. Their individual servings make them ideal for sharing, and their versatility allows for endless flavor variations. Whether you prefer them topped with luscious strawberries, blueberries, or a drizzle of chocolate, these cheesecake cups are sure to impress.
Understanding No-Bake Cheesecake
The Allure of No-Bake Desserts
In recent years, no-bake desserts have surged in popularity, and for good reason. They provide a quick and easy alternative to traditional baking, perfect for those who may be short on time or simply want to avoid the hassle of preheating the oven. The appeal lies not only in their simplicity but also in their ability to deliver delicious results with minimal effort.
No-bake recipes are often a hit during the warmer months when the last thing you want is to turn your kitchen into a sauna. With just a handful of ingredients and a little refrigeration time, you can whip up a dessert that tastes as indulgent as anything baked in the oven. This trend is all about making life easier while still enjoying the sweet pleasures of dessert.
The Science Behind a Perfect No-Bake Cheesecake
Crafting a flawless no-bake cheesecake is not just about tossing ingredients together; it involves understanding the science behind these delightful treats. The key to achieving a light and creamy texture lies in the quality of your ingredients. Each component plays a vital role in creating that dreamy consistency that makes no-bake cheesecakes so irresistible.
Cream cheese is the cornerstone of this dessert, providing both flavor and a rich, creamy base. When combined with other elements like whipped cream, it transforms into a fluffy filling that is both light and decadent. The whipped cream introduces air into the mixture, resulting in a texture that is smooth and airy rather than dense.
Using high-quality ingredients can significantly elevate your no-bake cheesecake cups. Opting for fresh cream cheese and real vanilla extract will make a noticeable difference in flavor, ensuring that your dessert is not only satisfying but also sophisticated.
Ingredients Breakdown
Creating the perfect no-bake cheesecake cups starts with the right ingredients. Here’s a breakdown of what you’ll need:
Essential Ingredients for Dreamy Cheesecake Cups
– Graham Cracker Crumbs: The foundation of the crust. Graham crackers provide a sweet and slightly nutty flavor, making them an ideal choice for a cheesecake base. They add that crunchy texture that contrasts beautifully with the creamy filling.
– Unsalted Butter: This ingredient binds the crust together. Melting unsalted butter and mixing it with the graham cracker crumbs creates a cohesive mixture that holds its shape when chilled. Using unsalted butter allows better control over the overall sweetness of the dessert.
– Granulated Sugar: Balancing sweetness in the crust. A small amount of granulated sugar is added to the crust mixture to enhance its flavor, making it a perfect complement to the rich filling.
– Cream Cheese: The key ingredient for creaminess and flavor. Full-fat cream cheese is recommended for the best results, as it adds richness and depth to the cheesecake filling.
– Powdered Sugar: For smooth texture and sweetness. Powdered sugar dissolves easily into the mixture, preventing any graininess and ensuring a silky finish.
– Vanilla Extract: Enhancing flavor depth. Pure vanilla extract adds a warm, aromatic quality to the cheesecake, elevating the overall taste and making each bite more enjoyable.
– Heavy Whipping Cream: Creating a light and airy texture. Whipping cream is whipped to soft peaks before being folded into the cream cheese mixture, imparting a luxurious lightness that is essential for no-bake cheesecakes.
– Fresh Berries: The vibrant topping option. Fresh berries not only add a burst of color but also provide a refreshing contrast to the sweet cheesecake. Strawberries, blueberries, or raspberries are all excellent choices.
– Mint Leaves: Optional garnish for added freshness. A sprig of mint can elevate your dessert’s presentation and add a hint of freshness that pairs beautifully with the sweetness of the cheesecake.
Step-by-Step Guide to Making No-Bake Cheesecake Cups
Preparing the Graham Cracker Crust
The first step in creating your dreamy no-bake cheesecake cups is to prepare the graham cracker crust. This step is essential, as it forms the base of your dessert and sets the stage for the creamy filling.
1. Gather Your Ingredients: Start by collecting graham cracker crumbs, unsalted butter, and granulated sugar. If you don’t have pre-made graham cracker crumbs, you can easily crush whole graham crackers in a food processor or by placing them in a zip-top bag and using a rolling pin.
2. Melt the Butter: In a microwave-safe bowl, melt the unsalted butter until it is completely liquefied, taking care not to overheat it. Allow the melted butter to cool slightly before mixing it with the dry ingredients.
3. Combine Dry Ingredients: In a large mixing bowl, combine the graham cracker crumbs and granulated sugar. Mix well to ensure the sugar is evenly distributed throughout the crumbs.
4. Mix Butter with Dry Ingredients: Pour the melted butter into the bowl with the graham cracker mixture. Use a fork or spatula to gently combine the ingredients until the crumbs are fully coated in butter. The mixture should resemble wet sand and hold together when squeezed in your hand.
5. Press the Crust into Cups: Divide the crust mixture evenly among your serving cups or glasses. Using the back of a spoon or your fingers, firmly press the crust into the bottom of each cup to create an even layer. This will provide a solid base for your cheesecake filling.
6. Chill the Crust: Place the cups in the refrigerator for about 10-15 minutes to allow the crust to set. Chilling the crust helps it firm up, making it easier to layer the cheesecake filling on top.
Once the crust has chilled, you can move on to preparing the creamy filling that will elevate these cheesecake cups to a whole new level of indulgence. Stay tuned for the next section, where we will dive into whipping up the luscious filling that makes these cups truly dreamy.

Detailed Instructions for Mixing and Pressing the Crust
Creating the perfect crust is key to a successful no-bake cheesecake cup. Start by combining your graham cracker crumbs with melted butter in a medium mixing bowl. The mixture should resemble wet sand and hold together when squeezed. Use a fork to thoroughly mix until all crumbs are evenly coated in butter.
Once the crust mixture is ready, it’s time to form the base of your cheesecake cups. Take a tablespoon-sized amount of the mixture and press it firmly into the bottom of your serving cups or jars. Use the back of a spoon or your fingers to ensure it’s packed tightly and evenly. This helps create a stable foundation that won’t crumble when you add the cheesecake filling.
Tips for Achieving the Perfect Crust Consistency
1. Use Fresh Ingredients: Ensure that your graham crackers are fresh for the best flavor. Stale crackers can lead to a soggy crust.
2. Correct Butter Ratio: The standard ratio is about 1/2 cup of melted butter for every 2 cups of crumbs. Adjust slightly if needed, but avoid making the mixture too wet.
3. Press Firmly: Don’t rush this step. A well-pressed crust will hold its shape better and provide a satisfying crunch when you take a bite.
Creating the Cheesecake Filling
Techniques for Beating Cream Cheese to a Smooth Consistency
To achieve a silky-smooth cheesecake filling, start with softened cream cheese. Remove it from the refrigerator about 30 minutes before you begin. This will make it easier to beat. In a large mixing bowl, use an electric mixer on medium speed to beat the cream cheese until it’s creamy and free of lumps. This should take about 2-3 minutes.
Gradual Incorporation of Powdered Sugar for Optimal Texture
Once your cream cheese is smooth, gradually add in the powdered sugar. Adding it slowly helps to prevent clumping and ensures that the sugar is fully incorporated. Continue to beat the mixture until it reaches a velvety consistency, which should take an additional 2 minutes. The filling should be sweet but balanced, enhancing the overall flavor of your cheesecake cups.
Whipping the Cream
Importance of Achieving Stiff Peaks
Whipping the cream is a critical step in creating a light and airy cheesecake filling. In a separate bowl, pour in the heavy whipping cream and start mixing on medium speed. As it begins to thicken, increase the speed to high. Whip the cream until stiff peaks form, meaning the cream holds its shape when the beaters are lifted.
Gentle Folding Techniques to Maintain Airiness
Once your cream is whipped, it’s time to combine it with the cream cheese mixture. Use a spatula to scoop a third of the whipped cream into the cream cheese mixture. Gently fold it in using a figure-eight motion. This technique helps maintain the airiness of the whipped cream, ensuring your cheesecake filling remains light and fluffy. Repeat with the remaining whipped cream until fully combined, being careful not to deflate the mixture.
Layering the Cheesecake Cups
Best Practices for Spooning or Piping the Filling
For the best presentation and even distribution of the cheesecake filling, you can either spoon or pipe the mixture into your crusted cups. If you opt to pipe, use a piping bag fitted with a large round tip for a clean application. This method allows for more control and can create beautiful swirls in your cups.
Tips for Distributing the Filling Evenly
To ensure that each cup has an equal amount of filling, consider using a measuring cup or a small ice cream scoop. This way, you can portion out the filling accurately, allowing for consistent servings. After filling, tap the cups gently on the counter to settle the mixture and eliminate any air bubbles.
Adding Fresh Berry Toppings
Suggestions for Combinations of Berries
Fresh berries add a burst of flavor and color to your cheesecake cups. Classic choices include strawberries, blueberries, raspberries, and blackberries. For a more exotic twist, you might consider adding pomegranate seeds or sliced kiwi. Mixing different types of berries not only enhances the visual appeal but also provides a delightful contrast in flavors.
Presentation Ideas for an Appealing Dessert
Presentation is key when serving desserts. You can layer the berries on top of the cheesecake filling or arrange them in a decorative pattern. Consider adding a sprig of mint for a pop of green, or drizzle a little honey or berry sauce over the top for added sweetness and visual interest. Individual cups make for an elegant dessert display at gatherings.
Chilling the Cheesecake Cups
Explanation of Why Chilling is Crucial for Texture
Chilling your cheesecake cups is essential for achieving the right texture. The cooling process allows the filling to set and the flavors to meld, resulting in a firmer and creamier dessert. If you skip this step, your cheesecake may be too soft and won’t hold its shape when served.
Recommended Chilling Time and Conditions
For optimal results, chill your cheesecake cups in the refrigerator for at least 4 hours, or overnight if you have the time. Cover them loosely with plastic wrap to prevent them from absorbing any odors from the fridge. The longer they chill, the better the flavors will develop, so don’t rush this important step!
Serving Suggestions
Perfect Pairings for Your Cheesecake Cups
When it comes to serving your dreamy no-bake cheesecake cups, consider complementing them with beverages and creative serving ideas.
Beverage Pairings: What to Serve Alongside
These cheesecake cups pair beautifully with a variety of beverages. A glass of chilled Prosecco or a fruity rosé can enhance the dessert experience, making it feel more celebratory. If you prefer non-alcoholic options, consider serving them with iced tea, lemonade, or sparkling water infused with fresh fruit for a refreshing contrast.
Creative Serving Ideas: Individual Jars vs. Large Bowls
While individual jars or cups are perfect for portion control and presentation, you can also create a large bowl for a family-style dessert. Layer the crust, cheesecake filling, and berries in a trifle dish for a stunning centerpiece. This option is great for potlucks or gatherings where guests can help themselves.
Concluding Thoughts
Reflecting on the Joy of No-Bake Desserts
No-bake cheesecake cups are a delightful treat that encapsulates the essence of indulgence without the hassle of baking. Their creamy texture combined with the freshness of berries provides a perfect balance, making them a hit with everyone. With this detailed guide, you can confidently create these luscious desserts that are sure to impress at any gathering.
Enjoy the easy preparation and the delicious outcome of these dreamy no-bake cheesecake cups, and let the flavors transport you to a place of dessert bliss. Whether it’s a summer barbecue, a holiday celebration, or simply a treat for yourself, these cheesecake cups can be adapted to any occasion, ensuring that they remain a beloved staple in your dessert repertoire.

