Introduction
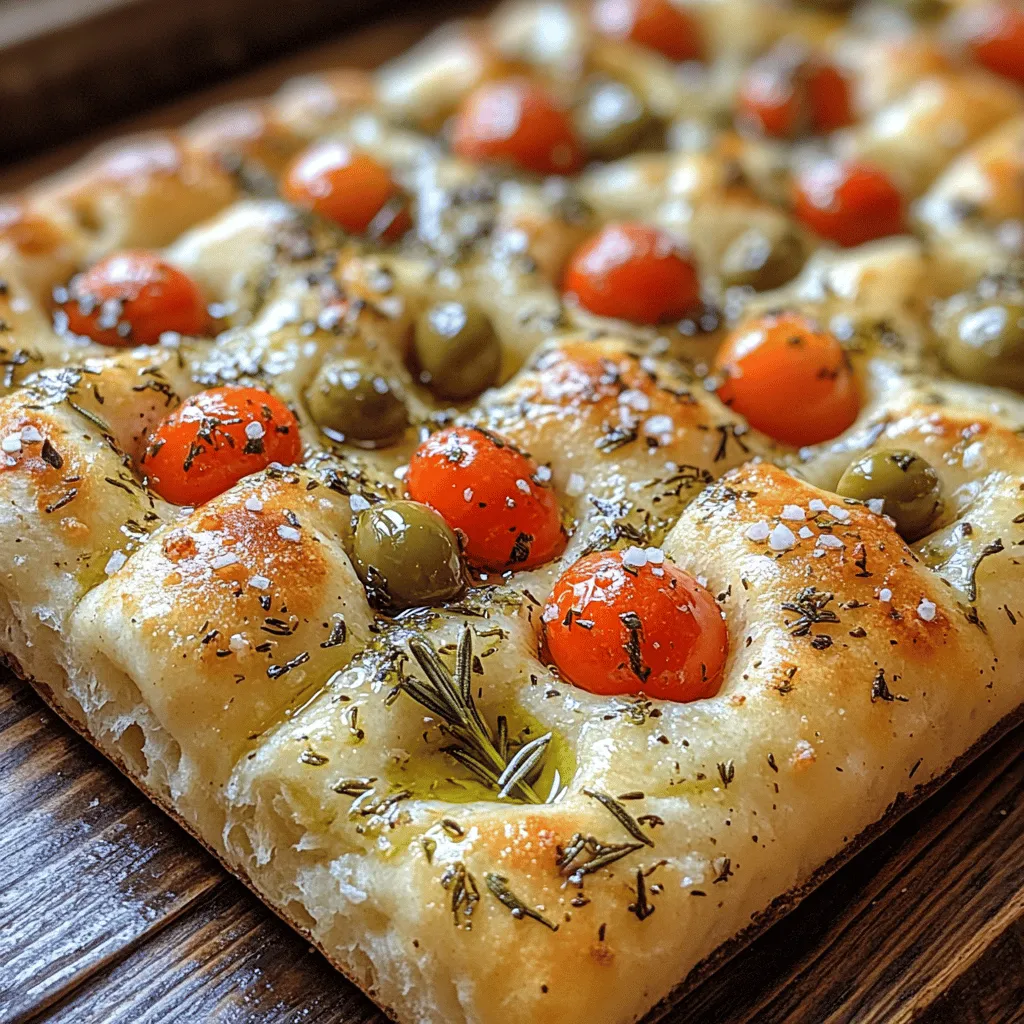
Focaccia, a beloved staple of Italian cuisine, is more than just a type of bread; it’s a canvas for creativity and flavor that has won the hearts of many around the world. Known for its soft, airy texture and golden, crispy crust, focaccia is often adorned with a variety of toppings, making it a versatile accompaniment to meals or a delightful snack on its own. What elevates focaccia to new heights is the infusion of fresh herbs, which not only enhances its flavor profile but also fills the kitchen with a tantalizing aroma that beckons everyone to the table.
In this article, we will guide you through a simple yet delicious recipe for Heavenly Herb-Infused Focaccia. Whether you’re a seasoned baker or a beginner, you’ll find that this focaccia recipe is approachable and rewarding. By the end, you’ll have a beautifully crafted loaf of focaccia that’s perfect for sharing or savoring all on your own.
Understanding Focaccia
History and Origins of Focaccia in Italian Cuisine
The origins of focaccia can be traced back to ancient Roman times, where it was known as “panis focacius,” a flat bread baked on the hearth. The term “focaccia” itself is derived from the Latin word “focus,” meaning “hearth.” Over the centuries, different regions of Italy have put their own spin on this classic bread, resulting in a variety of regional styles and flavors.
In Liguria, for instance, focaccia is known for its rich olive oil and is often topped with coarse salt and sometimes herbs. Meanwhile, in Puglia, you might find a thicker, more rustic version topped with tomatoes and olives. Each variation tells a story of local ingredients, traditions, and culinary creativity, making focaccia a true representation of Italy’s diverse gastronomic heritage.
Different Regional Variations of Focaccia Across Italy
As you explore the different regional variations of focaccia, you’ll discover that the toppings and preparation methods can wildly differ. In Liguria, the focus is on simplicity, allowing the quality of the olive oil and herbs to shine through. This version is often enjoyed with a touch of sea salt and rosemary, providing a fragrant and savory experience.
In contrast, in regions like Tuscany, you might encounter focaccia with a thicker, breadier texture, sometimes filled with meats or cheeses. In Puglia, the bread is frequently topped with cherry tomatoes, olives, and sometimes even potatoes, showcasing the local agricultural bounty.
Regardless of the regional twist, the essence of focaccia remains the same: a cherished bread that brings people together, whether served as an appetizer, a side dish, or the base for delicious sandwiches.
Importance of Texture and Flavor in a Classic Focaccia
The hallmark of a classic focaccia lies in its texture and flavor. A good focaccia should have a crispy exterior that gives way to a soft, chewy interior. The dough must be carefully managed to develop the gluten structure necessary for that perfect rise and airy crumb.
Flavor plays a vital role as well; the use of high-quality olive oil, fresh herbs, and an appropriate amount of salt can transform a simple loaf into something truly heavenly. The infusion of herbs not only enhances the taste but also contributes to the visual appeal of the bread, creating a mosaic of colors and textures that are as delightful to the eyes as they are to the palate.
Ingredients Breakdown
To create your own Heavenly Herb-Infused Focaccia, you’ll need a few key ingredients that work together to produce a flavorful and textured loaf. Here’s a detailed breakdown of what you’ll need:
All-Purpose Flour: Role in Structure and Texture
All-purpose flour is the backbone of this focaccia recipe. It provides the necessary starches and proteins that contribute to the bread’s structure. The protein content in all-purpose flour allows for gluten development, which is crucial for achieving the desired chewy texture. For those looking for a slightly more robust flavor, you might also consider using a blend of all-purpose and whole wheat flour, which can add depth to the taste while still maintaining a light texture.
Instant Yeast: Benefits of Using Instant Over Active Dry Yeast
For this focaccia recipe, we’ll be using instant yeast, which has become a favorite among bakers for its convenience and reliability. Instant yeast can be mixed directly with the dry ingredients without the need for proofing, which saves time and streamlines the process. It also tends to work faster than active dry yeast, allowing for quicker rises and a more efficient baking experience. This means you can enjoy your homemade focaccia in less time, without sacrificing quality.
Olive Oil: Importance for Flavor and Moisture
Olive oil is not just a cooking oil in this recipe; it’s a key ingredient that enhances both flavor and texture. A generous amount of high-quality extra virgin olive oil adds richness to the dough, contributing to its moistness and tender crumb. Additionally, olive oil is essential for the characteristic crispy crust of focaccia. Drizzling some over the top before baking creates a beautiful golden finish that’s hard to resist.
Fresh Herbs: Enhancing Aroma and Taste
One of the standout features of this focaccia is the infusion of fresh herbs. Herbs like rosemary, thyme, and basil can elevate the flavor profile dramatically, providing a fragrant aroma that wafts through your home as it bakes. Fresh herbs not only enhance the taste but also add a vibrant green touch, making your focaccia visually appealing. You can mix and match herbs based on your preference or what you have on hand, allowing for a personalized touch.
Optional Toppings: Variety and Customization Options
While this recipe focuses on herb-infused focaccia, the beauty of this bread lies in its versatility. Feel free to get creative with toppings! You can add sliced olives, cherry tomatoes, or even caramelized onions to customize your focaccia to your liking. Consider adding cheese for a savory twist or sprinkling coarse sea salt on top for an extra burst of flavor. The possibilities are endless, allowing you to tailor your focaccia experience to suit your tastes and the occasion.
Preparation Steps for Heavenly Herb-Infused Focaccia
Now that we’ve covered the essential ingredients, it’s time to dive into the preparation steps that will lead you to your own Heavenly Herb-Infused Focaccia.
Mixing the Dry Ingredients
Start by gathering your all-purpose flour, instant yeast, and salt. In a large mixing bowl, combine the flour with the salt, ensuring that the salt is evenly distributed. It’s crucial to keep the salt and yeast separate at this stage, as direct contact can inhibit the yeast’s ability to rise. Once combined, create a well in the center of the flour mixture where you will later pour in the wet ingredients.
Importance of Proper Distribution of Yeast and Salt
Proper distribution of the yeast and salt is vital for achieving an even rise in the focaccia. By keeping them separate until mixed with the wet ingredients, you ensure that the yeast can activate properly without being inhibited by the salt. This attention to detail lays the groundwork for a light and airy loaf.
Incorporating Wet Ingredients
Next, it’s time to add the wet ingredients. Pour warm water into the well you created in the flour mixture, followed by a generous amount of olive oil. The warm water helps to activate the yeast, while the olive oil adds richness and moisture to the dough. Using a wooden spoon or your hands, mix the ingredients together until they form a shaggy dough.
Tips for Achieving the Perfect Shaggy Dough
A shaggy dough is a sign that you’ve mixed the ingredients just right. It should be slightly sticky and not overly smooth. If the dough feels too dry, you can add a little more water, one tablespoon at a time, until you achieve the desired consistency. Avoid adding too much flour at this stage, as it can result in a dense focaccia.
Kneading the Dough
Once your dough has come together, it’s time to knead it. Kneading is essential for developing gluten, which gives the bread its structure. Turn the dough out onto a lightly floured surface and knead it for about 8-10 minutes. You want to work the dough until it becomes smooth and elastic.
Techniques for Developing Gluten Without Over-Flouring
While kneading, it’s important to avoid the temptation of adding too much flour, as this can lead to a dry and tough focaccia. Instead, use just enough flour to keep the dough from sticking to your hands and the work surface. If the dough becomes too sticky, you can also use the “stretch and fold” method, where you stretch the dough and fold it over itself to incorporate air and develop gluten without adding extra flour.
The First Rise: Significance of Time and Warmth
After kneading, place the dough in a lightly greased bowl, covering it with a damp cloth or plastic wrap. This first rise is crucial for allowing the yeast to work its magic, resulting in a light and airy loaf. Place the bowl in a warm environment, ideally around 75-80°F (24-27°C), for about 1-2 hours, or until the dough has doubled in size.
Optimal Conditions for Yeast Activation
The yeast thrives in warm conditions, so it’s important to find a spot in your kitchen that is warm but not too hot. If your kitchen is cool, you can create a warm environment by preheating your oven to the lowest setting for a few minutes, then turning it off and placing the dough inside with the door slightly ajar. This method creates an ideal microclimate for your dough to rise.
Shaping and Second Rise
Once your dough has risen and doubled in size, it’s time to shape the focaccia and prepare it for its second rise.
Preparing the Baking Pan
Take a baking pan (a half-sheet pan or a 9×13-inch baking dish works well) and generously grease it with olive oil. This step is crucial for achieving a non-stick finish and will also contribute to the crispy crust that we all love about focaccia.
Importance of Adequate Oiling for a Non-Stick Finish
The olive oil not only prevents the dough from sticking but also adds flavor as it bakes. Make sure the entire surface of the pan is well-oiled, as this will help create a beautifully golden crust.
Now that you have a greased baking pan, gently turn the risen dough out onto the pan, being careful not to deflate it too much. Use your fingers to stretch the dough to fit the shape of the pan. Don’t worry if it doesn’t reach the edges right away; the dough will continue to rise during the second proofing.
—
This is just the beginning of your journey to creating the perfect Heavenly Herb-Infused Focaccia. The next steps will guide you through the final touches, baking, and how to enjoy this delightful bread to its fullest potential. Stay tuned for the remainder of the article, where we’ll cover the final rise, topping suggestions, baking instructions, and tips for serving!

Punching Down the Dough and Shaping It
Once your focaccia dough has risen and doubled in size, it’s time to punch it down. This step is crucial as it releases the built-up carbon dioxide from the yeast, redistributing the yeast cells and allowing the dough to develop further flavor. To punch down the dough, simply use your fist to gently press into the center, deflating it without completely flattening it.
After punching down, transfer the dough onto a lightly floured surface. Shape it into a rectangle or circle, depending on your baking pan’s shape. Gently stretch and pull the dough while ensuring you don’t deflate it too much. You want to maintain some air bubbles for that fluffy texture once baked. Handling the dough with care is essential; use your fingertips rather than your palms to avoid excessive pressure, which can lead to a denser focaccia.
The Second Rise: How It Contributes to Fluffiness
After shaping the dough, it’s time for the second rise. This step is often overlooked but is vital for achieving the desired fluffiness in your focaccia. Cover the shaped dough with a clean kitchen towel or plastic wrap and let it rest in a warm, draft-free place for about 30 to 45 minutes.
During this time, the yeast will reactivate, causing the dough to rise again. The warmth encourages fermentation, which contributes to both the flavor and the texture of the bread. Keep in mind that factors like room temperature and humidity can affect the rising time, so be flexible and attentive. The dough should look puffy and have increased in size significantly.
Creating Texture and Flavor
The Dimple Technique: Why It’s Essential for Focaccia
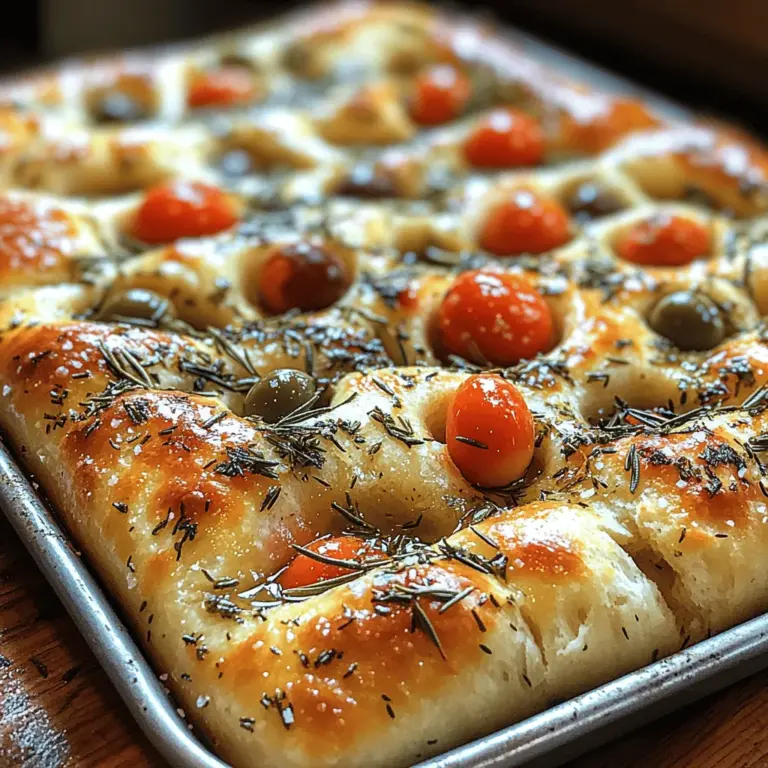
One of the signature techniques that set focaccia apart is the dimpling of the dough. Using your fingers, gently press into the surface of the dough to create dimples. This step is not just for aesthetics; it serves several purposes. The dimples help to hold onto the olive oil and toppings, ensuring they don’t slide off during baking.
Additionally, dimpling creates small pockets that allow steam to escape while baking, which contributes to a light and airy texture. The key here is to press firmly but gently, aiming for a consistent pattern across the entire surface of the dough.
Drizzling Olive Oil: Enhancing Moisture and Taste
Once you’ve dimpled the dough, it’s time to drizzle it with high-quality olive oil. This step not only enhances the flavor but also adds moisture to the bread, giving it that delightful crispy crust while keeping the inside soft. Use a generous amount of olive oil, making sure it seeps into the dimples.
When choosing olive oil, opt for an extra virgin variety, which offers robust flavor and health benefits. Brands like Lucini, California Olive Ranch, or a local favorite can elevate your focaccia experience. The richness of the oil complements the herbs and toppings, creating a harmonious flavor profile.
Topping Your Focaccia
Focaccia is incredibly versatile; you can stick to traditional toppings or get creative with your combinations. The classic combination of fresh rosemary and flaky sea salt is a timeless choice. The aromatic rosemary infuses the bread with a fragrant flavor, while the sea salt adds a subtle crunch.
However, don’t be afraid to experiment! Consider adding toppings such as sliced cherry tomatoes, Kalamata olives, or caramelized onions. These not only bring an additional layer of flavor but also visual appeal to your focaccia. Remember that balance is crucial; if you choose more intense flavors, pair them with milder toppings to ensure they don’t overwhelm the base.
Baking the Focaccia
Preheating the Oven: The Importance of Temperature
Before placing your focaccia in the oven, preheat it to 425°F (220°C). A well-preheated oven is essential for creating that perfect golden crust. This high temperature allows the exterior to cook quickly, locking in moisture for a fluffy interior.
Baking Time and Visual Cues for Doneness
Once your focaccia is in the oven, bake it for about 20-25 minutes. Keep an eye on the bread in the last few minutes of baking. You’ll know it’s done when the edges are golden brown and the top has a crispy texture. A good tip is to rotate the pan halfway through to ensure even baking, especially if your oven has hot spots.
Cooling and Serving Suggestions
Cooling Time: Why It’s Important Before Slicing
After removing the focaccia from the oven, allow it to cool in the pan for about 10 minutes. This resting period helps set the crust and makes slicing easier. If you cut into it too soon, you risk losing steam and moisture, which can result in a denser texture.
Serving Options: Pairing Focaccia with Dips, Soups, or Salads
Focaccia is a delightful addition to any meal. Serve it warm, sliced into squares or wedges, and pair it with olive oil for dipping or balsamic vinegar for a tangy contrast. It complements soups beautifully, adding a hearty touch to your bowl. Additionally, it can serve as a base for a light salad, topped with fresh greens, tomatoes, and your choice of protein for a complete meal.
Nutritional Information
A standard serving of homemade focaccia (about 1/8 of a loaf) typically contains:
– Calories: 150-200
– Total Fat: 5-8g
– Saturated Fat: 0.5-1g
– Carbohydrates: 24-30g
– Sugars: 1-2g
– Protein: 3-5g
By making focaccia at home, you control the ingredients, avoiding preservatives and additives often found in store-bought options. Moreover, the satisfaction of creating your own bread is unmatched, not to mention the aroma that fills your kitchen.
Conclusion
Making homemade focaccia is a simple yet rewarding process that brings the joy of baking right into your kitchen. From the delightful aroma of the herbs to the satisfying texture of the bread, there’s something truly special about sharing warm, freshly baked focaccia with family and friends. Don’t hesitate to experiment with flavors and toppings; each loaf can be a unique culinary adventure. The joy of sharing homemade bread is unparalleled, making every gathering a little more special. So roll up your sleeves, get your hands in the dough, and enjoy the heavenly experience of crafting your own focaccia!

