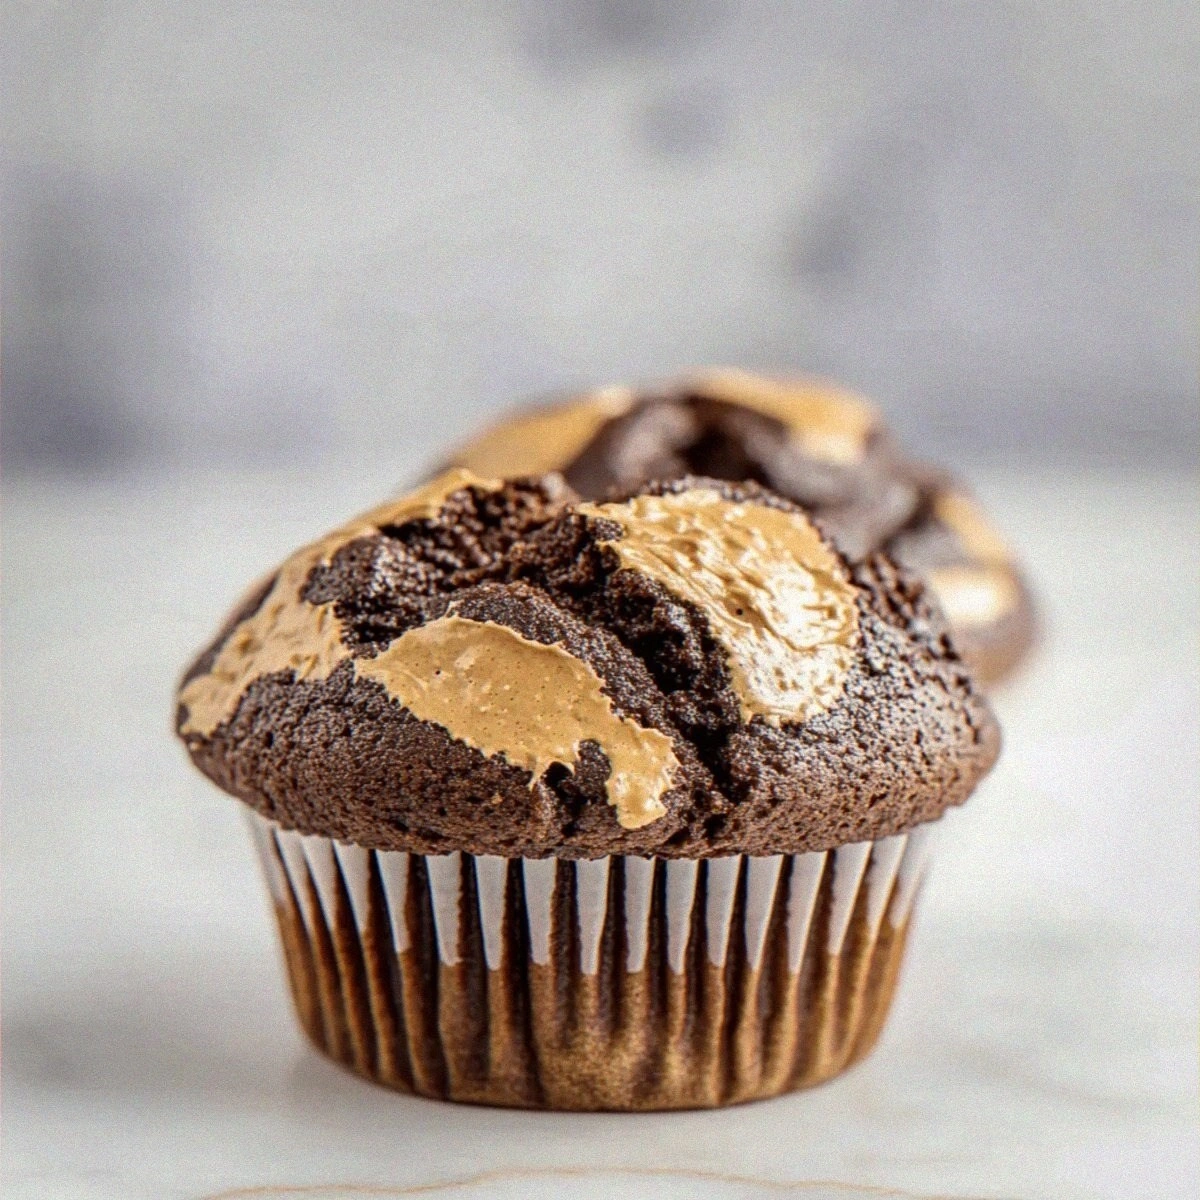
Irresistible Chocolate Peanut Butter Muffins for Anytime Treats
 Save
Save
I still remember the first time I baked these chocolate peanut butter muffins. It was a rainy Saturday afternoon, the kind where the sky looks like a soft, muted watercolor and the scent of wet earth drifts through the open window. I pulled out a battered tin of flour, a jar of creamy peanut butter that had been sitting on my pantry shelf for months, and a bar of dark chocolate that melted into a glossy river as soon as it hit the pan. The moment I lifted the lid off the oven, a cloud of fragrant steam hit me – a heady mix of cocoa, vanilla, and toasted peanuts that made my kitchen feel like a cozy café on a bustling city street. That first bite was a revelation: the muffin was moist, the chocolate rich, the peanut butter swirled through like a hidden treasure, and the crumb was just the right amount of tender yet slightly chewy.
Since that day, these muffins have become my go‑to “anytime treat.” Whether I’m packing them for a quick breakfast, serving them at a weekend brunch, or just craving a comforting snack after a long day, they never fail to deliver a smile. What makes them truly irresistible is the perfect balance between the deep, bittersweet cocoa and the salty‑sweet kiss of peanut butter, all wrapped up in a fluffy, cake‑like texture that seems to melt on the tongue. The secret? A few simple tricks that turn ordinary pantry staples into something that feels like it belongs on a gourmet menu. And the best part? You don’t need any fancy equipment – just a standard muffin tin, a whisk, and a little love.
But wait – there’s a hidden twist that most home bakers overlook, and it’s the key to achieving that ultra‑moist crumb without any extra oil or butter. I’ll reveal that in a moment, but first let’s talk about why this recipe works so well and why it should earn a permanent spot on your baking rotation. You’ll discover how each ingredient plays a starring role, how a tiny change in technique can elevate the flavor, and even a quick shortcut for a glossy finish that looks as good as it tastes. Trust me, once you try these muffins, you’ll be the hero of every coffee break and the envy of every potluck.
Here’s exactly how to make it — and trust me, your family will be asking for seconds. Grab your mixing bowls, preheat that oven, and get ready to dive into a world of chocolatey, peanut‑buttery bliss. The journey from raw batter to golden‑brown perfection is packed with sensory delights, handy hacks, and a few stories from my own kitchen mishaps that will keep you smiling even if you make a mistake. Ready? Let’s get started.
🌟 Why This Recipe Works
- Flavor Depth: The combination of natural unsweetened cocoa powder and creamy peanut butter creates a layered taste experience. The cocoa provides a deep, slightly bitter backbone that balances the sweet sugar, while the peanut butter adds a nutty richness that lingers on the palate.
- Moisture Magic: Buttermilk reacts with the baking soda to produce tiny bubbles that lift the batter, resulting in a tender crumb that stays moist for days. This reaction also gives the muffins a subtle tang that cuts through the sweetness, making each bite feel balanced.
- Texture Contrast: The oil adds richness without weighing the muffins down, while the eggs provide structure. Together they create a soft interior with a slightly crisp top that you hear when you tap the muffin with a spoon.
- Ease of Preparation: All the ingredients are pantry staples, and the steps are straightforward – no need for a stand mixer or special tools. Even a beginner can follow the method and end up with bakery‑level results.
- Time Efficiency: From start to finish, you’re looking at about 45 minutes, including a short cooling period. This makes the muffins perfect for busy mornings or last‑minute dessert cravings.
- Versatility: The base recipe is a blank canvas that welcomes add‑ins like chocolate chips, chopped nuts, or a swirl of caramel. You can also adjust the sweetness or swap the peanut butter for almond or cashew for a different flavor profile.
- Nutrition Boost: While still indulgent, the use of buttermilk and peanut butter adds protein and calcium, giving the muffins a modest nutritional edge over pure cake recipes.
- Crowd‑Pleasing Factor: Chocolate and peanut butter are a classic duo that appeals to both kids and adults. Serve them warm with a glass of milk, and you’ve got an instant hit.
🥗 Ingredients Breakdown
The Foundation
The first group of ingredients – all‑purpose flour, cocoa powder, sugar, baking powder, baking soda, and salt – form the structural backbone of the muffins. All‑purpose flour provides the gluten network that gives the muffins their shape, while cocoa powder infuses a rich, chocolatey hue and a subtle bitterness that prevents the muffins from becoming cloyingly sweet. Granulated sugar not only sweetens but also contributes to the tender crumb by breaking down gluten strands during mixing. Baking powder and baking soda work together as leavening agents; the soda needs an acid (the buttermilk) to activate, creating a light, airy texture. Finally, a pinch of salt enhances every other flavor, ensuring the chocolate and peanut butter shine.
Aromatics & Wet Ingredients
The wet side of the recipe brings moisture, flavor, and that signature melt‑in‑your‑mouth feel. Eggs act as binders and add richness, while the buttermilk introduces acidity that reacts with the soda, creating lift and a tender crumb. Vegetable oil contributes moisture without adding a heavy buttery flavor, keeping the muffins light and ensuring they stay soft even after a day or two. Vanilla extract adds a warm, aromatic backdrop that ties the chocolate and peanut butter together. And of course, creamy peanut butter is the star, delivering a nutty depth and a hint of salt that balances the sweet cocoa.
The Secret Weapons
While the core ingredients are essential, there are a few secret weapons that elevate these muffins from good to unforgettable. First, the natural unsweetened cocoa powder ensures that the chocolate flavor is pure and not diluted by added sugars. Second, using creamy peanut butter (as opposed to chunky) guarantees a smooth swirl throughout the batter, creating pockets of peanut buttery goodness in every bite. Lastly, a splash of buttermilk not only reacts with the soda but also adds a subtle tang that cuts through the richness, making the muffins feel lighter on the palate.
Finishing Touches
A few optional finishing touches can make these muffins feel extra special. A light dusting of powdered sugar just before serving adds a delicate sweetness and a pretty visual contrast. If you’re feeling adventurous, a drizzle of melted chocolate or a dollop of extra peanut butter on top of each warm muffin can create a decadent finish. And don’t forget the simple act of letting the muffins rest for a few minutes after they come out of the oven – this allows the steam to settle, locking in moisture and flavor.
With your ingredients prepped and ready, let's get cooking. Here's where the fun really begins…
🍳 Step-by-Step Instructions
🔐 Expert Tips for Perfect Results
The Taste Test Trick
Before you bake the full batch, scoop a tiny spoonful of the batter onto a piece of parchment and pop it in the oven for 5 minutes. This mini‑test lets you gauge the sweetness and chocolate intensity. If it’s too bitter, add a teaspoon of extra sugar; if it’s not chocolatey enough, a pinch more cocoa does the trick. I once used this trick and saved a batch from being overly sweet, and my family thanked me for the perfect balance.
Why Resting Time Matters More Than You Think
After mixing, let the batter sit for 5‑10 minutes before filling the tins. This short rest allows the flour to fully hydrate and the leavening agents to start reacting, resulting in a fluffier crumb. I used to skip this step and ended up with muffins that were dense and a bit gummy. Trust me, that extra patience pays off in texture.
The Seasoning Secret Pros Won’t Tell You
A pinch of sea salt on top of each muffin right before baking can amplify the chocolate flavor and counterbalance the sweetness of the peanut butter. It’s a subtle technique that professional bakers use to create depth. The result is a more complex taste that makes the muffins feel sophisticated, even though they’re made with pantry staples.
How to Get a Perfect Dome
For a tall, bakery‑style dome, fill the muffin cups a little higher – about 5/6 full – and use a higher oven temperature (395°F) for the first 5 minutes, then lower it to 375°F for the remainder. This initial blast of heat creates a rapid rise before the structure sets, giving you that coveted dome shape. I tried this once for a brunch crowd, and the visual impact was worth the extra attention.
Storing for Maximum Freshness
Once cooled, store the muffins in an airtight container with a paper towel at the bottom. The towel absorbs any excess moisture, keeping the tops from getting soggy while the interior stays soft. If you need them to last longer, wrap each muffin individually in plastic wrap before placing them in the container. This method keeps them fresh for up to five days.
🌈 Delicious Variations to Try
One of my favorite things about this recipe is how versatile it is. Here are some twists I've tried and loved:
Double Chocolate Delight
Add ½ cup of dark chocolate chips to the batter for an extra burst of chocolate in every bite. The melted chips create pockets of gooey goodness that complement the peanut butter swirl. This version is perfect for true chocolate addicts who want a richer experience.
Nutty Crunch
Stir in ¼ cup of chopped roasted peanuts or almonds before filling the tins. The toasted nuts add a satisfying crunch and a toasty aroma that elevates the flavor profile. I love sprinkling a few extra pieces on top before baking for an eye‑catching finish.
Banana Peanut Butter Swirl
Replace half of the buttermilk with mashed ripe banana and swirl an extra spoonful of peanut butter into the center of each muffin before baking. The banana adds natural sweetness and moisture, while the extra swirl creates a creamy core. This variation is a hit with kids because it feels like a hidden treat.
Spicy Mocha Kick
Add a pinch of cayenne pepper and ½ tsp of instant espresso powder to the dry ingredients. The subtle heat and coffee notes deepen the chocolate flavor and give the muffins a sophisticated edge. I serve these at brunch and watch guests’ eyes light up when they discover the surprise kick.
White Chocolate & Raspberry
Fold in ¼ cup of white chocolate chips and ¼ cup of fresh or frozen raspberries. The sweet white chocolate balances the dark cocoa, while the raspberries add a tart burst that cuts through the richness. This variation feels like a celebration of flavors and looks gorgeous when baked.
Vegan Friendly
Swap the eggs for ½ cup of unsweetened applesauce, replace the buttermilk with plant‑based milk mixed with 1 tbsp lemon juice, and use a vegan butter substitute for the oil. The texture remains tender, and the flavor stays true to the original. I’ve served these at a vegan potluck, and they were a unanimous favorite.
📦 Storage & Reheating Tips
Refrigerator Storage
Place the cooled muffins in an airtight container lined with a paper towel to absorb excess moisture. Store them in the fridge for up to five days. To keep the tops from drying out, cover the container loosely with a clean kitchen towel before sealing.
Freezing Instructions
Wrap each muffin individually in plastic wrap, then place them in a freezer‑safe zip‑top bag. They will stay fresh for up to three months. When you’re ready to enjoy one, let it thaw at room temperature for 30 minutes, then give it a quick 10‑second zap in the microwave to bring back that warm, melty texture.
Reheating Methods
For the best results, preheat your oven to 350°F (175°C) and warm the muffins for 8‑10 minutes, or until the tops are lightly crisp and the interior is heated through. If you’re short on time, a 10‑second burst in the microwave works, but add a splash of milk or a drizzle of melted butter to prevent dryness. The trick to reheating without drying it out? A splash of milk or a dab of butter right before heating restores moisture and adds extra richness.
❓ Frequently Asked Questions
Can I use almond butter instead of peanut butter?
Do I need to sift the cocoa powder?
Can I make these muffins gluten‑free?
How do I keep the muffins from sticking to the pan?
Can I add a glaze on top?
What if I don’t have buttermilk?
Can I use honey instead of sugar?
How long can I keep the muffins fresh at room temperature?
When the muffins are done, remove them from the oven and let them cool in the tin for 5 minutes before transferring to a wire rack. This short rest lets the steam escape, preventing the bottoms from getting soggy. As they cool, the edges will firm up while the centers stay soft and slightly molten – the perfect texture for a warm bite. Go ahead, take a taste — you’ll know exactly when it’s right. The result? A muffin that’s crisp on the outside, tender inside, and packed with chocolate‑peanut butter goodness.
Similar Recipes
 Appetizers
Sweet & Spicy Roasted Corn and Jalapeño Dip: A Flavorful Delight
Delicious Sweet & Spicy Roasted Corn and Jalapeño Dip: A Flavorful Delight
 Appetizers
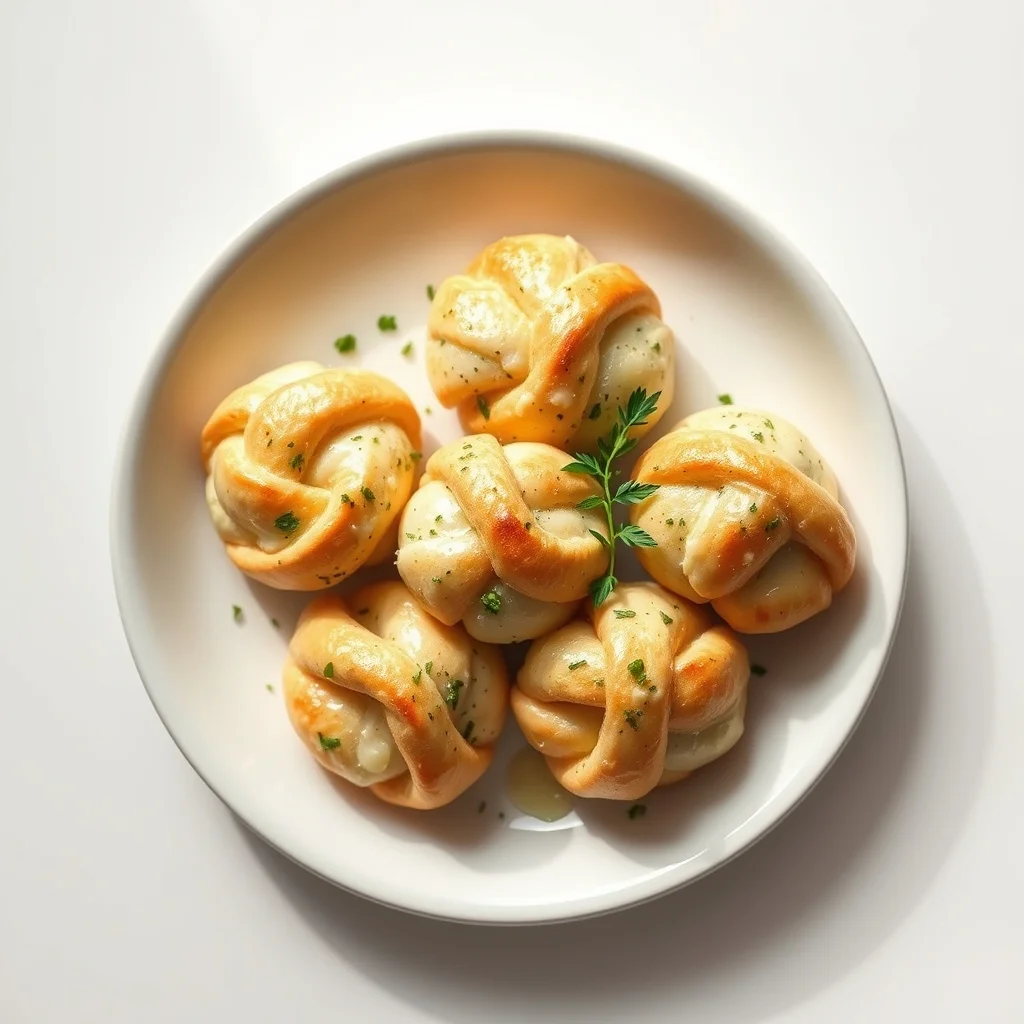
Cheesy Garlic Bread Knots
Delicious Cheesy Garlic Bread Knots
 Appetizers
Sizzling Cajun Shrimp Foil Packets
Delicious Sizzling Cajun Shrimp Foil Packets
 Appetizers
Apple and Cranberry Grilled Cheese Sandwich | Irresistibly Delicious Fall Comfort (2025)
Learn how to make delicious Apple and Cranberry Grilled Cheese Sandwich | Irresistibly Delicious Fall Comfort…
 Appetizers
Healthy Creamy Pumpkin Soup with Coconut Milk for Creaminess
Learn how to make delicious Healthy Creamy Pumpkin Soup with Coconut Milk for Creaminess. Easy recipe…
 Appetizers
Fall Harvest Cheesy Squash Gratin
Delicious Fall Harvest Cheesy Squash Gratin
 Appetizers
Spicy Roasted Chickpea Wraps: A Flavorful Plant-Based Delight
Delicious Spicy Roasted Chickpea Wraps: A Flavorful Plant-Based Delight
 Appetizers
Corundas: Traditional Mexican Corn Delights
Delicious Corundas: Traditional Mexican Corn Delights

Clara
I cook these recipes at home before they ever land here — simple ingredients, clear steps.