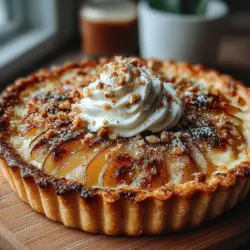
Pear Bliss Tart Recipe
As autumn casts its golden hue and the air turns crisp, there’s no better time to indulge in a dessert that encapsulates the essence of the season. The Pear Bliss Tart is a delightful combination of sweet, juicy pears blended with the rich flavors of maple syrup and creamy mascarpone cheese. This exquisite tart is not only visually stunning but also impressively simple to make, making it the perfect choice for any occasion, whether it’s a cozy family gathering or an elegant dinner party.
In this article, we’ll explore the alluring qualities of pears in desserts, delve into the essential ingredients that make up the Pear Bliss Tart, and guide you through the initial steps of creating this mouthwatering treat.
The Allure of Pears in Desserts
Pears possess a unique flavor profile that sets them apart from other fruits. Their delicate sweetness and subtle floral notes make them an ideal candidate for desserts, particularly tarts. Unlike apples, which can dominate a dish with their crispness and acidity, pears offer a gentler flavor that complements a range of ingredients, from spices to creamy elements. This versatility allows them to shine in various baked goods, bringing a refreshing and sophisticated twist to classic recipes.
The appeal of pears goes beyond their flavor; they also boast a plethora of health benefits. Rich in dietary fiber, pears are excellent for digestion and can help maintain a healthy weight. Additionally, they provide a good dose of vitamin C, which supports the immune system and promotes healthy skin. With these nutritious advantages, using pears in your desserts not only elevates the taste but also adds a touch of health-consciousness to your indulgence.
Essential Ingredients for Pear Bliss Tart
To create a Pear Bliss Tart that dazzles the taste buds, it is crucial to select high-quality ingredients that work harmoniously together. Here’s a detailed look at the main components of this delightful dessert:
– Pre-Made Pie Crust or Tart Shell: One of the simplest ways to save time in the kitchen is by using a pre-made pie crust or tart shell. This convenience not only speeds up the preparation process but also ensures a flaky and buttery base that complements the rich filling. Look for a brand that uses simple ingredients for the best flavor and texture.
– Ripe Pears: The star of the show, ripe pears are vital for achieving the perfect balance of sweetness and texture in your tart. When selecting pears, aim for those that yield slightly to gentle pressure, indicating their ripeness. Varieties like Bosc or Anjou work exceptionally well in tarts due to their firm flesh and ability to hold their shape while baking.
– Unsalted Butter: Butter is an essential ingredient in many baked goods, and the Pear Bliss Tart is no exception. Using unsalted butter allows you to control the saltiness of the dish, ensuring the natural sweetness of the pears shines through. The butter also adds richness and helps in sautéing the pears, enhancing their flavor profile.
– Brown Sugar and Spices: To elevate the natural sweetness of the pears, brown sugar is used in the tart filling. Its molasses content not only adds sweetness but also imparts a caramel-like flavor that complements the fruit beautifully. Additionally, a sprinkle of spices such as cinnamon or nutmeg can bring warmth and depth to the tart, making it a perfect fit for fall.
– Walnuts (Optional): For those looking to add an extra layer of texture and flavor, chopped walnuts can be included in the tart. Their crunchy texture contrasts wonderfully with the tender pears, while their nutty flavor enhances the overall taste experience. If you prefer a nut-free version, feel free to omit this ingredient without compromising the tart’s integrity.
Initial Steps to Prepare Your Pear Bliss Tart
Now that we’ve covered the ingredients, let’s dive into the initial steps of preparing your Pear Bliss Tart.
1. Preheat the Oven: Start by preheating your oven to 375°F (190°C). This ensures that your tart will bake evenly and achieve the perfect golden-brown finish.
2. Prepare the Tart Shell: If using a pre-made pie crust or tart shell, follow the instructions on the package for pre-baking. This usually involves placing the crust in a tart pan, pricking the bottom with a fork to prevent bubbling, and baking it for about 10-15 minutes until lightly golden. If you’re feeling adventurous and prefer to make your own crust from scratch, now is the time to prepare it.
3. Sauté the Pears: While the crust is baking, it’s time to prepare the pears. Peel, core, and slice the pears into thin wedges. In a large skillet over medium heat, melt unsalted butter. Once melted, add the pear slices, brown sugar, and your chosen spices. Sauté the mixture for about 5-7 minutes until the pears are tender and caramelized, allowing their natural sugars to develop a rich flavor.
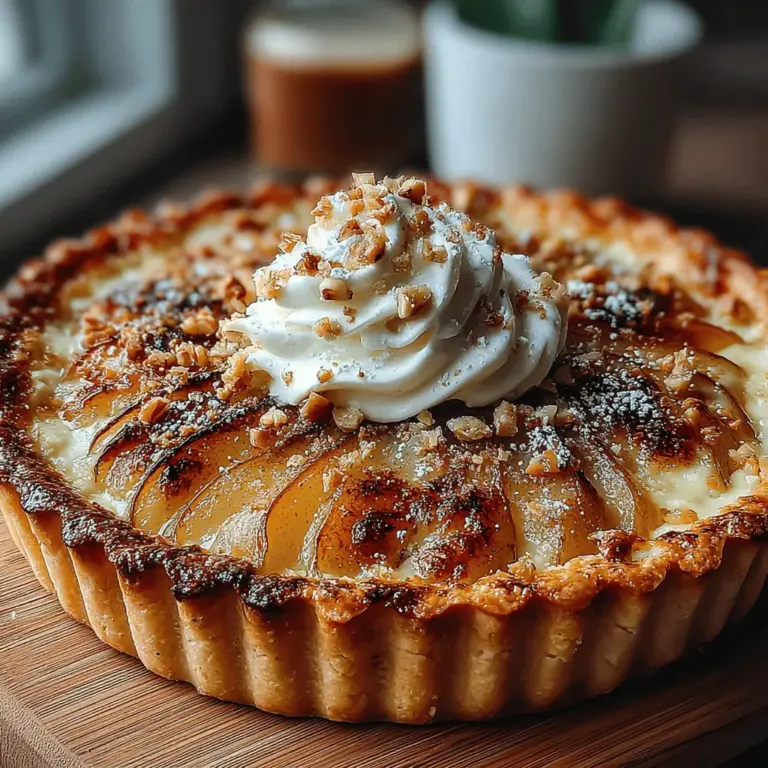
4. Assemble the Tart: Once the tart shell is ready and the pears are sautéed, it’s time to assemble the tart. Spread a layer of creamy mascarpone cheese over the bottom of the tart shell, creating a luscious base for the pears. Arrange the sautéed pear slices artfully on top, ensuring an even distribution for both aesthetics and taste.
With these initial steps, you’re well on your way to creating a Pear Bliss Tart that not only tastes divine but also captures the essence of fall in every bite. The combination of flavors and textures will leave your guests enchanted and asking for seconds, making this dessert a standout addition to your seasonal repertoire. Stay tuned as we continue with the remaining steps to complete this delightful recipe.
The Creamy Maple Mascarpone: A Perfect Complement
The Pear Bliss Tart is not just about the delicate pears and flaky crust; it is also about the luxurious maple mascarpone that brings the entire dessert together. Mascarpone cheese, with its rich and creamy texture, pairs beautifully with the sweetness of the pears and the subtle notes of maple syrup. This topping adds a hint of indulgence, making each bite of the tart even more delightful. The combination of flavors creates a balanced experience, enhancing the tart’s natural sweetness while providing a creamy contrast that elevates the dish to an irresistible level.
Step-by-Step Instructions for Baking Pear Bliss Tart
Preheating the Oven
Start by preheating your oven to 375°F (190°C). Preheating is a crucial step in baking, as it ensures that the tart shell bakes evenly and achieves the perfect texture. An adequately heated oven allows the crust to rise and crisp up, preventing a soggy bottom. Take this time to gather all your ingredients and tools, ensuring you are well-prepared for the baking process.
Preparing the Tart Shell
For the tart shell, you have the option to use store-bought or homemade crust. If you choose to go the homemade route, you’ll need flour, butter, sugar, and a pinch of salt. Mix the ingredients until you achieve a crumbly texture, then add cold water gradually until the dough comes together. Roll it out into a circle, ensuring it fits your tart pan, and gently press it into the edges. For pre-made crusts, simply follow the package instructions. Regardless of your choice, blind-bake the crust for 10-15 minutes until it is lightly golden. This step is essential to prevent the crust from becoming soggy after adding the filling.
Sautéing the Pears
Next, prepare the pears. Peel, core, and slice them into thin wedges. The technique here is to sauté the pears carefully to achieve the perfect tenderness without losing their shape. In a skillet, melt a tablespoon of butter over medium heat and add the sliced pears, a sprinkle of cinnamon, and a tablespoon of maple syrup. Cook for about 5-7 minutes, stirring gently until the pears are just tender but still firm enough to hold their shape. Remove them from the heat and let them cool slightly before assembling the tart.
Assembling the Tart
Now it’s time to assemble your Pear Bliss Tart. Begin by placing the sautéed pears in a circular pattern over the pre-baked tart shell, starting from the outer edge and working your way inward. This arrangement not only looks visually appealing but also ensures that each slice has a balanced distribution of pears. Drizzle any remaining maple syrup from the sautéing process over the pears for added flavor before moving on to the baking stage.
Baking the Tart
Bake the assembled tart in the preheated oven for an additional 25-30 minutes. Keep an eye on it, as the tart is done when the pears are beautifully caramelized and the crust is golden brown. You can perform a simple doneness test by gently pressing on the pears; they should be tender yet not mushy. Once done, remove the tart from the oven and allow it to cool for at least 15 minutes before adding the mascarpone topping.
Making the Maple Mascarpone
While the tart is cooling, prepare the maple mascarpone. In a mixing bowl, combine 1 cup of mascarpone cheese with 2 tablespoons of maple syrup and a dash of vanilla extract. Whisk the mixture until smooth and creamy, ensuring that the flavors are well-blended. This simple method results in a rich and velvety topping that is the perfect finishing touch for your Pear Bliss Tart.
Cooling and Serving
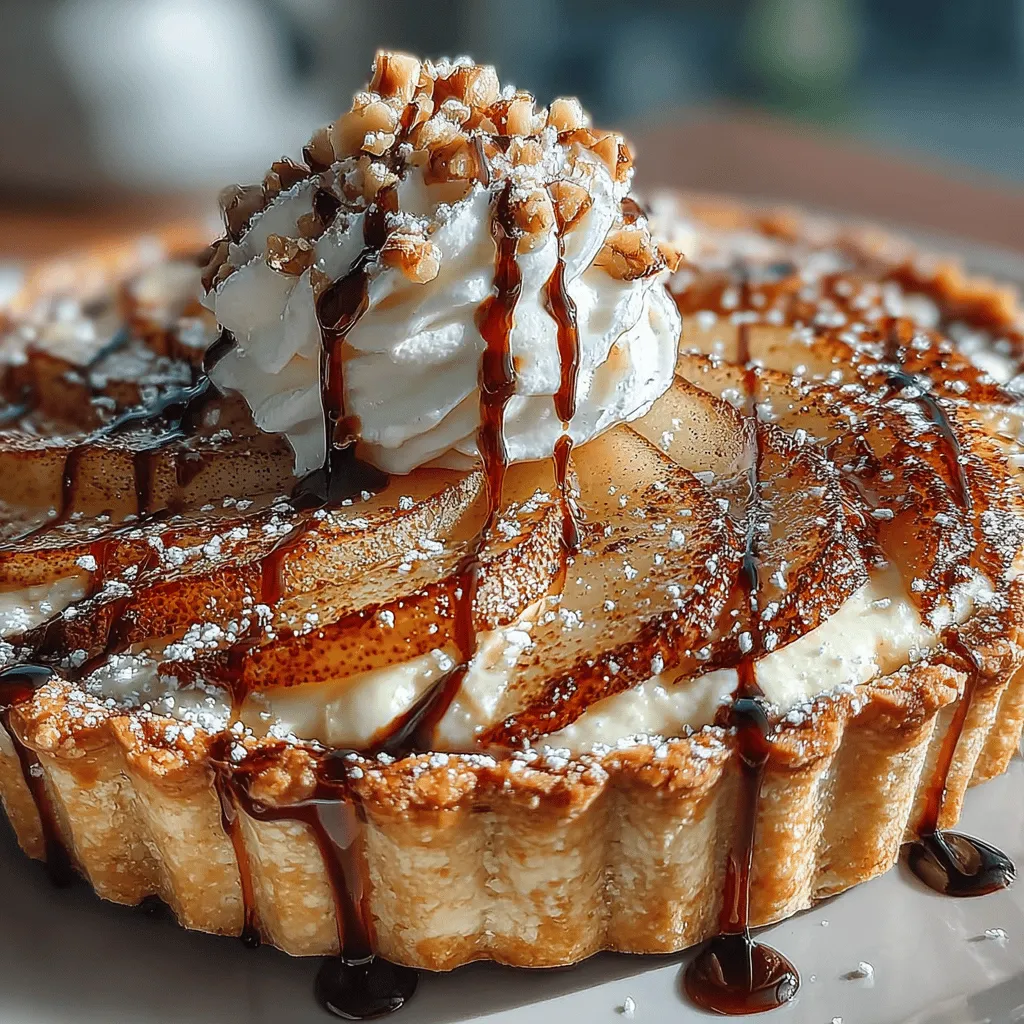
When the tart has cooled sufficiently, slice it into wedges using a sharp knife for clean cuts. To maintain the integrity of the tart and the texture of the pears, serve it at room temperature or slightly warm. This allows the flavors to meld beautifully, creating a memorable dessert experience. Pair each slice with a dollop of the maple mascarpone, and if you like, a sprinkle of toasted walnuts for added crunch.
Serving Suggestions and Pairings
The Pear Bliss Tart can be enjoyed in various ways, depending on your personal preference and the occasion. It is delightful warm or at room temperature, making it a versatile dessert for any time of year. For those looking to elevate the experience further, consider pairing the tart with a scoop of vanilla ice cream or a dollop of whipped cream. The creaminess of the ice cream contrasts nicely with the tart’s warm flavors, creating a harmonious balance.
To add a touch of elegance, sprinkle some toasted walnuts on top before serving. Their crunchy texture provides a delightful contrast to the soft pears and creamy mascarpone. Additionally, for a more sophisticated pairing, serve the tart with a glass of dessert wine or a fragrant herbal tea. These beverages enhance the flavors of the tart, making your dessert experience even more enjoyable.
Conclusion
The Pear Bliss Tart is a stunning dessert that combines the delightful flavors of pears, caramel, and a creamy maple mascarpone topping. Each bite offers a perfect blend of sweet and savory, with a texture that is sure to impress your guests. The ease of preparation makes this tart an excellent choice for gatherings, family dinners, or even a special treat for yourself.
Whether you opt for a homemade crust or a convenient store-bought option, the result is a dessert that is both delicious and visually appealing. As you savor each slice, take a moment to appreciate the joy of creating and sharing this beautiful tart. It’s more than just a dessert; it’s an experience to be cherished. So, roll up your sleeves, gather your ingredients, and enjoy the process of making the Pear Bliss Tart—your taste buds will thank you!