Introduction
As more people embrace plant-based diets, the popularity of vegan desserts has surged. Gone are the days when dessert lovers had to compromise on taste or texture to adhere to vegan principles. Today, the culinary landscape is rich with creative, indulgent options that satisfy even the most discerning sweet tooth. One standout recipe that has captured the hearts of vegans and non-vegans alike is the Decadent Vegan Chocolate Peanut Butter Fudge. This delightful treat perfectly encapsulates the essence of what a vegan dessert should be—easy to prepare, rich in flavor, and made entirely from plant-based ingredients.
Imagine sinking your teeth into a piece of fudge that is not only creamy and smooth but also packed with the wholesome goodness of natural ingredients. The combination of rich chocolate and creamy peanut butter creates a luscious treat that is hard to resist. Whether you’re looking for a quick snack, a delightful addition to a dessert table, or a sweet gift for a friend, this fudge recipe is a must-try.
What makes this recipe even more appealing is its simplicity. With just a handful of ingredients, you can whip up a batch of fudge that rivals any confectionery shop’s offerings. This recipe showcases the beauty of plant-based cooking, demonstrating that you can create decadent desserts without compromising on flavor or quality. Let’s delve into the key features of this fudge, and then we’ll explore the ingredients that contribute to its irresistible taste and texture.
Understanding the Ingredients
To create the perfect Decadent Vegan Chocolate Peanut Butter Fudge, it’s important to understand the role of each ingredient. Each component not only contributes to the flavor but also serves a purpose in achieving the desired texture and consistency.
Natural Peanut Butter: Types and Health Benefits
Peanut butter is the star of this fudge, and choosing the right type can make all the difference. Natural peanut butter is made from ground peanuts, often with little to no added ingredients. This type is less processed than conventional peanut butter, which may contain added sugars, oils, or preservatives. When selecting peanut butter for this recipe, look for options labeled as “natural” or “organic,” which usually contain only peanuts (and possibly a pinch of salt).
The health benefits of natural peanut butter are noteworthy. It is a source of healthy fats, protein, and essential vitamins and minerals, including vitamin E, magnesium, and potassium. These nutrients not only enhance the fudge’s flavor but also provide a nutritional boost, making this dessert a more guilt-free indulgence.
Dairy-Free Chocolate Chips: Options and Why They Are Vegan-Friendly
Chocolate is another crucial ingredient in the fudge, and fortunately, there are numerous dairy-free chocolate chips available on the market today. These chips are typically made from cocoa solids, cocoa butter, and sweeteners, without any milk products. Brands like Enjoy Life, Hu Chocolate, and Lily’s Sweets offer vegan-friendly chocolate chips that deliver rich chocolate flavor without compromising dietary restrictions.
When choosing chocolate chips for your fudge, look for those with a high cocoa percentage (at least 60% or higher) for a richer taste. It’s also essential to check the ingredient list to ensure there are no hidden dairy products. The right chocolate will melt beautifully and create a luscious, velvety fudge base.
Maple Syrup vs. Agave Syrup: Comparison of Sweeteners
Sweeteners play a vital role in balancing flavors in desserts, and in this fudge recipe, you have options. Maple syrup and agave syrup are both excellent choices, each bringing its unique flavor profile and benefits.
– Maple Syrup: Derived from the sap of maple trees, this syrup has a distinct caramel-like flavor that pairs wonderfully with chocolate and peanut butter. It is also a source of antioxidants and minerals, including manganese and zinc. The consistency of maple syrup adds moisture to the fudge, enhancing its creamy texture.
– Agave Syrup: Extracted from the agave plant, agave syrup is sweeter than sugar and has a mild flavor. It is often favored for its low glycemic index, making it a popular choice for those watching their blood sugar levels. However, it’s essential to use it in moderation, as it is still a form of sugar.
Both sweeteners can be used interchangeably in this recipe, but be mindful of the flavor nuances they bring. Maple syrup will impart a richer taste, while agave will provide a subtler sweetness.
Coconut Oil: Benefits for Texture and Flavor
Coconut oil is a versatile ingredient that not only contributes to the fudge’s texture but also enhances its flavor. When melted, coconut oil provides a smooth, creamy consistency that helps bind the other ingredients together. It also adds a subtle coconut flavor that complements the chocolate and peanut butter beautifully.
In addition to its culinary benefits, coconut oil is known for its health properties. It contains medium-chain triglycerides (MCTs), which are believed to support metabolism and provide quick energy. When using coconut oil in your fudge, opt for refined coconut oil if you prefer a neutral taste, or use virgin coconut oil for a more pronounced coconut flavor.
Vanilla Extract: Importance in Enhancing Flavor
Vanilla extract is a common ingredient in many dessert recipes, and for good reason. In the case of this vegan fudge, a splash of vanilla extract elevates the overall flavor profile, adding depth and warmth to the sweet and nutty notes of the chocolate and peanut butter.
When selecting vanilla extract, it’s best to choose pure vanilla extract rather than imitation vanilla, which can contain synthetic flavors. Pure vanilla extract is made from vanilla beans and has a richer, more complex flavor that enhances desserts beautifully.
The Role of Salt in Balancing Sweetness
While it may seem counterintuitive to add salt to a sweet treat, a pinch of salt is essential in this recipe. Salt enhances the sweetness of the fudge, balancing out the flavors and preventing the dessert from tasting overly sugary. It also brings out the richness of the chocolate and the depth of the peanut butter, creating a more harmonious flavor experience.
Optional Toppings: Choices and Their Contributions to Flavor and Texture
To take your Decadent Vegan Chocolate Peanut Butter Fudge to the next level, consider adding optional toppings. These can enhance both the presentation and flavor of the fudge.
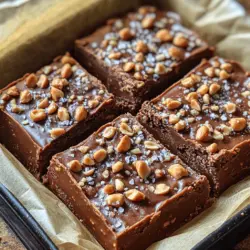
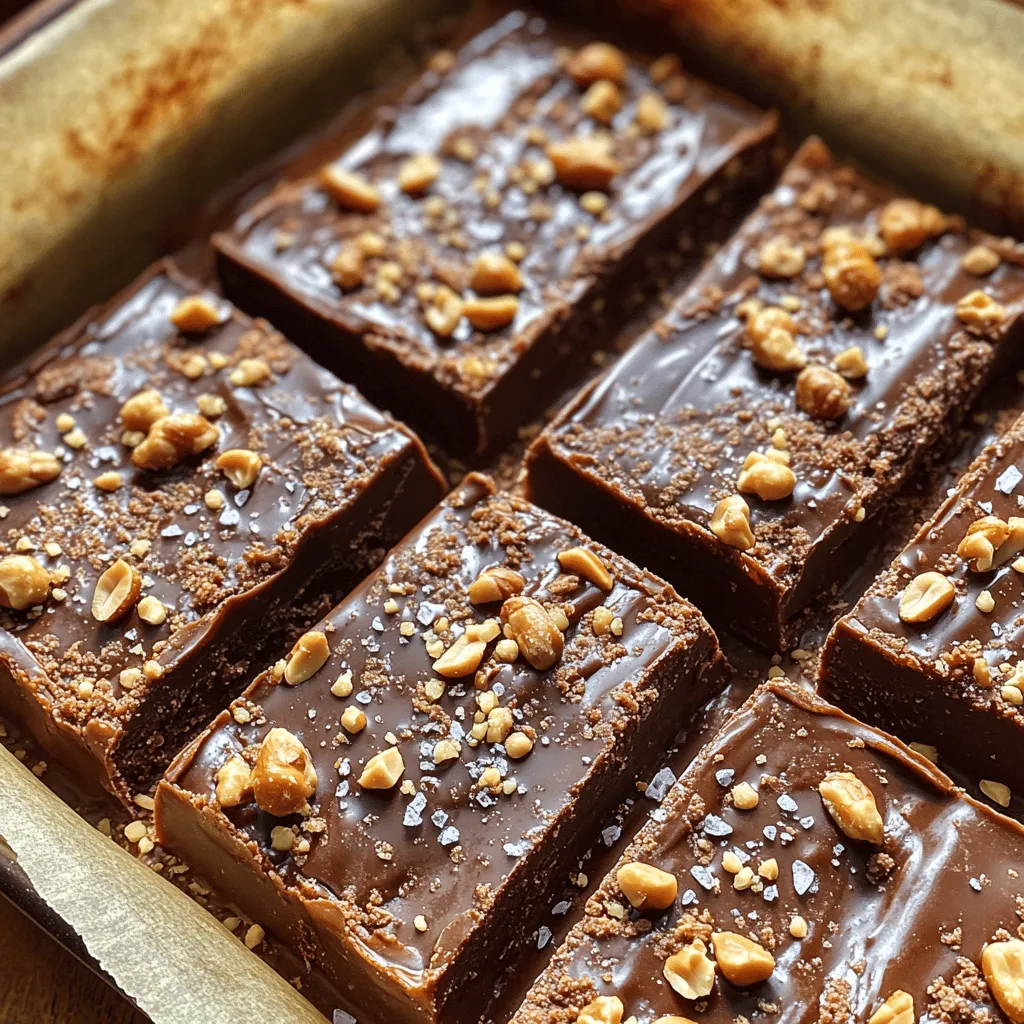
– Chopped Nuts: Adding crushed peanuts or walnuts on top provides a delightful crunch that contrasts with the smooth fudge. Nuts also contribute additional healthy fats and protein.
– Cocoa Powder: A light dusting of cocoa powder can add an extra layer of chocolate flavor and sophistication.
– Sea Salt Flakes: For those who enjoy a sweet-salty contrast, sprinkling a few sea salt flakes on top before the fudge sets can elevate the overall taste.
– Coconut Flakes: Unsweetened coconut flakes can add texture and a hint of tropical flavor that complements the fudge beautifully.
Now that we’ve explored the key ingredients that make this Decadent Vegan Chocolate Peanut Butter Fudge irresistible, let’s move on to the step-by-step instructions for preparing this delightful treat.
Step-by-Step Instructions
Preparing the Pan: Importance of Parchment Paper for Easy Removal
Before diving into the preparation of the fudge, it’s essential to prepare your pan properly. Line an 8-inch square baking dish with parchment paper, leaving some overhang on the sides. This overhang will serve as handles, making it easy to lift the fudge out of the pan once it has set. Using parchment paper not only prevents sticking but also ensures that the fudge maintains its shape when cut into squares.
Melting the Chocolate: Techniques for a Smooth Consistency
The first step in making the fudge is melting the dairy-free chocolate chips along with the coconut oil. This can be done using a double boiler method or in the microwave.
– Double Boiler Method: Fill a small saucepan with water and bring it to a simmer. Place a heatproof bowl on top of the saucepan, ensuring it doesn’t touch the water. Add the chocolate chips and coconut oil to the bowl, stirring frequently until melted and smooth.
– Microwave Method: If you prefer a quicker method, you can melt the chocolate chips and coconut oil in the microwave. Place them in a microwave-safe bowl and heat in 30-second intervals, stirring in between, until fully melted and smooth. Be careful not to overheat, as this can cause the chocolate to seize.
Once melted, remove the bowl from heat and set it aside to cool slightly while you prepare the peanut butter mixture.
Mixing in the Peanut Butter: Tips for Achieving the Perfect Blend
In a separate mixing bowl, combine the natural peanut butter with your chosen sweetener (maple syrup or agave syrup), and vanilla extract. Stir until the mixture is well combined and smooth.
If your peanut butter is quite thick, you may need to warm it slightly in the microwave for 10-15 seconds to make it easier to mix. Aim for a creamy consistency that blends seamlessly with the sweetener and vanilla.
Combining Mixtures: Ensuring a Glossy and Uniform Fudge Mixture
Once both mixtures are ready, it’s time to combine them. Pour the melted chocolate mixture into the bowl with the peanut butter blend. Using a spatula, gently fold the two mixtures together until fully combined. This should create a glossy, uniform fudge mixture that is rich in color and aroma. Be careful not to overmix, as you want to maintain the smooth texture.
Pouring into the Pan: Techniques for Even Distribution
Now that your fudge mixture is ready, pour it into the prepared baking dish. Using a spatula, spread the mixture evenly across the pan, ensuring it reaches all the corners. To create a smooth top, gently tap the pan on the counter to help the fudge settle and remove any air bubbles.
Once the fudge is evenly distributed, you can proceed to add any optional toppings if desired. Place the pan in the refrigerator for at least 2-3 hours, or until the fudge is set and firm.
With these detailed steps, you are well on your way to creating a luscious batch of Decadent Vegan Chocolate Peanut Butter Fudge that will impress friends and family. The rich flavors and smooth texture are sure to make this treat a favorite. Stay tuned for more tips and serving suggestions as we continue to explore this delightful recipe.
Adding Toppings: Creative Ideas for Personalizing Your Fudge
One of the best aspects of the Decadent Vegan Chocolate Peanut Butter Fudge is its versatility. While the base recipe is rich and satisfying on its own, you can elevate your fudge by adding customized toppings. Here are some creative ideas to make your fudge even more delightful:
1. Chopped Nuts: Sprinkle some chopped almonds, walnuts, or pecans on top for an extra crunch. Toasting the nuts beforehand can enhance their flavor.
2. Flaky Sea Salt: A pinch of flaky sea salt on top of the fudge will enhance the sweetness and create a beautiful contrast with the rich chocolate.
3. Coconut Flakes: Unsweetened shredded coconut can add a tropical twist. It pairs wonderfully with the chocolate and peanut butter flavors.
4. Vegan Chocolate Chips: For a double chocolate experience, sprinkle some vegan chocolate chips on top just before the fudge sets.
5. Dried Fruit: Add some chopped dried cherries, cranberries, or apricots for a burst of fruity flavor that complements the fudgy texture.
6. Nut Butter Swirls: Drizzle additional melted peanut butter or another nut butter over the top and swirl it in with a toothpick for a beautiful pattern.
Feel free to mix and match these toppings to create a fudge that is uniquely yours!
Chilling to Set: The Science Behind the Chilling Process for Optimal Texture
Once you have prepared your fudge mixture and poured it into your lined pan, the next crucial step is chilling it to set properly. The chilling process is not just about making the fudge firm; it is essential for achieving the perfect texture. Here’s how it works:
– Solidification of Fats: The coconut oil and peanut butter in your fudge mixture are in a liquid state when warm. Chilling allows these fats to solidify, creating a creamy, smooth texture that is easy to cut.
– Flavor Development: Chilling also allows the flavors to meld together. As the fudge cools, the chocolate and peanut butter flavors intensify, creating a more harmonious taste.
– Duration: Generally, allowing your fudge to chill for at least 2 to 3 hours in the refrigerator is ideal. For the best results, leave it overnight, if possible. This ensures that the fudge is firm and easy to slice.
Slicing and Serving: Best Practices for Cutting and Presenting Fudge
Once your fudge has chilled and set, it’s time to slice and serve. Here are some best practices to ensure you get the perfect pieces every time:
1. Use a Sharp Knife: A sharp knife will make clean cuts and prevent the fudge from crumbling. If the fudge is too firm, you can warm the knife slightly by running it under hot water and then drying it off before cutting.
2. Cut into Uniform Pieces: For a professional look, cut the fudge into uniform squares or rectangles. This not only looks appealing but also ensures even distribution of flavors when serving.
3. Presentation: Arrange the slices on a decorative platter or plate. You can garnish with a sprinkle of sea salt or some of your chosen toppings for an eye-catching display.
4. Serving Suggestions: Consider serving the fudge alongside fresh fruit, like strawberries or raspberries, to add a refreshing contrast. Alternatively, pair it with a scoop of vegan vanilla ice cream for an indulgent dessert experience.
Storage Solutions: How to Keep the Fudge Fresh and Delicious
To enjoy your Decadent Vegan Chocolate Peanut Butter Fudge at its best, proper storage is essential. Here’s how to keep it fresh:
– Refrigeration: Store the fudge in an airtight container in the refrigerator. It can last for up to two weeks, but it’s unlikely to last that long once everyone gets a taste!
– Freezing: If you want to keep the fudge for longer, you can freeze it. Cut the fudge into pieces, place parchment paper between layers, and store in an airtight container or a freezer bag. This will help prevent freezer burn. The fudge can be frozen for up to three months.
– Thawing: When you’re ready to enjoy the frozen fudge, simply remove it from the freezer and let it thaw in the refrigerator for a few hours or at room temperature for about 30 minutes.
Nutritional Benefits of the Fudge
This decadent fudge not only satisfies your sweet cravings but also offers some nutritional benefits that make it a guilt-free indulgence. Here’s a breakdown of what’s in it:
– Calories: Each piece of fudge contains approximately 100-120 calories, depending on the size and specific ingredients used.
– Fats: The fudge is rich in healthy fats from peanut butter and coconut oil, providing around 8-10 grams of fat per serving. These fats are essential for energy and overall health.
– Protein: With the inclusion of peanut butter, each piece provides about 2-3 grams of plant-based protein, which is beneficial for muscle repair and growth.
– Health Benefits: Peanut butter is a good source of protein, magnesium, and healthy monounsaturated fats. Dark chocolate, especially when using varieties with at least 70% cocoa, is rich in antioxidants and can improve heart health.
– Vegan-Friendly Aspects: This recipe contains no dairy or animal products, making it suitable for vegans, vegetarians, and those with dairy allergies. It fits perfectly into various dietary lifestyles, including gluten-free diets, as it uses no flour or gluten-containing ingredients.
Why This Fudge Recipe Stands Out
This Decadent Vegan Chocolate Peanut Butter Fudge recipe is not just another dessert; it stands out for several compelling reasons:
– Comparison with Traditional Fudge Recipes: Traditional fudge often relies on sweetened condensed milk and butter, making it high in calories and not suitable for vegans. This recipe replaces those ingredients with wholesome alternatives, ensuring that you can indulge without guilt.
– The Balance of Flavors: This fudge strikes the perfect balance between sweet, salty, and nutty. The richness of dark chocolate is beautifully complemented by the creamy peanut butter, creating a flavor profile that appeals to all taste buds.
– Versatility: The recipe can be easily customized to accommodate different dietary preferences. For instance, you can use almond butter for those with peanut allergies, or adjust the sweetness level by using less maple syrup or opting for a sugar-free substitute.
Common Questions and Answers
1. Can I use different types of nut butters?
Absolutely! You can substitute peanut butter with almond butter, cashew butter, or sunflower seed butter. Each will impart a different flavor, so choose one that suits your palate.
2. What if I don’t have coconut oil?
If you don’t have coconut oil, you can use any neutral oil, such as vegetable oil or avocado oil. However, coconut oil adds a unique texture and flavor, so keep that in mind.
3. How do I make this recipe gluten-free?
This recipe is inherently gluten-free, as it does not contain any flour or gluten-based ingredients. Just ensure that the ingredients you choose, like chocolate and nut butter, are labeled gluten-free.
4. Can I freeze the fudge, and how should I do it?
Yes, you can freeze the fudge! Cut it into pieces, layer them with parchment paper, and store in an airtight container. It will keep well in the freezer for up to three months. When ready to eat, thaw in the refrigerator or at room temperature.
Conclusion
The Decadent Vegan Chocolate Peanut Butter Fudge is a delightful treat that combines rich flavors with a plant-based twist. This recipe not only satisfies your sweet tooth but also provides nutritional benefits, making it an indulgence you can feel good about. With easy preparation and the ability to customize, it’s a dessert that anyone can enjoy, regardless of dietary restrictions.
So why not gather your ingredients, follow the simple steps, and create your own batch of this delicious fudge? You’ll find that it’s not just a dessert but a guilt-free experience that brings joy to your taste buds. Incorporating plant-based treats like this fudge into your diet is a fantastic way to enjoy a healthier lifestyle while still indulging in sweetness. Enjoy every bite!