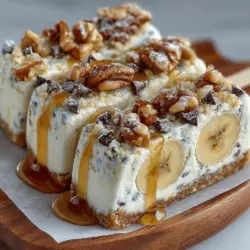
Chilly Delight: Frozen Yogurt Banana Walnut Bars
As the sun shines brightly and temperatures rise, nothing quite compares to the refreshing allure of a frozen treat. Enter the Chilly Delight: Frozen Yogurt Banana Walnut Bars—an exquisite blend of flavors and textures that promises to be your new favorite summer snack. With an emphasis on wholesome ingredients, this recipe not only satisfies your sweet cravings but also nourishes your body with each bite.
These frozen yogurt bars are a delightful way to indulge in the goodness of bananas, the creaminess of Greek yogurt, and the crunch of walnuts, all while keeping health in mind. They are simple to make and offer a guilt-free indulgence that is perfect for kids and adults alike. Whether you are looking for a quick snack to cool off on a hot day or a light dessert to end a meal, these bars will fit the bill perfectly.
The Health Benefits of Frozen Yogurt Bars
Before diving into the preparation, it’s essential to highlight the health benefits of the ingredients that make up these delicious bars. First and foremost, Greek yogurt is a nutritional powerhouse. It is packed with protein, which aids in muscle repair and growth, making it an excellent choice for anyone looking to maintain a healthy diet. Additionally, Greek yogurt is a great source of probiotics, promoting gut health and enhancing digestion.
Next, we have bananas—one of nature’s most convenient snacks. Bananas are rich in potassium, a mineral that plays a crucial role in heart health and maintaining proper muscle function. They are also an excellent source of dietary fiber, which helps keep you feeling full and supports a healthy digestive system. Their natural sweetness makes them a perfect addition to our bars, eliminating the need for excessive sugar.
Walnuts round out the mix with their healthy fat content and antioxidant properties. These nuts are high in omega-3 fatty acids, which can help reduce inflammation and support brain health. The crunchiness they provide adds a wonderful texture to the otherwise creamy bars, making each bite a delightful experience.
To sweeten this wholesome treat, you can opt for honey or maple syrup. Both are natural sweeteners that can enhance flavor without the negative effects of refined sugars. Honey offers a floral note, while maple syrup brings a warm, earthy sweetness. You can choose based on your preference or even experiment with both to find the perfect balance for your palate.
Ingredients Breakdown
To prepare your Chilly Delight: Frozen Yogurt Banana Walnut Bars, you will need the following ingredients:
1. Ripe Bananas: The key to achieving the perfect sweetness and creamy texture in your frozen bars lies in the ripeness of your bananas. Look for bananas that have a few brown spots; this indicates they are sweet and ready to mash.
2. Plain Greek Yogurt: For this recipe, plain Greek yogurt is preferred over flavored versions. Flavored yogurts often contain added sugars and artificial ingredients that can detract from the health benefits. Plain yogurt provides a neutral base that allows the natural flavors of the bananas and nuts to shine.
3. Honey or Maple Syrup: Both honey and maple syrup are excellent natural sweeteners. Honey is a bit sweeter and can add a lovely floral note, while maple syrup brings a rich, caramel-like flavor. You can choose one based on your taste preferences or dietary needs.
4. Vanilla Extract and Ground Cinnamon: These two ingredients play a crucial role in enhancing the flavor of the bars. The vanilla extract adds warmth and depth, while ground cinnamon offers a hint of spice that pairs beautifully with bananas.
5. Walnuts: Chopped walnuts not only provide a delightful crunch but also pack a nutritional punch. They are rich in healthy fats, making them an excellent addition to any snack. If you prefer a different flavor profile, you can substitute walnuts with pecans for a slightly sweeter taste.
6. Optional Mini Chocolate Chips: For those who crave a touch of indulgence, mini chocolate chips can be a fantastic addition. They allow you to enjoy the rich flavor of chocolate without overwhelming the health benefits of the bars. Just a sprinkle can elevate the taste and make these bars even more irresistible.
Step-by-Step Instructions
Now that you have your ingredients ready, it’s time to get started on making your Frozen Yogurt Banana Walnut Bars. Follow these simple steps to create a delicious treat that you can enjoy all summer long:
1. Prepare the Bananas: Begin by peeling the ripe bananas and placing them in a large mixing bowl. Use a fork or a potato masher to mash the bananas until smooth. A few small lumps are okay, as they will add a bit of texture to your bars.
2. Mix in the Yogurt: Once you have your mashed bananas, add the plain Greek yogurt to the bowl. Stir well to combine the two ingredients until you achieve a uniform mixture. The bananas should blend seamlessly with the yogurt, creating a creamy base.
3. Add Sweeteners and Flavorings: Next, drizzle in the honey or maple syrup, depending on your choice of sweetener. Add the vanilla extract and ground cinnamon as well. Stir the mixture again to ensure all ingredients are well integrated.
4. Incorporate the Walnuts: Chop the walnuts into small pieces and fold them into the banana-yogurt mixture. If you’re using mini chocolate chips, you can add them at this stage too. Ensure the walnuts are evenly distributed throughout the mixture for the best texture.
5. Prepare for Freezing: Line a baking dish or a shallow pan with parchment paper. This will make it easier to remove the bars after they have frozen. Pour the banana-yogurt mixture into the prepared dish and spread it out evenly.
6. Freeze the Mixture: Place the dish in the freezer and allow it to freeze for at least 4-6 hours, or until the mixture is completely solid. If you want to speed up the freezing process, you can use a larger dish that has a wider surface area.
These initial steps set the stage for creating a delightful frozen treat that is both nourishing and satisfying. Stay tuned for the next part of this article, where we will discuss the final steps in preparing your Chilly Delight: Frozen Yogurt Banana Walnut Bars and how to serve them for maximum enjoyment.
Detailed Instructions for Each Step
Preparing the Bananas
To start, select ripe bananas as they provide natural sweetness and the right creamy texture for your frozen yogurt bars. Overripe bananas work best; they should have a few brown spots, indicating maximum sweetness. Begin by peeling the bananas and placing them in a large mixing bowl. Using a fork or a potato masher, mash the bananas until smooth. Aim for a consistent texture without large lumps, as this will ensure that each bite is creamy. If you prefer a chunkier texture, leave a few small pieces, but be careful not to overmix, as the goal is a balanced creaminess.
Combining the Ingredients
Once the bananas are prepared, it’s time to add the yogurt. Choose a plain or vanilla yogurt for a neutral flavor that complements the bananas and walnuts. Using a spatula, gently fold the yogurt into the mashed bananas until fully combined. This step is crucial; thorough mixing ensures that the flavors meld together beautifully. If you want to add a natural sweetener, like honey or maple syrup, now is the time. Add it gradually, tasting as you go to achieve your desired sweetness.
Adding Walnuts and Optional Ingredients
Next, introduce the chopped walnuts to the banana-yogurt mixture. Fold them in gently to avoid losing the airiness of the mixture. You can also add optional ingredients at this stage, such as a sprinkle of cinnamon for warmth or a splash of vanilla extract for enhanced flavor. Be cautious to maintain the fluffy texture you’ve achieved; overmixing can lead to a denser bar.
Lining the Pan
Preparation of your baking dish is key to easy removal of the frozen bars. Line an 8-inch by 8-inch square pan with parchment paper, allowing the edges to hang over the sides. This will facilitate easy lifting of the bars once they are frozen. Alternatively, you can use a silicone baking pan, which naturally releases the bars without the need for parchment paper. Ensure the bottom and sides are covered to prevent sticking.
Pouring and Spreading the Mixture
Carefully pour the banana-yogurt mixture into the lined pan. Using a spatula, spread the mixture evenly, smoothing the top for a uniform layer. This step is essential for even freezing; an uneven layer can lead to inconsistent texture in the final product. Tap the pan gently on the counter to remove any air bubbles, which can create pockets in your bars.
Freezing Process
To achieve the best texture and consistency, place the pan in the freezer for at least four hours, or until the mixture is solid. For optimal results, cover the pan with plastic wrap or aluminum foil after the first hour of freezing to prevent ice crystals from forming on top. If you plan to keep the bars frozen longer, consider wrapping them individually in plastic wrap once they are fully frozen for easier access later.
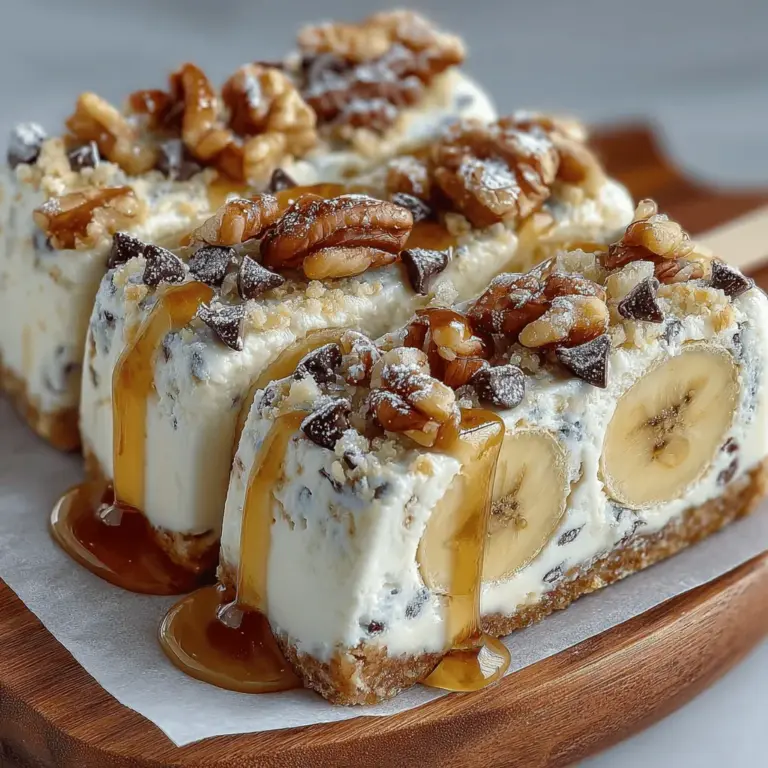
Slicing and Serving
Once frozen solid, remove the pan from the freezer. Lift the bars out using the parchment overhang and place them on a cutting board. Use a sharp knife to slice the bars into squares or rectangles, depending on your preferred serving size. For clean cuts, dip the knife in warm water and wipe it dry between cuts. This method prevents the bars from sticking to the blade and results in a polished presentation.
Creative Serving Suggestions
These frozen yogurt banana walnut bars are delicious on their own, but you can elevate your serving presentation with a few creative ideas:
– Pairing with Fresh Fruits or Yogurt: Serve the bars alongside a bowl of fresh berries or sliced fruits like strawberries, kiwi, or peaches. A dollop of additional yogurt on the side can enhance the creamy experience and provide a refreshing contrast.
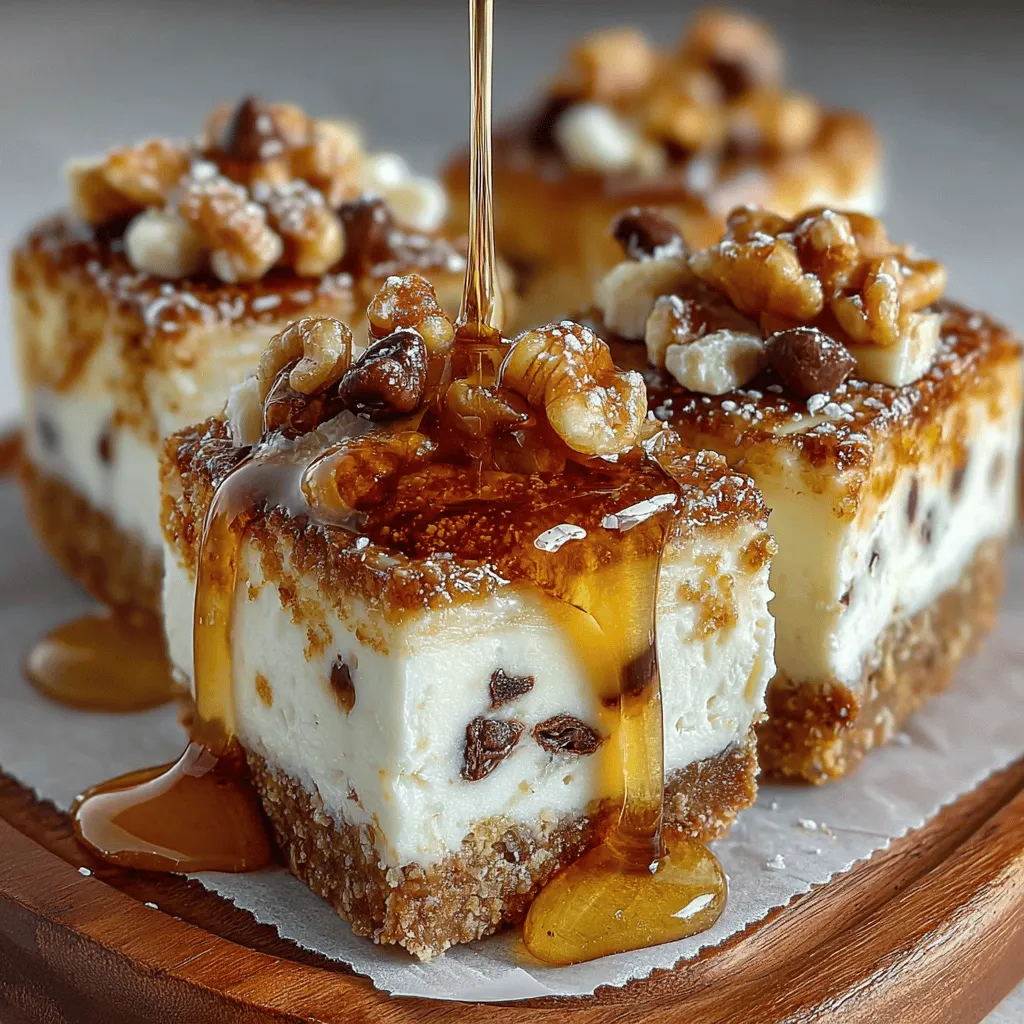
– Drizzling with Chocolate or a Fruit Sauce: For a touch of indulgence, drizzle melted dark chocolate or a homemade fruit sauce over the bars just before serving. A simple berry coulis can be made by blending fresh or frozen berries with a bit of honey and water for a vibrant, flavorful topping.
– Suggestions for Toppings or Side Items: Consider adding a sprinkle of granola or coconut flakes on top of the bars for added texture. Chopped nuts, such as almonds or pecans, can provide a delightful crunch, while a dusting of cocoa powder can add a hint of richness.
Storage and Shelf Life
To preserve your frozen yogurt banana walnut bars, store them in an airtight container in the freezer. If you’ve wrapped them individually, you can stack them in a container to save space. Properly stored, these bars can last for up to three months in the freezer without significant loss of flavor or texture.
To maintain their quality, avoid leaving the bars out at room temperature for extended periods, as this can lead to melting and undesirable texture changes. When you’re ready to enjoy a bar, simply remove it from the freezer and let it sit at room temperature for a few minutes for easier slicing or to soften slightly before eating.
Conclusion
Making homemade frozen yogurt banana walnut bars is not just a delightful culinary adventure; it also provides an opportunity to create a nutritious snack that satisfies your sweet cravings. The joy of blending natural ingredients, coupled with the satisfaction of knowing exactly what goes into your treats, is truly rewarding.
Feel free to experiment with variations; consider adding other nuts, seeds, or even different fruits like blueberries or peaches to create your unique twist on this recipe. These bars fit seamlessly into a healthy lifestyle while offering a delicious alternative to store-bought snacks. Enjoy your creation, and share the joy of these delightful frozen treats with friends and family!