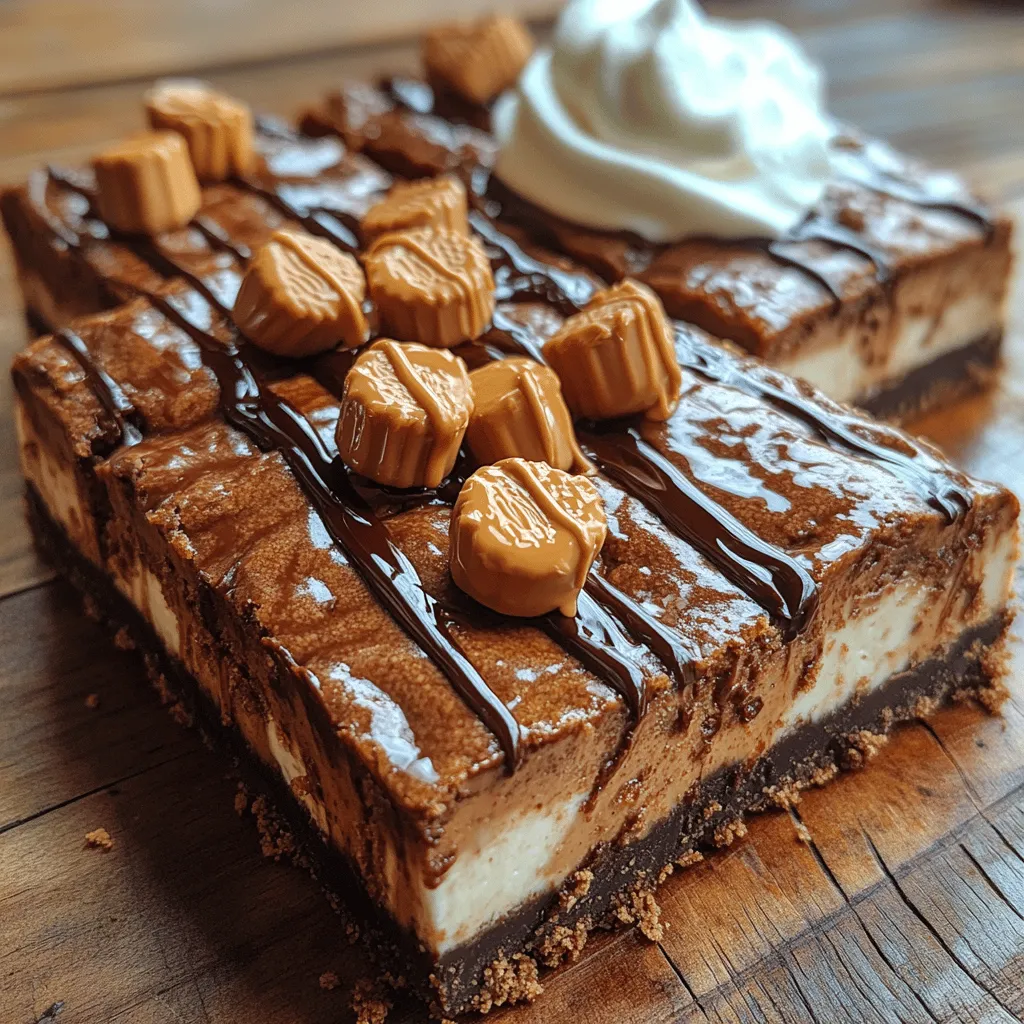
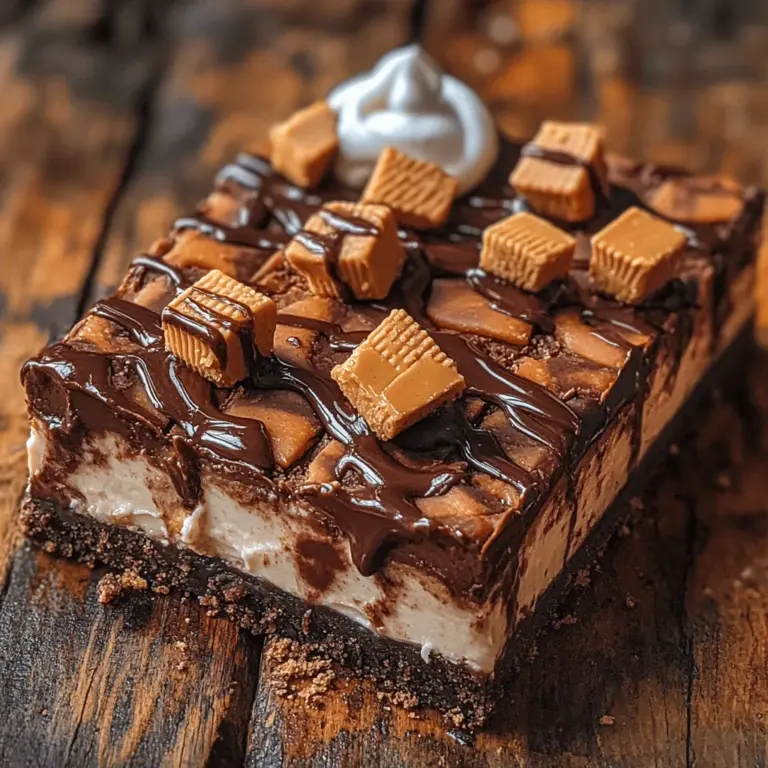
Chocolate and peanut butter—two flavors that have captured the hearts and taste buds of food lovers worldwide. This dynamic duo has been a staple in countless recipes, ranging from cookies to cakes, and for good reason. The rich, creamy texture of peanut butter perfectly complements the smooth, decadent taste of chocolate, making it a match made in culinary heaven. Among the myriad of desserts featuring this beloved combination, Chocolate Peanut Butter Bliss Bars stand out as a particularly indulgent treat.
These bliss bars are not just a dessert; they are an experience—a delightful fusion of textures and flavors that can elevate any occasion. Whether you are celebrating a special event or simply seeking a sweet escape from the everyday hustle and bustle, these bars offer a satisfying balance of sweetness and richness. They are easy to make and can be prepared ahead of time, making them an ideal choice for both casual gatherings and formal celebrations.
In this article, we will delve into the delicious world of Chocolate Peanut Butter Bliss Bars, exploring the essential ingredients required to create this delectable dessert, as well as the step-by-step instructions to guide you through the preparation. You will also learn about serving suggestions that will impress your guests and make your dessert the highlight of any meal.
The Allure of Chocolate and Peanut Butter
The combination of chocolate and peanut butter isn’t just a modern-day trend; it has historical roots that trace back decades. In fact, the first recorded recipe featuring chocolate and peanut butter dates back to the early 20th century when peanut butter became more widely available. Over the years, this pairing has evolved, finding its way into various desserts, snacks, and confections, with each generation discovering new ways to enjoy these complementary flavors.
From classic peanut butter cups to rich chocolate cakes, the allure of chocolate and peanut butter can be attributed to their unique nutritional profiles as well. Peanut butter, packed with protein and healthy fats, provides a satisfying richness that is both filling and flavorful. When combined with chocolate, which is known for its mood-boosting properties due to the presence of flavonoids and antioxidants, this pairing becomes not just a treat for the taste buds but also a source of comfort and joy.
This combination resonates deeply with dessert lovers because it caters to both sweet cravings and savory desires. The creaminess of peanut butter contrasts beautifully with the smoothness of chocolate, creating a symphony of flavors and textures that keeps people coming back for more. Whether you are a die-hard chocolate enthusiast or a peanut butter aficionado, there is no denying the magic that happens when these two ingredients come together.
Ingredients Breakdown
Creating the perfect Chocolate Peanut Butter Bliss Bars begins with understanding the key ingredients that contribute to their luscious taste and texture. Here, we will break down the ingredients into three main categories: the crust, the cheesecake filling, and the topping.
For the Crust
1. Graham Cracker Crumbs: The base of these bliss bars is made from graham cracker crumbs, which provide a sweet, crunchy texture that complements the creamy filling. The subtle flavor of the graham crackers enhances the overall taste, making them an ideal choice for a dessert base.
2. Cocoa Powder: To elevate the chocolate flavor, unsweetened cocoa powder is added to the crust mixture. This ingredient not only intensifies the chocolatey taste but also adds richness, creating a more indulgent experience with each bite.
3. Sugar and Butter: Granulated sugar and melted butter are essential for binding the crust ingredients together while adding moisture and a touch of sweetness. The combination of these two ingredients creates a crumbly yet cohesive base that holds the filling beautifully.
For the Cheesecake Filling
1. Cream Cheese: The star of the filling is cream cheese, which lends a creamy, rich texture that is essential for cheesecake recipes. It provides the necessary structure while ensuring the bars remain soft and luscious rather than overly dense.
2. Powdered Sugar: To balance the richness of the cream cheese, powdered sugar is used. It dissolves easily, ensuring a smooth filling that is perfectly sweet without being overwhelming.
3. Creamy Peanut Butter: The key flavor component of this dessert, creamy peanut butter adds depth and a nutty essence that pairs perfectly with chocolate. It is essential for achieving the blissful taste that defines these bars.
4. Eggs and Vanilla Extract: Eggs contribute to the overall structure and stability of the cheesecake filling, helping it to set firmly yet remain creamy. Vanilla extract enhances the flavor profile, adding a hint of warmth and complexity.
For the Topping
1. Reese’s Peanut Butter Cups: For an extra layer of indulgence, chopped Reese’s Peanut Butter Cups are sprinkled on top of the filling before chilling. This not only adds a delightful crunch but also amplifies the peanut butter flavor, making each bite even more satisfying.
2. Optional Toppings: Depending on your preferences, you can enhance the presentation and flavor with optional toppings such as whipped cream, chocolate syrup, or additional peanut butter drizzles. These toppings can add not just visual appeal but also varying textures and flavors that complement the bars beautifully.
Step-by-Step Preparation Guide
Now that we’ve covered the essential ingredients, it’s time to dive into the preparation process for these delectable Chocolate Peanut Butter Bliss Bars. The steps are straightforward, making this recipe accessible even for novice bakers. Let’s break it down:
Step 1: Preheat Your Oven
Begin by preheating your oven to 350°F (175°C). This ensures that your bars will bake evenly and achieve the perfect texture.
Step 2: Prepare the Crust
– In a medium bowl, combine the graham cracker crumbs, cocoa powder, sugar, and melted butter. Mix well until all the crumbs are evenly moistened.
– Press the mixture firmly into the bottom of a greased 9×9-inch baking pan, creating an even layer. Make sure to compact the crust well to prevent it from crumbling when sliced.
Step 3: Bake the Crust
– Place the crust in the preheated oven and bake for approximately 10 minutes. This step helps to set the crust and enhance the flavors.
– Once done, remove the crust from the oven and allow it to cool while you prepare the cheesecake filling.
Step 4: Make the Cheesecake Filling
– In a large mixing bowl, beat the cream cheese until smooth and creamy, ensuring there are no lumps.
– Gradually add the powdered sugar and continue to beat until well combined and fluffy.
– Add the creamy peanut butter and mix until fully incorporated. Scrape down the sides of the bowl as needed.
– Finally, add the eggs one at a time, mixing well after each addition. Then, add the vanilla extract and mix until smooth.
Step 5: Assemble and Bake
– Pour the cheesecake filling over the cooled crust, spreading it evenly with a spatula.
– Bake in the oven for 25-30 minutes, or until the edges are set but the center still has a slight jiggle. This ensures a creamy texture that is not overcooked.
Step 6: Cool and Chill
– Once baked, remove the bars from the oven and allow them to cool at room temperature for about an hour.
– After cooling, cover the pan with plastic wrap and refrigerate for at least 4 hours, or preferably overnight. This chilling time allows the flavors to meld and the bars to set properly.
As you follow these steps, the aroma of chocolate and peanut butter will fill your kitchen, enticing everyone nearby. This is just the beginning of a delicious journey that will culminate in a dessert that is sure to impress.
In the following sections, we will explore serving suggestions that will elevate your Chocolate Peanut Butter Bliss Bars even further, as well as answer some common questions about this delightful treat. Stay tuned for more delicious insights!

Preparing the Crust
To achieve the perfect base for your Chocolate Peanut Butter Bliss Bars, it’s essential to focus on mixing and pressing the crust correctly. Start by preheating your oven to 350°F (175°C). This temperature ensures that your crust bakes evenly, providing a solid foundation for the rich cheesecake layer above.
In a mixing bowl, combine the crushed graham crackers, melted butter, and a pinch of salt. Using a fork or your hands, mix until the crumbs are evenly coated with the butter. The mixture should have a consistency similar to wet sand — it should hold together when pressed, but not be overly greasy.
Once the mixture is ready, transfer it to a lined 8×8 inch baking dish. Using the back of a measuring cup or your fingers, firmly press the crumb mixture into an even layer across the bottom of the dish. It’s important to press the crust down well to avoid any crumbling when you cut the bars later.
Bake the crust in the preheated oven for about 10 minutes, or until it turns a light golden brown. This brief baking time helps set the crust, making it sturdy enough to hold the rich filling. Be vigilant about not overbaking; a well-timed crust will enhance the overall texture of your bars.
Making the Cheesecake Filling
Now, let’s move on to the star of the show: the cheesecake filling. Achieving a smooth and creamy consistency is key to making these bars irresistible. Begin by ensuring all your ingredients — cream cheese, peanut butter, powdered sugar, and vanilla extract — are at room temperature. This step is crucial because softened cream cheese blends more easily with the other ingredients, reducing the risk of lumps.
In a large mixing bowl, use an electric mixer or a whisk to beat the softened cream cheese until it’s completely smooth. Gradually add in the creamy peanut butter, mixing until the two are well combined. Use a spatula to scrape down the sides of the bowl to incorporate all ingredients fully.
Next, sift in the powdered sugar, followed by the vanilla extract. Continue mixing until the filling is silky and free of lumps. For an extra touch of decadence, consider folding in a handful of mini chocolate chips at this stage; they’ll add delightful bursts of chocolate in every bite.
Assembling the Bars
With the crust baked and the filling prepared, it’s time to assemble your Chocolate Peanut Butter Bliss Bars. Begin by pouring the cheesecake filling over the cooled crust. Use a spatula to spread it evenly across the surface, ensuring every corner is filled. The goal is to create a uniform layer that will bake evenly.
Once the filling is spread, it’s time to sprinkle your chosen toppings over the cheesecake layer. Mini chocolate chips, crushed peanuts, or even a drizzle of melted chocolate work wonderfully. To ensure they adhere to the filling, gently press the toppings into the mixture. This step not only enhances the flavor but also improves the aesthetics of your bars.
Baking Process
The baking process is critical in achieving the right texture for your Chocolate Peanut Butter Bliss Bars. Place the assembled dish in the oven and bake at 350°F (175°C) for approximately 25-30 minutes. You’ll know the bars are done when the edges appear set, but the center still has a slight jiggle — this indicates a creamy texture.
After removing the bars from the oven, let them cool at room temperature for about 30 minutes before transferring them to the refrigerator. Chilling is vital; allow the bars to chill for at least 4 hours, or preferably overnight. This resting period not only helps the flavors meld together but also allows the filling to set properly for easy slicing.
Serving Suggestions
Chocolate Peanut Butter Bliss Bars are versatile and perfect for various occasions. Whether it’s a birthday party, a family gathering, or a casual get-together with friends, these bars are sure to impress.
For an elegant presentation, slice the bars into neat squares and arrange them on a decorative platter. Consider garnishing each piece with a dollop of whipped cream and a sprinkle of crushed peanuts for added flair. Drizzling melted chocolate over the top or serving alongside fresh berries can elevate the dish further.
Pair these bliss bars with beverages that complement their rich flavors. A glass of cold milk, a cup of coffee, or even a dessert wine can balance the sweetness and enhance the experience.
Storage Tips
To maintain the freshness of your Chocolate Peanut Butter Bliss Bars, proper storage is essential. After chilling, cover the baking dish with plastic wrap or transfer the bars to an airtight container. They can be stored in the refrigerator for up to a week; however, they are best enjoyed within the first few days for optimal flavor and texture.
If you want to prepare these bars in advance, consider freezing them. Cut the bars into squares and place them in a single layer on a parchment-lined baking sheet. Freeze until solid, then transfer them to a freezer-safe container or zip-top bag. When you’re ready to enjoy, simply thaw at room temperature for about 30 minutes or in the refrigerator overnight.
Conclusion
Creating Chocolate Peanut Butter Bliss Bars at home is a rewarding experience that brings joy not only to the baker but also to everyone who gets to indulge in them. The combination of rich peanut butter and smooth cheesecake, all atop a buttery crust, is a match made in dessert heaven.
We encourage you to try this recipe for yourself and savor the delicious results. Don’t hesitate to share your experiences, variations, or tips with friends and family. Homemade desserts have a unique way of bringing people together, and there’s nothing quite like the satisfaction of serving something made with love. Embrace the joy of baking, and let these bliss bars be a delightful addition to your culinary repertoire.

