Introduction
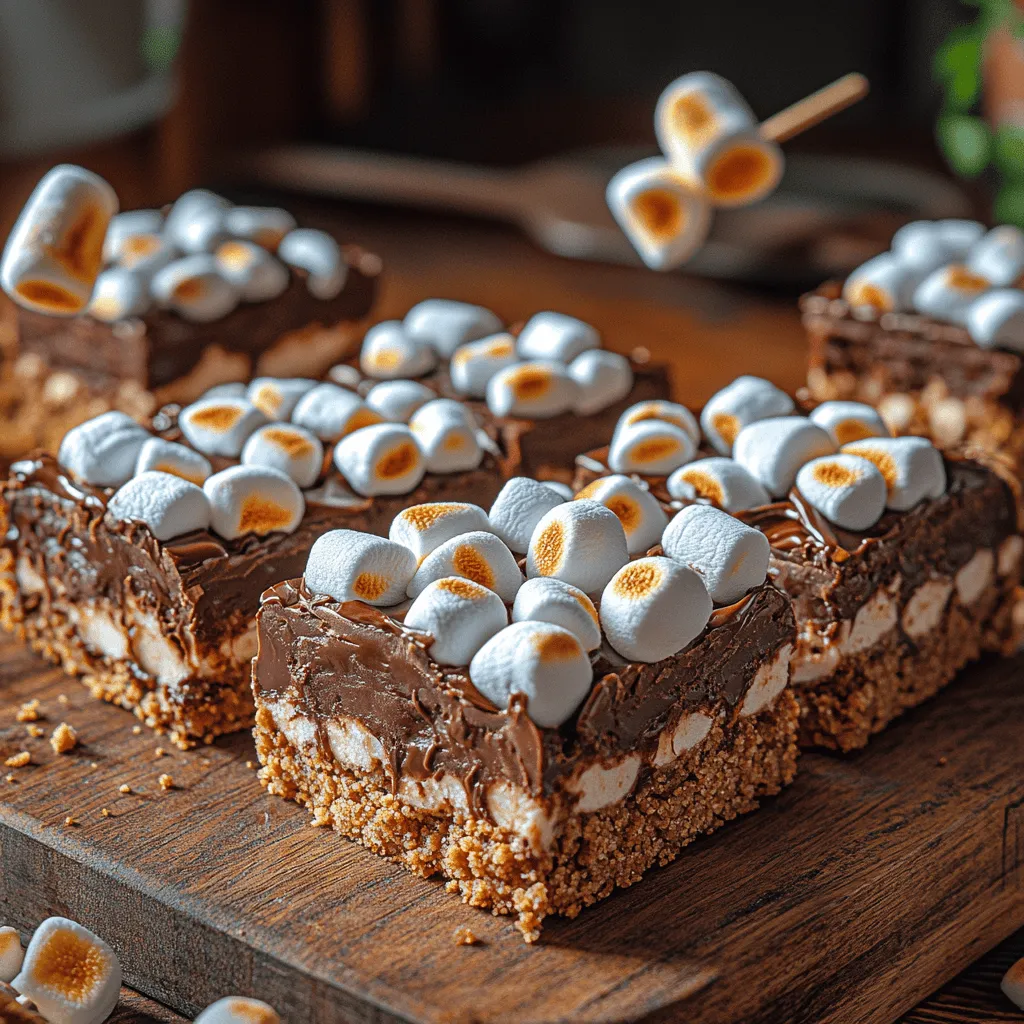
S’mores have long been a beloved treat, evoking memories of summer nights spent around crackling campfires, where laughter and marshmallow toasting go hand in hand. The classic combination of graham crackers, gooey roasted marshmallows, and rich chocolate is not just a nostalgic experience; it’s a universally cherished dessert that brings people together. However, while the traditional method requires a campfire, we’re introducing a modern twist to this classic favorite: Heavenly No-Bake S’mores Bars.
These delectable bars provide all the flavors of the iconic s’mores without the need for any cooking or baking, making them a perfect treat for any occasion, be it a picnic, birthday party, or simply a sweet indulgence at home. For busy individuals and families, the appeal of a no-bake recipe is undeniable. With minimal preparation and no need to turn on the oven, you can whip up these bars in no time, allowing you to spend more time enjoying the treats and less time in the kitchen.
The Allure of S’mores
The history of s’mores is as rich as the flavors they encapsulate. First documented in 1927 in a Girl Scouts’ publication, the recipe for s’mores has evolved but remains steadfast in its popularity. Traditionally made by roasting marshmallows over an open flame and sandwiching them with chocolate between two graham crackers, the s’more has transcended its origins to become a staple in American culture, representing warmth, friendship, and the joy of outdoor gatherings.
Culturally, s’mores have taken on various forms around the globe. In some regions, variations incorporate different types of chocolate or even flavored marshmallows. The versatility of s’mores has inspired countless twists, including brownies, cupcakes, and, of course, no-bake versions like our Heavenly No-Bake S’mores Bars.
As home cooking trends evolve, no-bake desserts are gaining immense popularity. They offer convenience without sacrificing flavor, making them ideal for families with busy schedules. The simplicity of these recipes, combined with the delightful tastes they produce, allows home chefs of all skill levels to create impressive desserts with ease.
Understanding the Ingredients
To create the perfect Heavenly No-Bake S’mores Bars, understanding the ingredients is essential. Each component contributes to the bars’ structure, flavor, and overall appeal:
Graham Cracker Crumbs
Graham cracker crumbs serve as the foundation of these bars, providing the necessary crunch and a hint of sweetness reminiscent of traditional s’mores. When selecting your graham crackers, consider using plain varieties to avoid any overpowering flavors. For a more unique twist, cinnamon-flavored graham crackers can add an extra layer of complexity to the taste profile.
Cocoa Powder
Cocoa powder is an essential ingredient that adds depth and richness to the dessert. It not only enhances the chocolate flavor but also contributes to the bar’s overall visual appeal with its deep brown hue. When choosing cocoa powder, opt for unsweetened varieties to maintain a balanced sweetness throughout the treat.
Powdered Sugar
Powdered sugar is preferred over granulated sugar in this recipe for a reason. Its fine texture allows for a smooth and creamy mixture when combined with other ingredients. This results in a velvety base that holds together well without being overly sweet.
Unsalted Butter
The importance of using unsalted butter cannot be overstated. Unsalted butter allows you to control the saltiness of the dessert, ensuring that the flavors are perfectly balanced. It also contributes to the creaminess and richness of the bars, elevating the overall taste experience.
Mini Marshmallows
Mini marshmallows are essential for recreating that quintessential s’mores experience. They melt beautifully into the mixture, making each bite delightfully gooey. Additionally, their smaller size ensures an even distribution throughout the bars, providing that satisfying marshmallow texture in every mouthful.
Semi-Sweet Chocolate Chips
Choosing the right chocolate is crucial to achieving optimal flavor in your Heavenly No-Bake S’mores Bars. Semi-sweet chocolate chips strike the perfect balance between sweetness and rich chocolate flavor, creating a luscious layer that complements the marshmallows and graham cracker base.
Creamy Peanut Butter
For a unique twist, creamy peanut butter adds an extra layer of flavor and enhances the dessert’s creaminess. The nutty undertones of peanut butter pair beautifully with chocolate and marshmallows, making these bars even more indulgent. If you prefer, you can substitute almond butter or sunbutter for a different taste experience.
Vanilla Extract and Salt
Lastly, a dash of vanilla extract and a sprinkle of salt are crucial for elevating the overall flavor profile of the bars. Vanilla extract adds warmth and depth, while the salt enhances the sweetness, ensuring that every bite is perfectly balanced.
Step-by-Step Instructions for Heavenly No-Bake S’mores Bars
Now that you understand the allure of s’mores and the vital ingredients that will come together to create your Heavenly No-Bake S’mores Bars, let’s dive into the preparation process. The first step is preparing the base, which sets the foundation for these deliciously indulgent bars.
Preparing the Base
1. Crush the Graham Crackers: Begin by crushing your graham crackers into fine crumbs. You can do this by placing them in a resealable plastic bag and using a rolling pin or by pulsing them in a food processor. Aim for a texture similar to sand—this ensures that your bars will have a sturdy base.
2. Mix the Dry Ingredients: In a large mixing bowl, combine the crushed graham crackers, unsweetened cocoa powder, and powdered sugar. Whisk together until well combined, ensuring that the cocoa powder is evenly distributed throughout the mixture.
3. Melt the Butter: In a small saucepan over low heat, melt the unsalted butter until fully liquefied. Be careful not to burn it; you want it just melted.
4. Combine Wet and Dry Ingredients: Pour the melted butter into the bowl with the dry ingredients. Mix thoroughly using a spatula or wooden spoon until all the dry ingredients are evenly coated in the butter. The mixture should start to clump together, forming a crumbly yet cohesive texture.
5. Press into the Pan: Line an 8×8-inch baking dish with parchment paper, leaving some overhang for easy removal later. Transfer the mixture into the prepared dish, using your hands or the back of a measuring cup to firmly press it into an even layer. Make sure to pack it down well to create a solid base that will hold together once chilled.
With the base prepared, you’re well on your way to creating your Heavenly No-Bake S’mores Bars. The next steps will involve adding the delightful layers of chocolate, marshmallows, and peanut butter, which will culminate in a treat that is sure to impress. Stay tuned for the continuation of this delicious journey!

Adding Wet Ingredients
The star of any no-bake dessert is undoubtedly the wet ingredients, and in our Heavenly No-Bake S’mores Bars, butter plays a pivotal role. Melted butter not only adds richness but also helps bind the dry ingredients, creating that essential cohesive texture. To achieve the perfect consistency, ensure your butter is fully melted but not bubbling. This can be done on the stovetop over low heat or in the microwave in short intervals. Stirring the butter as it melts will prevent it from burning and ensure an even melt. Once melted, allow it to cool slightly before mixing it with the dry ingredients to prevent any changes in texture.
Forming the Base
Creating a firm base is crucial for the structural integrity of your s’mores bars. Begin by transferring the combined dry ingredient and melted butter mixture into your prepared baking dish. Using a spatula, spread the mixture evenly across the bottom of the dish. To achieve an even layer, press down firmly using the back of the spatula or even your hands (a piece of parchment paper can help prevent sticking). The goal is to create a tightly packed layer that won’t crumble when you cut the bars later. Pay attention to the corners and edges to ensure uniform compression.
Melting the Chocolate
Melting chocolate can be tricky, but with the right techniques, you’ll avoid burning and achieve a silky consistency. Use a double boiler method by placing a heatproof bowl over a pot of simmering water, ensuring the bowl does not touch the water. This gentle heat helps melt the chocolate without scorching it. Alternatively, you can use the microwave; heat the chocolate in 30-second intervals, stirring between each session until melted. If you’re adding peanut butter, mix it with the chocolate after it has melted. This combination enhances the flavor and adds a creamy texture to your chocolate layer.
Spreading the Chocolate Layer
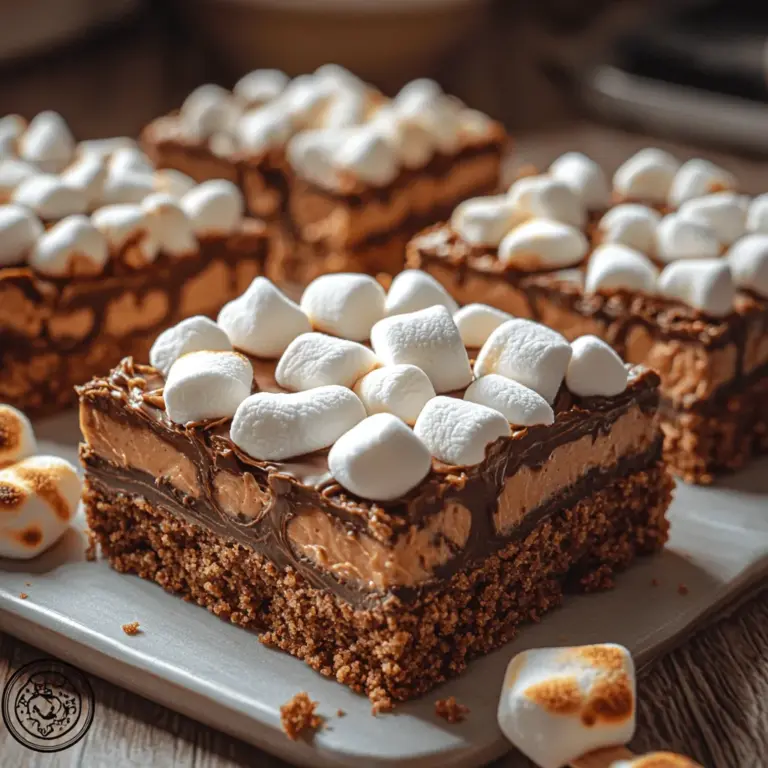
Once your chocolate and peanut butter mixture is perfectly melted and combined, it’s time to spread it over your base. Pour the melted chocolate onto the pressed base and use a spatula to spread it evenly. To ensure the chocolate adheres well, you can gently tap the dish on the counter after spreading to eliminate any air bubbles. Be sure to cover the entire surface, reaching the edges to create a visually appealing finish. For an extra touch, you can sprinkle a few graham cracker crumbs on top of the chocolate layer before the marshmallows for added texture and flavor.
Adding the Marshmallows
Now comes the fun part—adding the marshmallows! Use mini marshmallows for a more even distribution across the chocolate layer. Sprinkle them generously over the melted chocolate, ensuring they are evenly spaced. To help them adhere, gently press down on the marshmallows with your hands or the spatula. This not only helps them stick but also creates a delightful texture contrast once chilled. If you want a toasted flavor reminiscent of traditional s’mores, you can use a kitchen torch to lightly toast the marshmallows after the bars have set.
Chilling and Setting
Chilling is essential for achieving the perfect texture. Place the baking dish in the refrigerator for at least 2 hours, or until the chocolate layer is firm to the touch. The cooling process allows the chocolate to solidify and the flavors to meld together. It also provides that satisfying bite when you cut into the bars. If you’re short on time, you can speed up the process by placing the dish in the freezer for about 30-45 minutes, but be careful not to freeze them completely.
Cutting and Serving
Once set, it’s time to cut your Heavenly No-Bake S’mores Bars. Using a sharp knife, cut the bars into squares or rectangles, depending on your preferred serving size. For cleaner cuts, you can warm the knife slightly by running it under hot water before slicing. Presentation matters, so consider serving the bars on a decorative platter or individual dessert cups. You might even want to drizzle some extra melted chocolate over the top or sprinkle with crushed graham crackers for an appealing finish.
Nutritional Information
When enjoying your Heavenly No-Bake S’mores Bars, it’s good to be aware of the nutritional profile. Each bar is a delightful combination of carbohydrates, fats, and sugars, making it a rich treat. A typical serving contains around 200 calories, with a balanced mix of protein from the peanut butter and healthy fats from the chocolate.
While these bars are indulgent, portion control is key. Enjoying one or two bars as a treat occasionally fits well within a balanced diet. You can also modify ingredients to suit dietary needs—for instance, using dark chocolate for a healthier option or substituting maple syrup for sugar to reduce refined sugars.
Why You’ll Love These No-Bake S’mores Bars
These no-bake s’mores bars are not only convenient and quick to prepare, but they also appeal to various dietary preferences. With simple ingredient swaps, you can easily make gluten-free or nut-free versions, ensuring everyone can enjoy this delightful dessert. Their versatility makes them perfect for any occasion, whether a summer BBQ, a cozy night in, or a festive gathering.
Additionally, these bars serve as a fantastic conversation starter at parties. The nostalgic flavors of classic s’mores, combined with the ease of a no-bake recipe, will surely impress your guests. Plus, they are perfect for kids and adults alike, bringing smiles to faces of all ages.
Storing and Preserving Your S’mores Bars
To maintain the freshness of your Heavenly No-Bake S’mores Bars, store them in an airtight container at room temperature for up to a week. If you live in a warmer climate, it’s best to keep them in the refrigerator to prevent the chocolate from melting. For longer storage, these bars freeze well. Cut them into squares, wrap each piece in plastic wrap, and place them in a freezer-safe bag. They can last up to three months in the freezer. When ready to enjoy, simply thaw at room temperature for about 30 minutes before serving.
Conclusion
In summary, the Heavenly No-Bake S’mores Bars are a delightful treat that captures the essence of summer in every bite. Their simplicity and adaptability make them a must-try for anyone looking to create a delicious and memorable dessert. Whether you’re sharing them with family and friends or enjoying them solo, these bars promise to bring joy and satisfaction. So gather your ingredients, follow the steps, and indulge in the timeless appeal of s’mores, transformed into a no-bake delight that everyone will love. Enjoy the process, and don’t forget to share your creations and experiences!

