Introduction
There’s something undeniably enchanting about the allure of chocolate doughnut holes. These small, round, and oh-so-satisfying treats are perfect bites of joy that can brighten any day. Whether you’re enjoying them with a cup of coffee in the morning or serving them at a festive gathering, chocolate doughnut holes never fail to impress. The beauty of homemade treats lies not just in their flavor but in the memories they create—baking together with loved ones, sharing a batch with friends, or indulging in a sweet moment alone.
In this article, you can expect to discover a delightful and easy-to-follow recipe for chocolate doughnut holes that will cater to all occasions. With just a few simple ingredients and steps, you’ll be able to whip up a batch of these delicious morsels that are sure to satisfy your sweet tooth and impress your guests.
The Joy of Baking Doughnut Holes
To fully appreciate chocolate doughnut holes, it’s essential to understand their historical context. Doughnuts have a rich history, dating back to the early 19th century. Originally, these fried treats were made with a mixture of flour, sugar, and eggs, often shaped into rings and filled with fruit preserves. Over time, variations emerged, and doughnut holes—small, round pieces cut from the center of traditional doughnuts—became increasingly popular.
In contemporary baking, doughnut holes have experienced a renaissance. Their bite-sized nature makes them the perfect indulgence, allowing for guilt-free snacking. They can be enjoyed plain, glazed, or, in our case, filled with rich chocolate flavors. Chocolate doughnut holes, in particular, have captured the hearts of dessert lovers everywhere, thanks to the deep, satisfying cocoa taste that pairs perfectly with their soft and tender texture.
Why are chocolate doughnut holes a favorite among dessert enthusiasts? The answer lies in their versatility and appeal. They are easy to share, simple to make, and incredibly satisfying. Whether you’re planning a birthday party, a holiday gathering, or just a casual afternoon treat, these doughnut holes are guaranteed to please a crowd. Plus, they can be customized with different coatings, fillings, and toppings, making them an ideal canvas for your culinary creativity.
Ingredients Breakdown
Now that we’ve set the stage for our irresistible chocolate doughnut holes, let’s dive into the ingredients that will bring this recipe to life. Each component plays a crucial role, contributing to the overall flavor, texture, and success of your doughnut holes.
All-Purpose Flour: The Foundation for Structure
All-purpose flour is essential for providing the structure of our doughnut holes. It acts as the backbone of the batter, giving it the necessary strength to hold its shape while baking. The gluten in the flour develops as you mix the ingredients, helping to create a light and fluffy texture that we all crave in baked goods.
Unsweetened Cocoa Powder: Adding Rich Chocolate Flavor
To achieve that deep, rich chocolate flavor that defines our doughnut holes, unsweetened cocoa powder is a must. It adds the characteristic chocolate color and taste without the sweetness, allowing for a balanced flavor profile. The quality of cocoa powder can significantly impact the final product, so opt for a good quality brand to ensure maximum chocolatey goodness.
Granulated and Brown Sugar: Balancing Sweetness and Moisture
A combination of granulated and brown sugars brings the perfect balance of sweetness to our doughnut holes. Granulated sugar contributes to the overall sweetness and helps with browning, while brown sugar adds moisture and a hint of caramel flavor due to its molasses content. This combination ensures that your doughnut holes are not only sweet but also delightfully moist.
Baking Powder and Baking Soda: Importance in Leavening
Both baking powder and baking soda are crucial for achieving the right rise and texture in your doughnut holes. Baking powder is a double-acting leavening agent that reacts both when mixed into the batter and when heated in the oven. It helps create a light and airy structure. Baking soda, on the other hand, requires an acidic ingredient (like buttermilk or yogurt) to activate it. In this recipe, it works alongside the baking powder to ensure that your doughnut holes achieve that perfect puffiness.
Salt: Enhancing Flavor
While salt may seem like a simple ingredient, it plays a significant role in enhancing the flavors of your chocolate doughnut holes. Just a pinch can elevate the overall taste, balancing the sweetness and bringing out the rich chocolate flavor. Don’t skip this essential step; it’s a small addition that makes a big difference.
Whole Milk: Keeping the Batter Moist
Whole milk is used in this recipe to keep the batter moist and contribute to a tender crumb. The fat in whole milk adds richness and helps create a luxurious texture that melts in your mouth. If you prefer a dairy-free option, feel free to substitute with almond milk or oat milk, but keep in mind the flavor and texture may vary slightly.
Vegetable Oil: Adding Richness and Preventing Dryness
Vegetable oil is another key ingredient that contributes to the moistness of the doughnut holes. It provides richness without the heaviness that butter can sometimes impart. Using oil in your baking gives you a soft and tender product, ensuring that each bite is as delightful as the last.
Eggs: Binding the Ingredients and Adding Moisture
Eggs are essential for binding the ingredients together in our doughnut hole batter. They provide structure, moisture, and richness, helping to create a tender crumb. The proteins in eggs coagulate during baking, contributing to the overall stability of your doughnut holes.
Vanilla Extract: Enhancing Flavor Complexity
Vanilla extract is a flavor powerhouse in baking. A splash of pure vanilla extract enhances the overall flavor of your chocolate doughnut holes, providing a warm, aromatic note that complements the rich chocolate. Always opt for pure vanilla extract over imitation for the best flavor.
Semi-Sweet Chocolate Chips: The Delightful Surprise in Each Bite
To take our chocolate doughnut holes to another level, semi-sweet chocolate chips are added to the batter. They melt slightly during baking, creating pockets of gooey chocolate that elevate each bite. You can also experiment with dark chocolate or milk chocolate chips, depending on your taste preference.
Powdered Sugar: For the Perfect Finishing Touch
Finally, powdered sugar is used for dusting the finished doughnut holes, adding a touch of sweetness and an appealing visual contrast. The light dusting of sugar not only enhances the flavor but also gives these treats that classic doughnut appearance we all know and love.
Step-by-Step Instructions for Perfect Chocolate Doughnut Holes
Now that we’ve covered the ingredients, it’s time to get into the nitty-gritty of preparation. Making chocolate doughnut holes is a straightforward process, and following these step-by-step instructions will ensure your success.
Preparing the Oven and Muffin Tin
Start by preheating your oven to 350°F (175°C). This is a crucial step, as baking in a properly heated oven ensures that your doughnut holes rise beautifully and cook evenly. While the oven is preheating, prepare your muffin tin. You can use a mini muffin pan to create perfectly-sized doughnut holes. Grease the pan generously with non-stick cooking spray or line it with paper liners to ensure easy removal after baking.
Importance of Proper Temperature and Greasing Techniques
Proper temperature and greasing techniques are vital to achieving the best results. If the pan is not greased well, your doughnut holes may stick, making it difficult to remove them without damaging their shape. Additionally, ensure that your ingredients are at room temperature for a smoother batter and more even mixing. This step will help achieve a consistent texture and avoid any lumps in your doughnut hole batter.
With your oven preheated and your muffin tin ready, you’re all set to start mixing the ingredients and creating your irresistible chocolate doughnut holes. In the next section, we will dive into the detailed mixing and baking instructions to guide you through the process of bringing these delightful treats to life. Stay tuned for the delicious journey ahead!

Mixing Dry Ingredients: Achieving the Right Consistency
To create the perfect chocolate doughnut holes, begin by preparing your dry ingredients. In a mixing bowl, combine the all-purpose flour, cocoa powder, baking powder, baking soda, and salt. Each ingredient plays a crucial role in the structure and flavor of your doughnut holes, ensuring they rise beautifully while maintaining a rich chocolate taste.
Achieving the right consistency starts with sifting the dry ingredients together. This not only helps to remove any lumps but also aerates the mixture, contributing to a lighter texture in the final product. Use a whisk to blend the dry ingredients thoroughly, ensuring that the cocoa powder is evenly distributed. This step is vital, as uneven cocoa can lead to inconsistent flavors in your doughnut holes.
Tips on Proper Whisking Techniques to Avoid Lumps
When whisking, employ a technique that allows for maximum incorporation without overworking the flour. Hold the whisk at a slight angle, and use a circular motion to mix the ingredients. If you encounter lumps, press them against the side of the bowl with the whisk to break them down. This technique ensures that your dry mixture is as smooth as possible, providing a better base for the wet ingredients.
Combining Wet Ingredients: Ensuring Smoothness
Next, turn your attention to the wet ingredients. In a separate bowl, combine the eggs, granulated sugar, vanilla extract, and melted butter. Whisk these ingredients together until the mixture is smooth and homogenous. The incorporation of air during this step not only enhances the flavor but also contributes to the overall rise of the doughnut holes.
Best Practices for Mixing Wet Ingredients Effectively
To ensure a smooth mixture, it’s essential to add the melted butter gradually while whisking continuously. This prevents the butter from solidifying and creating lumps in your wet mixture. Once everything is well combined, the resultant mixture should be glossy and free of any visible separation between the ingredients.
Merging Dry and Wet Mixtures: Understanding the Mixing Process
Now it’s time to merge the dry and wet mixtures. Make a well in the center of the dry ingredients and pour in the wet mixture. Using a spatula or wooden spoon, gently stir until the ingredients are just combined. It’s crucial to stop mixing as soon as no dry flour remains visible. Overmixing can lead to dense and tough doughnut holes, a common mistake that can easily be avoided.
Why Gentle Mixing is Crucial to Avoid Toughness
Gentle mixing is key to preserving the tender texture of your doughnut holes. The gluten in the flour develops through mixing; excessive mixing can create a chewy, bread-like texture instead of the soft, airy consistency we aim for in baked goods. By treating the batter with care, you’re ensuring that the end product is delightfully tender.
Adding Chocolate Chips: Techniques for Even Distribution
Once your batter is ready, it’s time to fold in the chocolate chips. This step adds delightful bursts of chocolate flavor throughout your doughnut holes. To ensure even distribution, sprinkle the chocolate chips over the surface of the batter and use a folding technique to incorporate them gently.
How to Fold in Chocolate Chips Without Overmixing
To fold in the chocolate chips, slide the spatula down the side of the bowl and gently lift the batter over the chips, rotating the bowl as needed. Repeat this motion until the chips are evenly distributed without overworking the batter. This technique will help maintain the desired consistency of your doughnut holes.
Filling the Muffin Tin: Portioning the Batter Accurately
With your batter complete, it’s time to fill the muffin tin. Use a measuring spoon or a small ice cream scoop to portion the batter evenly into each cavity of your greased or lined muffin tin. Aim for about two-thirds full for each doughnut hole, allowing room for rising. This method ensures that all doughnut holes bake evenly and look uniform.
Suggestions for Measuring Tools for Even Baking
For accuracy, consider using a kitchen scale for weighing your ingredients, and a silicone spatula for scraping down the sides of the bowl. These tools not only enhance precision but also promote even baking, resulting in a consistent texture and flavor in every bite.
Baking the Doughnut Holes: Timing and Testing for Doneness
Preheat your oven to 350°F (175°C) and place the filled muffin tin in the center of the oven. Bake the doughnut holes for 10-12 minutes, or until a toothpick inserted into the center comes out clean. The tops should be set and spring back slightly when pressed.
Knowing When They Are Perfectly Baked for Maximum Flavor
To achieve the best flavor and texture, avoid opening the oven door too frequently, as this can disrupt the baking process. Trust your senses; the aroma of baking chocolate will fill your kitchen, signaling that they are nearly ready. The perfect doughnut holes will have a slightly domed top and a rich, dark color.
Cooling and Coating: The Finishing Touches
Once baked, remove the muffin tin from the oven and allow the doughnut holes to cool in the tin for about 5 minutes. This cooling period helps them set and makes it easier to remove them without breaking. After this time, transfer the doughnut holes to a wire rack to cool completely.
Importance of Cooling Time for Texture and Flavor Enhancement
Cooling is essential for the development of flavors. As the doughnut holes cool, they will continue to absorb moisture, ensuring they remain tender and moist. If you coat them in sugar or glaze while they are still warm, it can melt and create a syrupy texture rather than a lovely outer layer.
Serving Suggestions and Pairings
Now that your irresistible chocolate doughnut holes are complete, consider how to present and serve them. They make a fantastic treat for breakfast, brunch, or as a sweet snack throughout the day.
Ideas for Serving Chocolate Doughnut Holes
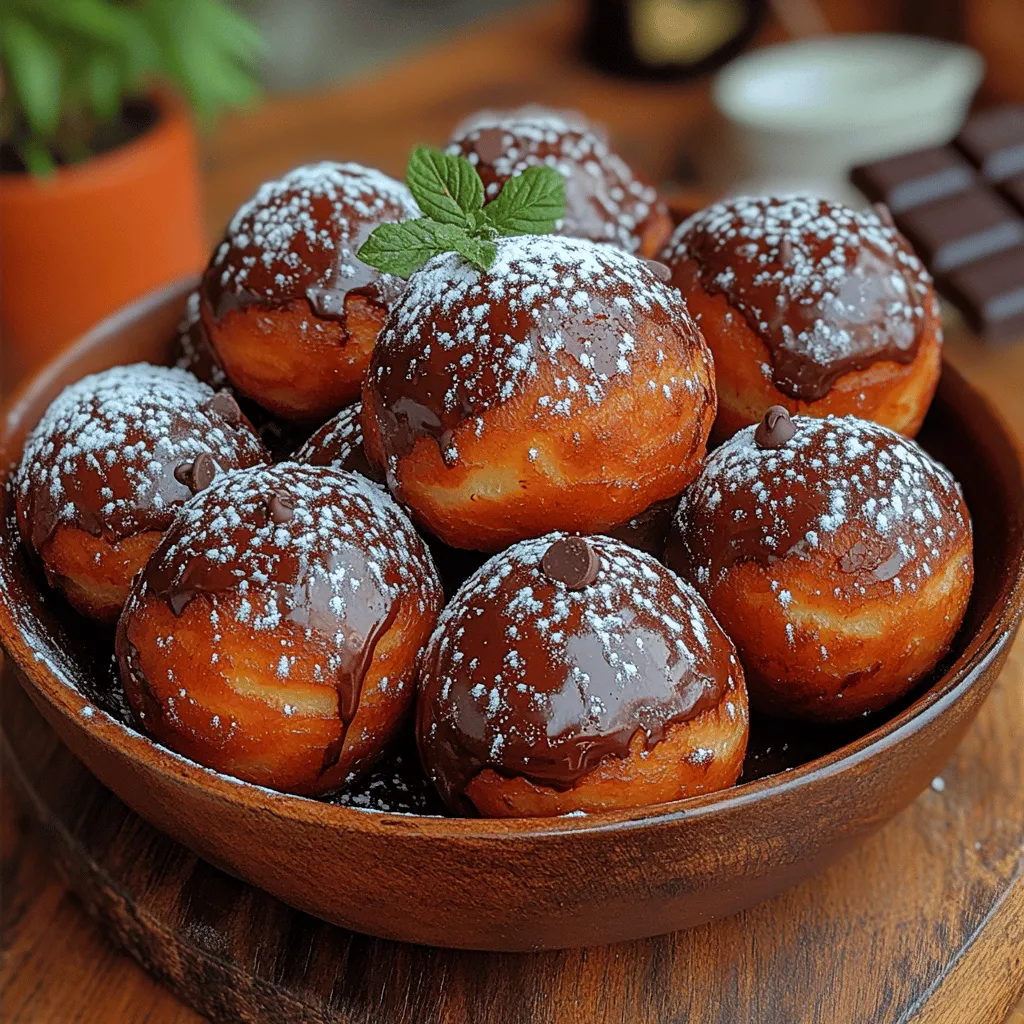
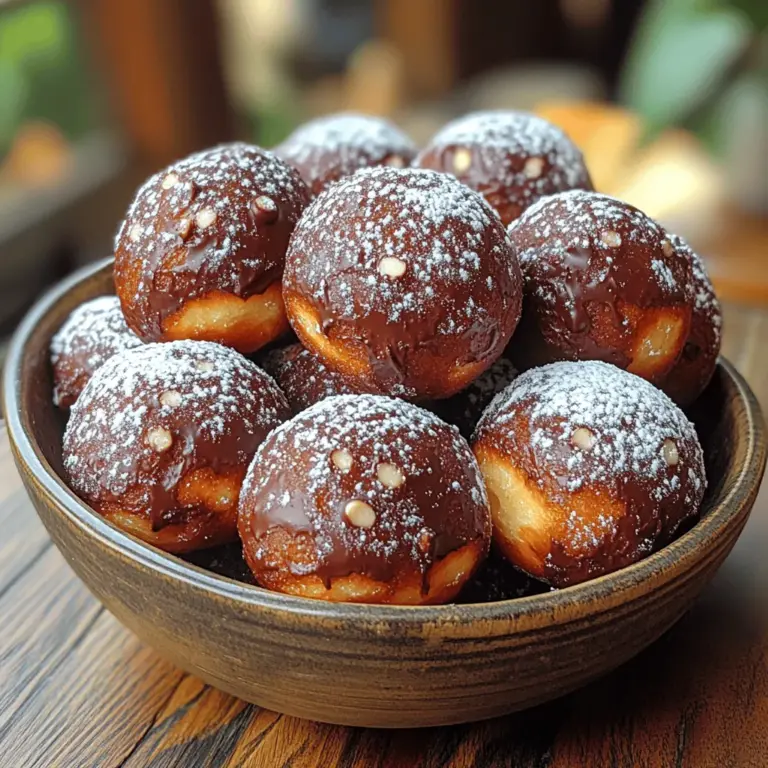
Dust the doughnut holes with powdered sugar for a classic look, or dip them in a rich chocolate glaze for an indulgent treat. You can also roll them in cinnamon sugar for a delightful twist. Present them in a decorative bowl or on a tiered cake stand for an appealing display.
Perfect Accompaniments like Coffee, Milk, or Tea
Pair your chocolate doughnut holes with a hot cup of coffee, a cold glass of milk, or a soothing cup of tea. The rich chocolate flavor complements the bitterness of coffee beautifully, while milk offers a creamy contrast.
Creative Serving Concepts for Parties or Gatherings
For parties or gatherings, consider creating a doughnut hole bar. Provide various toppings such as sprinkles, toasted coconut, or flavored glazes, allowing guests to customize their treats. This interactive element adds fun and engagement to your dessert presentation.
Themed Presentations or Dessert Tables
For themed events, incorporate your chocolate doughnut holes into a dessert table. Create a visually appealing display by arranging them alongside other desserts that share similar flavors, such as chocolate cupcakes or brownies, ensuring a cohesive theme.
Nutritional Information
Understanding the nutritional content of your chocolate doughnut holes can help you enjoy them mindfully. Each doughnut hole contains approximately 100 calories, depending on the size and specific ingredients used.
Overview of Serving Size and Calories per Doughnut Hole
Typically, a serving size is around two doughnut holes, providing a satisfying chocolate indulgence without overdoing it. Balancing indulgence and moderation is key, as these treats are rich and flavorful.
Discussion on the Balance of Indulgence and Moderation
While chocolate doughnut holes are a delightful treat, it’s essential to enjoy them in moderation. Consider making them a special occasion snack rather than an everyday indulgence to fully appreciate their rich flavor and texture.
Conclusion
Baking chocolate doughnut holes is a joyous experience that brings together the magic of chocolate with the delight of homemade treats. The process of measuring, mixing, and baking allows for creativity and personal expression in the kitchen.
Recap of the Joy of Baking and Sharing Homemade Chocolate Doughnut Holes
These irresistible chocolate doughnut holes are perfect for sharing with family and friends, making any gathering feel special. The satisfaction derived from creating something delicious from scratch is unparalleled.
Encouragement to Embrace the Process of Baking and the Satisfaction it Brings
So, gather your ingredients and embrace the joy of baking. Whether enjoyed fresh out of the oven or shared at a gathering, chocolate doughnut holes are sure to bring smiles and sweet memories. The special place they hold in the realm of desserts is a testament to their enduring appeal, inviting everyone to indulge in a moment of happiness with each bite.

