Quick & Cheesy Back-To-School Quesadillas: A Delicious Solution for Busy Days
As the school year kicks off, families often find themselves navigating hectic schedules filled with homework, extracurricular activities, and the inevitable rush to get everyone out the door on time. In the midst of this chaos, the need for quick and easy meals becomes paramount. Parents are on the lookout for recipes that not only satisfy hungry kids but also pack a nutritional punch. Enter the Quick & Cheesy Back-To-School Quesadillas—a delightful solution that promises to please even the pickiest of eaters while being simple to prepare.
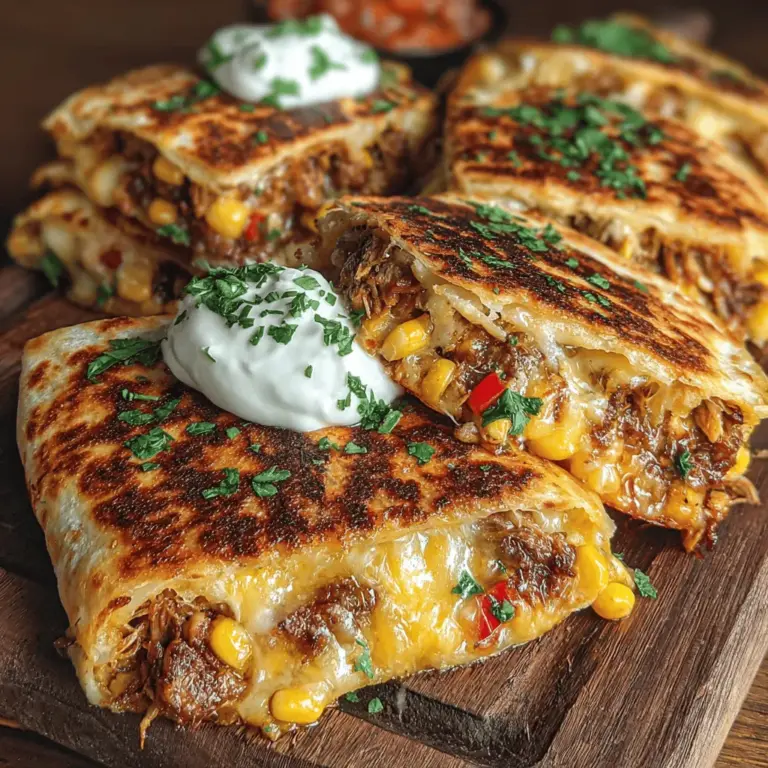
These quesadillas stand out as a versatile meal option, easily tailored to cater to both meat lovers and vegetarians alike. Whether you’re looking to whip up a quick lunch or a simple dinner, these cheesy delights are sure to become a staple in your back-to-school meal rotation. With their golden, crispy exterior and gooey, melty cheese inside, they’re not just a meal; they’re a crowd-pleasing experience that brings smiles to the dinner table.
The Joy of Quesadillas
Quesadillas are a quintessential Mexican dish that have gained immense popularity worldwide. At their essence, quesadillas consist of a tortilla filled with cheese and other ingredients, folded in half and cooked until the cheese melts and the tortilla becomes crisp. This simplicity is part of their charm, making quesadillas an ideal choice for families looking for a quick meal solution.
Culturally, quesadillas hold significance in Mexican cuisine, often enjoyed as a snack or light meal. They can be found in countless variations, filled with everything from meats to vegetables, and even sweet ingredients like chocolate or fruit. The adaptability of quesadillas makes them a beloved dish that transcends generations, allowing families to create their own unique versions based on personal tastes and dietary preferences.
From a practical standpoint, quesadillas are a fantastic option for busy families. They can be prepared in minutes, making them perfect for lunchboxes or after-school snacks. Additionally, quesadillas can be customized with an array of ingredients to ensure that every family member enjoys their meal. This flexibility not only saves time but also helps in introducing children to new flavors and textures in a fun and approachable way.
Ingredients Breakdown
To create the Quick & Cheesy Back-To-School Quesadillas, it’s essential to understand each ingredient that contributes to this delicious meal. Here’s a detailed look at the key components:
– Flour Tortillas: The foundation of any quesadilla, flour tortillas are typically soft and pliable, making them easy to fold and cook. Choosing the right size is crucial; larger tortillas can hold more filling, while smaller ones may be better for younger children. You can also opt for whole wheat tortillas for a healthier twist.
– Cheddar and Mozzarella Cheese: A blend of cheddar and mozzarella cheeses is what makes these quesadillas irresistibly cheesy. Cheddar offers a sharp flavor, while mozzarella adds creaminess and excellent melting qualities. Together, they create a perfect cheese pull that kids will love.
– Cooked Chicken vs. Beans: For those who enjoy a protein boost, cooked chicken is an excellent choice. It not only adds flavor but also provides essential nutrients. Alternatively, for vegetarian families, black beans or pinto beans can serve as a hearty and nutritious filling, offering a great source of protein and fiber.
– Bell Peppers and Red Onion: These vegetables not only add vibrant color to the quesadillas but also contribute crunch and sweetness. Bell peppers are rich in vitamins A and C, while red onions provide antioxidants and a subtle bite, enhancing the overall flavor profile of the dish.
– Corn: Adding corn to the mix introduces a touch of sweetness and additional nutrients, making the quesadilla more filling. It’s a great way to sneak in some extra vegetables without your kids even noticing.
– Spices (Cumin, Chili Powder, Garlic Powder): These spices play a crucial role in elevating the flavor of the quesadillas. Cumin adds an earthy depth, chili powder brings a hint of heat, and garlic powder provides aromatic richness. A balanced blend of spices ensures that each bite is packed with flavor.
– Optional Toppings: To take your quesadillas to the next level, consider adding optional toppings such as sour cream, guacamole, or fresh salsa. These condiments not only enhance the taste but can also add additional nutritional value, making your meal even more satisfying.
Preparation Steps
Now that we have a clear understanding of the ingredients, let’s dive into the preparation steps for the Quick & Cheesy Back-To-School Quesadillas. This process is straightforward, allowing you to spend less time in the kitchen and more time with your family.
1. Prepare the Filling: Start by gathering all your ingredients. If using chicken, ensure it’s cooked and shredded; for beans, drain and rinse them if they’re canned. In a large bowl, combine the shredded chicken or beans with diced bell peppers, chopped red onion, and corn.
2. Season the Mixture: Add the spices—cumin, chili powder, and garlic powder—to the filling mixture. It’s important to mix the ingredients thoroughly to ensure that the spices are evenly distributed throughout. This step is crucial for achieving a well-flavored quesadilla, as each bite should contain a harmonious blend of ingredients.
3. Assemble the Quesadillas: Lay a tortilla flat on a clean surface. Sprinkle a generous layer of cheddar and mozzarella cheese on one half of the tortilla, then spoon the prepared filling on top of the cheese. Add a little more cheese on top of the filling to help seal the quesadilla when folded. Carefully fold the tortilla in half, pressing gently to secure the filling.
4. Cook the Quesadillas: Preheat a non-stick skillet over medium heat. Once hot, place the folded quesadilla in the skillet and cook for about 2-3 minutes on one side, or until golden brown. Flip the quesadilla carefully and cook the other side until it is equally golden and the cheese has melted.
These initial steps ensure a delicious and satisfying meal that can be prepared in a flash, making it an ideal choice for busy school days. Stay tuned for the next part of this article, where we’ll explore additional tips for cooking, serving suggestions, and creative variations to keep mealtime exciting throughout the school year.
Instructions
Heating the Pan and Oil Selection
Begin by selecting a non-stick skillet or griddle for optimal cooking. Place it over medium heat and allow it to warm up for about two minutes. The right temperature is crucial; too hot, and your quesadillas risk burning before the cheese melts; too low, and they’ll turn out soggy.
When your pan is heated, add a tablespoon of oil to the surface. You can use vegetable oil, canola oil, or even olive oil for a slightly different flavor. Swirl the pan to ensure the oil coats the surface evenly. The oil not only prevents sticking but also contributes to that lovely golden-brown crust that everyone craves.
Tips for Achieving the Perfect Golden-Brown Quesadilla
To achieve that perfect golden-brown quesadilla, patience is key. Allow each side to cook undisturbed for about 3 to 4 minutes. Resist the urge to flip too soon; this will prevent the cheese from melting properly and may lead to uneven cooking.
For an extra crispy texture, consider sprinkling a pinch of salt on the outside of the tortilla after applying the oil. This adds flavor and enhances the crust.
Detailed Assembly Instructions
Now that your pan is ready, it’s time to assemble your quesadillas. Start with one tortilla and sprinkle a generous amount of shredded cheese evenly across the surface. You can use a combination of cheeses for added depth of flavor; cheddar, Monterey Jack, and mozzarella work beautifully together.
Next, layer your desired fillings on top of the cheese. This can include diced bell peppers, cooked chicken, corn, or black beans. Make sure not to overload the quesadilla; a light hand will keep the fillings contained when you fold it.
Carefully place a second tortilla on top, pressing down gently to secure the fillings. Once your quesadilla is assembled, it’s time to cook.
Importance of Folding and Cooking Techniques for Optimal Results
Folding the quesadilla properly is essential to ensure all fillings are tucked in and won’t spill out during cooking. The method is straightforward: lift one side of the tortilla and fold it over the other side, creating a half-moon shape. Press down lightly to seal the edges.
Now, carefully transfer the folded quesadilla to the hot skillet. Cook for 3 to 4 minutes until the bottom is a lovely golden brown. Use a spatula to flip the quesadilla over, ensuring that you maintain that half-moon shape. If you’re concerned about losing fillings during the flip, consider sliding the quesadilla onto a plate, flipping it over, and then sliding it back into the pan.
Cooking Techniques
Overview of Cooking Times and Temperatures
Cooking quesadillas requires attention to detail. Maintain medium heat throughout the process. This allows for even cooking without risking burnt tortillas. Each side should take about 3 to 4 minutes, but this can vary slightly based on your stove and pan type.
Emphasis on the Importance of Medium Heat for Cooking Quesadillas
Medium heat is your best friend when it comes to quesadillas. It ensures the tortilla crisps up nicely while giving the cheese enough time to melt thoroughly, creating that gooey, cheesy goodness that is the hallmark of a perfect quesadilla.
Tips on Flipping Quesadillas Without Losing the Filling
Flipping a quesadilla can be tricky, especially if filled to the brim. Here’s a pro tip: use a large spatula to support the entire quesadilla while flipping. Slide the spatula under the quesadilla, lift it gently, and then swiftly invert it over the skillet. This technique minimizes the risk of losing fillings.
Discussion on Variations in Cooking Methods
While a skillet is the traditional way to cook quesadillas, they can also be made on a griddle or even baked in the oven. If you prefer to bake your quesadillas, preheat your oven to 400°F (200°C). Place assembled quesadillas on a baking sheet and lightly brush both sides with oil. Bake for about 10-15 minutes, flipping halfway through, until golden brown and crispy. This method is excellent for making multiple quesadillas at once.
Serving Suggestions
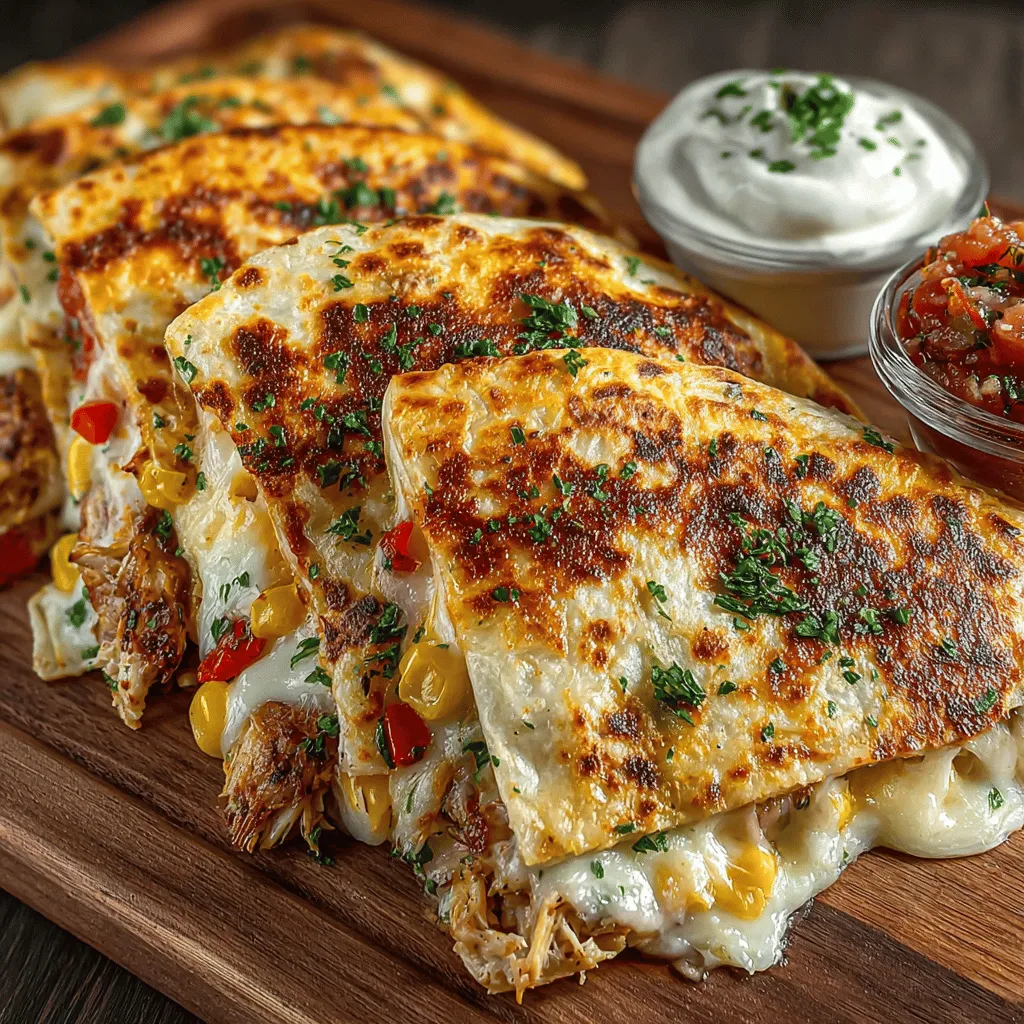
How to Slice and Present Quesadillas for a Visually Appealing Dish
Once your quesadillas are cooked, let them rest for a minute before slicing. This helps the cheese set slightly, making it easier to cut without losing the filling. Use a sharp knife or pizza cutter to slice them into wedges or triangles. Arrange the slices on a serving platter, and consider garnishing with fresh herbs like cilantro or parsley for a pop of color.
Ideas for Pairing Quesadillas with Sides or Dips
Quesadillas are incredibly versatile and can be paired with a variety of sides and dips. Consider serving them with a side of fresh salsa, guacamole, or a dollop of sour cream. For a refreshing touch, a simple salad with lime dressing complements the richness of the quesadillas beautifully.
Nutritional Value of Toppings
When it comes to toppings, you can elevate the nutritional value of your meal. Sour cream adds a creamy texture but can also be high in calories. Opt for Greek yogurt as a healthier alternative. Salsa is low in calories and packed with vitamins, while guacamole provides healthy fats that are beneficial for heart health. Fresh cilantro not only adds flavor but is also rich in antioxidants.
Suggestions for Meal Prep and Storage for Leftovers
Quesadillas are perfect for meal prep! You can assemble them ahead of time, refrigerate, and cook them fresh when needed. If you have leftovers, store them in an airtight container in the refrigerator for up to three days. To reheat, place them in a skillet over medium heat for a few minutes on each side, or pop them in the oven until warmed through.
Nutritional Information
Overview of the Nutritional Benefits of the Ingredients Used
The ingredients in your Quick & Cheesy Back-To-School Quesadillas provide a balanced mix of macronutrients. Whole grain tortillas offer fiber, while cheese supplies protein and calcium. Adding vegetables like bell peppers not only enhances flavor but also boosts the vitamins and minerals in your meal.
Balance of Proteins, Carbohydrates, and Healthy Fats
Each quesadilla delivers a satisfying combination of proteins, carbohydrates, and healthy fats. The cheese and any added proteins like chicken or beans contribute to the protein content, while the tortillas provide carbohydrates for energy. Using avocado or olive oil introduces healthy fats, making for a well-rounded meal.
Considerations for Dietary Restrictions
If you have dietary restrictions, this recipe is easily adaptable. Gluten-free tortillas are widely available and can be substituted directly. For a dairy-free option, consider using plant-based cheese alternatives or even skipping the cheese altogether and loading up on veggies.
Conclusion
In summary, Quick & Cheesy Back-To-School Quesadillas are not only easy to make but also incredibly versatile, making them an ideal addition to your meal rotation. Whether you’re preparing them for a quick school night dinner or packing them for lunch, they offer a delightful combination of flavors and textures that the whole family will enjoy.
With the ability to customize ingredients and fillings, you can create variations that cater to everyone’s tastes. This recipe is bound to become a family favorite, perfect for those busy back-to-school evenings. So gather your ingredients, get cooking, and don’t hesitate to explore new fillings and flavors. Make these quesadillas a regular part of your meal planning, and watch as they quickly become a go-to dish for your family!
