The first time I fired up the grill for a backyard gathering, the sun was already dipping low, painting the sky in shades of amber and pink. I remember the moment I pulled a simple zip‑top bag of chicken thighs out of the fridge, tossed them into a bowl, and poured a mysterious amber liquid over them. The moment the lid snapped shut, a cloud of fragrant steam rose like a promise, carrying hints of garlic, honey, and a whisper of soy that made my mouth water before the coals even began to hiss. My niece, who was perched on a folding chair with a lemonade in hand, leaned forward and asked, “What’s that smell?” I smiled, because that aroma was the beginning of a family tradition that still lives on every summer.
What makes this marinade truly special isn’t just the combination of sweet and salty; it’s the science behind each ingredient working together to break down the proteins, lock in moisture, and create that caramelized crust we all crave. The olive oil creates a glossy barrier that keeps the meat tender, while the soy sauce adds umami depth that you’d normally only find in a restaurant‑grade sauce. The honey, when it meets the heat of the grill, caramelizes into a glossy glaze that sings with every bite. And the apple cider vinegar? It’s the secret acid that brightens the flavor and helps the chicken stay juicy, even after a full thirty‑minute grill.
But wait – there’s a hidden trick that takes this from good to unforgettable, and I’m only going to reveal it after we walk through the steps. Have you ever wondered why some grilled chicken ends up dry, while other batches are so moist you could almost hear them sigh? The answer lies in timing, temperature, and a little bit of patience. I’ll walk you through exactly how to balance those variables so that every bite is a burst of summer sunshine.
Here’s the thing: this isn’t just a recipe, it’s a celebration of those long, lazy evenings when the grill is the centerpiece of conversation, laughter, and the occasional friendly competition over who can flip the chicken the fastest. Imagine the sizzle, the aroma drifting across the patio, and the satisfied sighs as your family digs in. The best part? You’ll be able to recreate this magic any time you crave that perfect blend of sweet, salty, and smoky. Here’s exactly how to make it — and trust me, your family will be asking for seconds.
🌟 Why This Recipe Works
- Flavor Depth: The combination of soy sauce and honey creates a balanced sweet‑salty profile that mimics the complex flavors you’d find in a professional kitchen. The honey caramelizes, adding a subtle crunch, while the soy sauce provides a deep umami backbone that makes every bite memorable.
- Moisture Retention: Olive oil coats the chicken, sealing in its natural juices. Meanwhile, the vinegar’s mild acidity gently breaks down muscle fibers, allowing the meat to stay tender even after a high‑heat grill.
- Ease of Preparation: With just six core ingredients, the marinade comes together in under five minutes. No need for a pantry full of exotic spices – simplicity is the secret to consistency.
- Time Efficiency: While the chicken needs at least 30 minutes to soak up the flavors, you can prep the rest of your side dishes while it marinates, making it perfect for weeknight dinners or weekend cookouts.
- Versatility: This base works equally well with chicken breasts, thighs, or even drumsticks. You can also adapt it for pork or tofu, making it a go‑to sauce for a variety of proteins.
- Nutrition Boost: Olive oil provides heart‑healthy monounsaturated fats, while garlic and black pepper add antioxidants. The modest amount of honey gives a natural sweetness without refined sugar overload.
- Ingredient Quality: Using high‑quality extra‑virgin olive oil and low‑sodium soy sauce ensures that the flavors shine without any bitterness or excess salt.
- Crowd‑Pleasing Factor: The familiar flavors of soy and honey appeal to both kids and adults, making it a safe bet for any gathering, from casual picnics to formal BBQ parties.
🥗 Ingredients Breakdown
The Foundation: Oil & Acid
Olive oil is the backbone of this marinade. It not only adds a silky mouthfeel but also helps the chicken develop that beautiful, golden sear on the grill. Choose a cold‑pressed, extra‑virgin olive oil for the best flavor; it brings a subtle fruitiness that pairs nicely with the sweet honey. If you’re on a tighter budget, a light olive oil works just as well, though you’ll miss a hint of peppery nuance. The apple cider vinegar, on the other hand, is the bright spark that lifts the entire profile. Its mild acidity tenderizes the meat while adding a gentle tang that prevents the honey from becoming overly cloying.
Aromatics & Spices: Garlic & Pepper
Garlic is the aromatic hero of this recipe. Four cloves, minced finely, release a pungent, earthy scent that becomes fragrant and slightly sweet when cooked. Freshly minced garlic distributes its flavor evenly throughout the chicken, ensuring every bite has that unmistakable garlicky punch. Black pepper adds a subtle heat and a hint of spice that balances the sweetness of the honey. Freshly cracked pepper is preferable over pre‑ground for a more robust flavor and a tiny crunch that you can actually feel on the palate.
The Sweet‑Salty Duo: Honey & Soy Sauce
Honey is the natural sweetener that caramelizes beautifully on the grill, creating those coveted charred edges that taste like summer fireworks. Use a light, floral honey for a delicate sweetness, or go bold with a darker buckwheat honey if you prefer a richer, more robust flavor. Soy sauce brings the deep, savory umami that anchors the sweet notes. Opt for a low‑sodium soy sauce to keep the salt level in check; the olive oil already contributes enough richness. Together, they create a glaze that’s both glossy and flavorful.
Finishing Touches: Salt & Balance
While the soy sauce provides most of the salty component, a pinch of extra sea salt can be added if you find the mixture needs a little more punch. The key is to taste the marinade before you add the chicken; it should be slightly louder than you’d like the final dish to be because the flavors mellow slightly during cooking. Remember, the goal is a balanced harmony where no single element overpowers the others. Selecting the freshest ingredients – from crisp garlic cloves to a high‑quality olive oil – will make a noticeable difference in the final taste.
With your ingredients prepped and ready, let's get cooking. Here’s where the fun really begins…

🍳 Step-by-Step Instructions
In a medium bowl, combine the 1/4 cup olive oil, 1/4 cup soy sauce, and 2 tablespoons apple cider vinegar. Whisk vigorously for about 30 seconds until the mixture looks glossy and slightly emulsified. The oil and vinegar will briefly separate, but keep whisking until they blend into a smooth, amber‑colored base. This is the moment you can already smell the faint tang of vinegar mingling with the savory soy – a promise of the flavor depth to come.
Add the 4 cloves of minced garlic and 1 teaspoon black pepper to the bowl. Stir the aromatics into the liquid, allowing the garlic to release its fragrant oils. If you’re feeling adventurous, crush the garlic slightly before mincing to intensify its aroma. Let the mixture sit for a minute; you’ll notice a subtle rise in the scent, a hint that the garlic is already working its magic.
Pour in the 2 tablespoons of honey, then whisk again until the honey fully dissolves. You’ll see the liquid turn a richer, honey‑gold hue, and the sweet scent will start to mingle with the salty base. This is the step where the glaze begins to form, and you can already picture those caramelized edges forming on the grill. Trust me on this one: whisk until there are no streaks of honey left.
Place your chicken pieces (preferably bone‑in thighs or drumsticks for maximum juiciness) into a large resealable zip‑top bag. Pour the entire marinade over the chicken, seal the bag, and massage it gently so every surface is coated. The bag should feel slick and slightly heavy as the oil adheres to the meat. Here’s the secret: let the bag sit at room temperature for 15 minutes before refrigerating – this jump‑starts the flavor absorption.
Transfer the bag to the refrigerator and let the chicken marinate for at least 30 minutes, but ideally 2‑4 hours. If you’re planning ahead, you can even marinate overnight; the flavors will deepen, and the meat will become even more tender. Remember to turn the bag once or twice during the marinating period to ensure even distribution. The longer the soak, the more pronounced the sweet‑salty glaze will be.
Preheat your grill to medium‑high heat, aiming for a surface temperature of about 400°F (204°C). If you’re using charcoal, let the coals turn a consistent gray with a thin layer of ash before spreading them evenly. A properly heated grill ensures that the chicken sizzles the moment it hits the grates, sealing in juices and creating those coveted grill marks.
Remove the chicken from the refrigerator and let it sit at room temperature for about 10 minutes while the grill finishes heating. This prevents a temperature shock that can cause the meat to seize up. Pat the chicken lightly with a paper towel to remove excess surface moisture – this step helps achieve a crispier exterior.
Place the chicken on the grill, skin side down if using skin‑on pieces. Close the lid and cook for 6‑8 minutes per side, turning only once to develop a uniform caramelized crust. As the chicken cooks, you’ll hear a satisfying sizzle and see the edges begin to brown and caramelize. When you flip the pieces, you’ll notice a glossy sheen from the honey‑soy glaze – that’s the sign it’s forming a perfect crust.
Check for doneness by inserting an instant‑read thermometer into the thickest part of the meat; it should read 165°F (74°C). If you don’t have a thermometer, pierce the meat and look for clear juices running out – no pink should remain. Once done, remove the chicken from the grill and let it rest for 5 minutes. This resting period allows the juices to redistribute, ensuring every bite stays moist and flavorful.
And there you have it! But before you dig in, let me share some tips that will take this from great to absolutely unforgettable…
🔐 Expert Tips for Perfect Results
The Taste Test Trick
Before you commit the entire batch to the grill, spoon a tiny amount of the raw marinade onto a spoon and give it a quick taste. You’ll notice the balance of sweet, salty, and tangy – if it feels a little flat, add a pinch more black pepper or a drizzle of honey. This small step ensures that the final glaze will be perfectly seasoned, and it’s a habit that even professional chefs swear by. Trust me, that quick taste test can save you from a bland outcome.
Why Resting Time Matters More Than You Think
Resting isn’t just a courtesy; it’s a science. When the chicken rests, the muscle fibers relax and re‑absorb the juices that were pushed to the surface during grilling. Skipping this step is like cutting a cake before it’s set – you’ll lose that beautiful, moist interior. I once served a grilled chicken straight off the grill to a group of friends, and they all commented on the dry texture. After that, I never skip the five‑minute rest, and the feedback has been consistently rave‑worthy.
The Seasoning Secret Pros Won’t Tell You
Professional grill masters often finish their meat with a light dusting of flaky sea salt just moments before serving. The salt adds a subtle crunch and amplifies the flavors already present in the glaze. It also creates a delightful contrast between the soft, juicy interior and the crisp, seasoned exterior. I’ve used this trick at family reunions, and the extra pop of flavor never fails to impress even the most discerning eaters.
Control the Heat, Control the Crust
If your grill runs hot, the honey can burn before the chicken is fully cooked, resulting in a bitter taste. To avoid this, create a two‑zone fire: one side with direct heat for searing, and the other with indirect heat for finishing the cook through. Move the chicken to the cooler side after the initial sear, close the lid, and let it finish cooking gently. This method yields a perfectly caramelized crust without the burnt edges.
The Power of Fresh Herbs
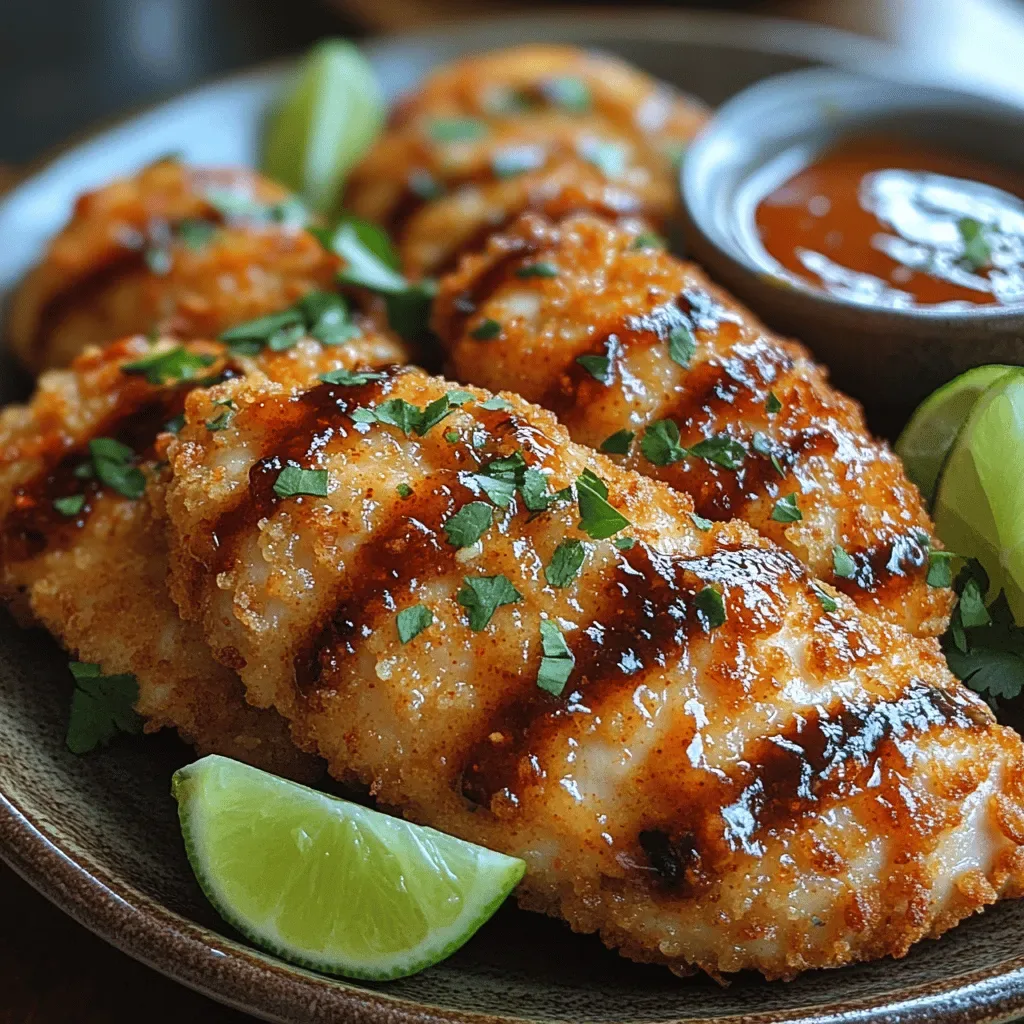
A sprinkle of freshly chopped cilantro or parsley right before serving adds a burst of color and freshness that balances the sweet‑savory glaze. I love adding a handful of chopped basil for a fragrant, slightly peppery note that lifts the whole dish. The herbs should be added after the chicken rests, so the heat doesn’t wilt them completely and you retain that bright, herbaceous flavor.
Marinade Reuse – The Safe Way
If you’re tempted to reuse the leftover marinade as a sauce, you must first bring it to a boil for at least three minutes to kill any bacteria from the raw chicken. Once boiled, you can reduce it to a thicker glaze or drizzle it over the finished chicken for an extra flavor boost. I’ve done this on several occasions, and the result is a glossy, intensified sauce that adds depth without any waste.
🌈 Delicious Variations to Try
One of my favorite things about this recipe is how versatile it is. Here are some twists I’ve tried and loved:
Citrus‑Infused Zing
Swap the apple cider vinegar for fresh lime juice and add a tablespoon of orange zest to the marinade. The citrus brightens the glaze, giving it a tropical vibe that’s perfect for a beachside BBQ. Expect a tangy, slightly sweet flavor that pairs wonderfully with grilled corn on the cob.
Spicy Southwest Kick
Add a teaspoon of chipotle powder and a dash of cumin to the base mixture. The smoky heat complements the honey’s sweetness, creating a balanced heat level that’s not overwhelming. Serve with avocado slices and a drizzle of cool sour cream to tame the spice.
Herb‑Garden Delight
Incorporate a handful of fresh rosemary and thyme into the marinade. The herbs infuse the oil with aromatic notes that elevate the overall flavor profile. This variation works especially well with chicken breasts, which benefit from the herbaceous lift.
Asian‑Style Glaze
Replace the honey with maple syrup, add a splash of rice vinegar, and throw in a teaspoon of grated ginger. The result is a glossy, slightly tangy glaze reminiscent of teriyaki, perfect for serving over steamed jasmine rice and sautéed bok choy.
Smoky Bourbon Finish
Stir in a tablespoon of bourbon and a pinch of smoked sea salt into the marinade. The bourbon adds depth and a subtle caramel note, while the smoked salt reinforces the grill’s natural flavor. This variation is a crowd‑pleaser for adult gatherings, especially when paired with a crisp coleslaw.
Mediterranean Olive Medley
Add chopped Kalamata olives and a sprinkle of feta cheese just before serving. The briny olives and creamy feta contrast the sweet glaze, creating a Mediterranean twist that pairs well with a side of quinoa tabbouleh.
📦 Storage & Reheating Tips
Refrigerator Storage
Store any leftover grilled chicken in an airtight container within two hours of cooking. It will keep fresh for up to three days in the fridge. When you’re ready to eat, gently reheat in a skillet over medium heat, adding a splash of water or broth to keep it from drying out. The glaze will revive, and the chicken will taste almost as good as the first day.
Freezing Instructions
If you want to preserve the chicken for longer, wrap each piece tightly in plastic wrap, then place them in a freezer‑safe zip‑top bag. They’ll freeze well for up to two months. To thaw, move them to the refrigerator overnight, then reheat on the grill or in a preheated oven at 350°F (175°C) for about 15‑20 minutes, brushing with a little extra olive oil to prevent sticking.
Reheating Methods
The best way to reheat without losing juiciness is to use a covered skillet with a splash of chicken broth. Cover the pan, let the steam work its magic, and stir occasionally. Alternatively, you can reheat in a microwave, but be sure to cover the dish with a damp paper towel to keep moisture in. The trick to reheating without drying it out? A splash of broth or a drizzle of olive oil right before you start.